


63
SEARCH
MENU
REV
SKIP
FWD
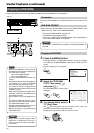
HDD
OPERATE
LOCK
VIDEO AUDIO
OUT
EXECUTE
6.
4.5.
EXECUTE
EXECUTE
OPERATE
ALL RECONFIGURED HDD DATA IS DELETED!
START?
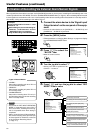
CONFIRM HDD RECONFIGURING
[CANCEL]:CANCEL [EXEC]:START
EXTERNAL HDD4 : NOW FORMATTING...
EXTERNAL HDD 4 : FORMAT SUCCEEDED
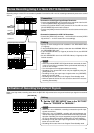
MIRRORING SETING
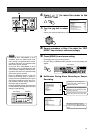
HDD UPDATE IS COMPLETED
PRESS [OPERATE] FOR OPERATION
HDD UPDATE IS COMPLETED
PRESS [OPERATE] FOR OPERATION
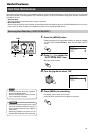
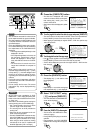
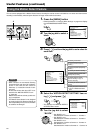
4.
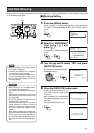
Press the [EXECUTE] button
• This displays the “CONFIRM HDD
RECONFIGURING” Screen.
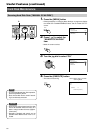
5.
Press the [EXECUTE] button again
• This starts the formatting of the external hard disk drive.
• Upon completion, the “FORMAT SUCCEEDED” screen will be dis-
played.
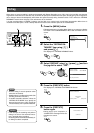
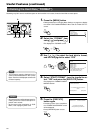
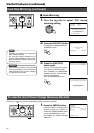
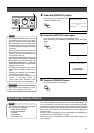
6.
Press the [OPERATE] button
• The hard disk drives are now usable.
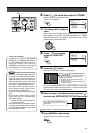
• If the “HDD RECONFIGURING” screen is
not displayed upon turning on the power
again, this means the connection is faulty.
Turn off the power of VR-716 and the exter-
nal hard disk drives and check if the cables,
terminator and power supply are properly
connected.
• Press the [CANCEL] button when the HDD
Reconfiguration screen is displayed to ter-
minate the process. Upon terminating, turn
off the power of VR-716.
• Disconnection instead of formatting will be
executed when “DISCONNECT” is selected
for the alteration of connection setup. The
“NOW DISCONNECTING...” z “DISCON-
NECTING SUCCEEDED” messages will be
displayed on the screen.
•Formatting time required for each external
hard disk drive (120 GB) is about 30 sec-
onds.
• Recording and playback are not possible
when altering connection setup.
• The hard disk capacity displayed on the
screen is calculated based on
1 GB = (1024)
3
Bytes. Therefore it is dis-
played as lower than the actual capacity.
Notes
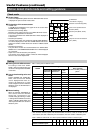
Hard Disk Recovery Feature
This unit is incorporated with automatic recovery feature. When there is fail-
ure on the hard disk, it will restart and recover automatically. Upon restart,
recording will continue with the remaining hard disk after the hard disk which
failure occurred had been automatically disconnected. Recording is disabled
during restart. Error code [E-01] will be displayed on the front display after
automatic restart.
To return to the normal display from error code display, turn [OPERATE] to
off once and then turn [OPERATE] to on again.
Automatic recovery is not possible in the case of severe failure where it can-
not be rebooted.
• The following operations are not possible
when error [E-01] is displayed:
• “TIME ZONE SETTING”
• “DEFRAG DATABASE”
• “FORMAT”
• “MIRRORING”
•“DVD-RAM COPY”
Note
• At the screen upon completion of “FOR-
MAT”, never unplug the power cord.
Caution