


55
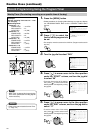
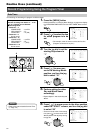
1.
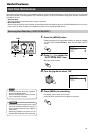
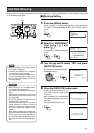
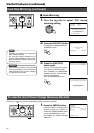
Press the [MENU] button
•Follow procedures in ‘Changing Menu Settings’ on page 22 to display
the “DISK UTILITY/MAINTENANCE” Menu and the “DISK UTILITY”
screen.
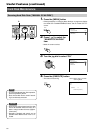
2.
Press [ ] to select the
“AUTO SCAN DISK” item
•Move the cursor to select.
3.
Turn the jog dial to select “ON”
4.
Press [MENU] to end setting
• The display returns to the normal screen.
• Scanning will be executed when the power is turned on.
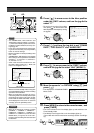
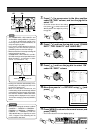
Hard Disk Maintenance
• Scanning may take a longer time if the data
volume of recorded events are heavy or if
there is a large number of events. (Approx.
a few hours)
• Recording, playback and search are not
possible when Auto Scan Disk is executed.
•To cancel the Auto Scan Disk operation,
press the [CANCEL] button.
• Scan the hard disk once a month if record-
ing is continuously executed.
Notes
Caution
Useful Features
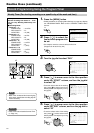
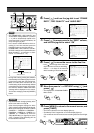
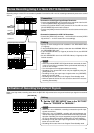
Scanning Hard Disk Data (“AUTO SCAN DISK”)
When power failure occurs while in the Recording mode or Sensor Record Standby mode, or when failure occurs in the recorded
data of the hard disk, recording/playback may not function properly. To repair the hard disk, two types of scan disk functions are
available on VR-716:
•Auto Scan Disk
Scans the hard disk automatically upon turning on the power.
• Manual Scan Disk
Performs manual scanning of the hard disk. Perform Manual Scan Disk regularly when the “AUTO SCAN DISK” item in the menu
is set to “OFF” or when the power of the equipment remains on for extensive periods of time.
SEARCH
MENU
REV
SKIP
FWD
HDD
OPERATE
LOCK
VIDEO AUDIO
OUT
EXECUTE
1.4.
3.2.
MENU
REV FWD
MENU
1.AUTO SCAN DISK
2.MANUAL SCAN DISK OFF
OFF
3.DEFRAG DATABASE
4.FORMAT
5.MIRRORING
DISK UTILITY
1.AUTO SCAN DISK
2.MANUAL SCAN DISK OFF
ON
3.DEFRAG DATABASE
4.FORMAT
5.MIRRORING
DISK UTILITY