


25
•
••••••••••••••••••••••••••••••••••••••••••••••••••••••••••••••••••••••••••••••••••••••••••••••••••••••••••••••••••••••••••••
Operations
ENGLISH
How to set up / Various settings
How to set up
Various settings
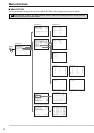
■ How to display menus
As shown in the menu displayed on pages 22 - 24, the
menus are divided into several layers. The following steps
show how to display the desired menu on the screen.
When any of the menu displays are shown on the
screen, the SPLIT/SEQUENCE button, the Camera
number button and the ZOOM button do not work.
1. Find the menu you want to view from the menu overview on
pages 22 - 24 and press the correct key to activate the menu.
2. When the menu you want to view is active:
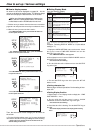
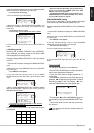
• The <MENU SETTING> menu, press the SET UP button on
the front panel of this unit.
SET UP
<MENU SETTING>
TIME DATE DISPLAY
MPX DISPLAY
TIMER PROGRAM
NORMAL REC SETTING
A-REC/M-DET SETTING
DATA CLEAR SELECTION
COMMUNICATION SETTING
REAR TERMINAL
SERVICE
INITIAL SET UP
▲
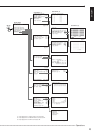
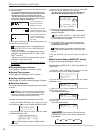
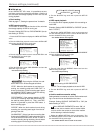
• The <SEARCH SELECTION> menu, press the SEARCH
button on the front panel of this unit.
SEARCH
<SEARCH SELECTION>
SELECTION CAMERA NO. ALL
TIME DATE SEARCH
INDEX SEARCH
SKIP SEARCH
ALARM LIST SEARCH
JUMP TO START POINT
▲
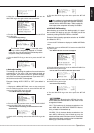
• The <INFORMATION> menu, press the INFO button on the
front panel of this unit.
INFO
10000H
10000H
10000H
<INFORMATION>
RECORDED PERIOD
CONNECTED SCSI DEVICE
<ELAPSED TIME>
MAIN
ARCHIVE
COPY
▲
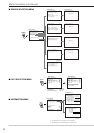
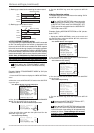
• The <COPY SELECTION> menu, press the COPY button on
the front panel of this unit.
COPY
<COPY SELECTION>
COPY DIRECTION HDD}COPY
OVERWRITE OFF
TRANSFER PERIOD MAN
FROM:06-09-01 02:59:12
TO:06-09-01 03:59:12
EXECUTE OFF
▲
Then, the main menu of each category will be shown on
the screen.
3. Turn the JOG dial until the cursor ( ) is next to the desired
item and turn the SHUTTLE ring to the right to show its setting.
• Please refer to the relevant section of this manual for the
detailed setting of each menu.
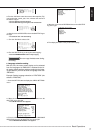
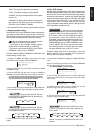
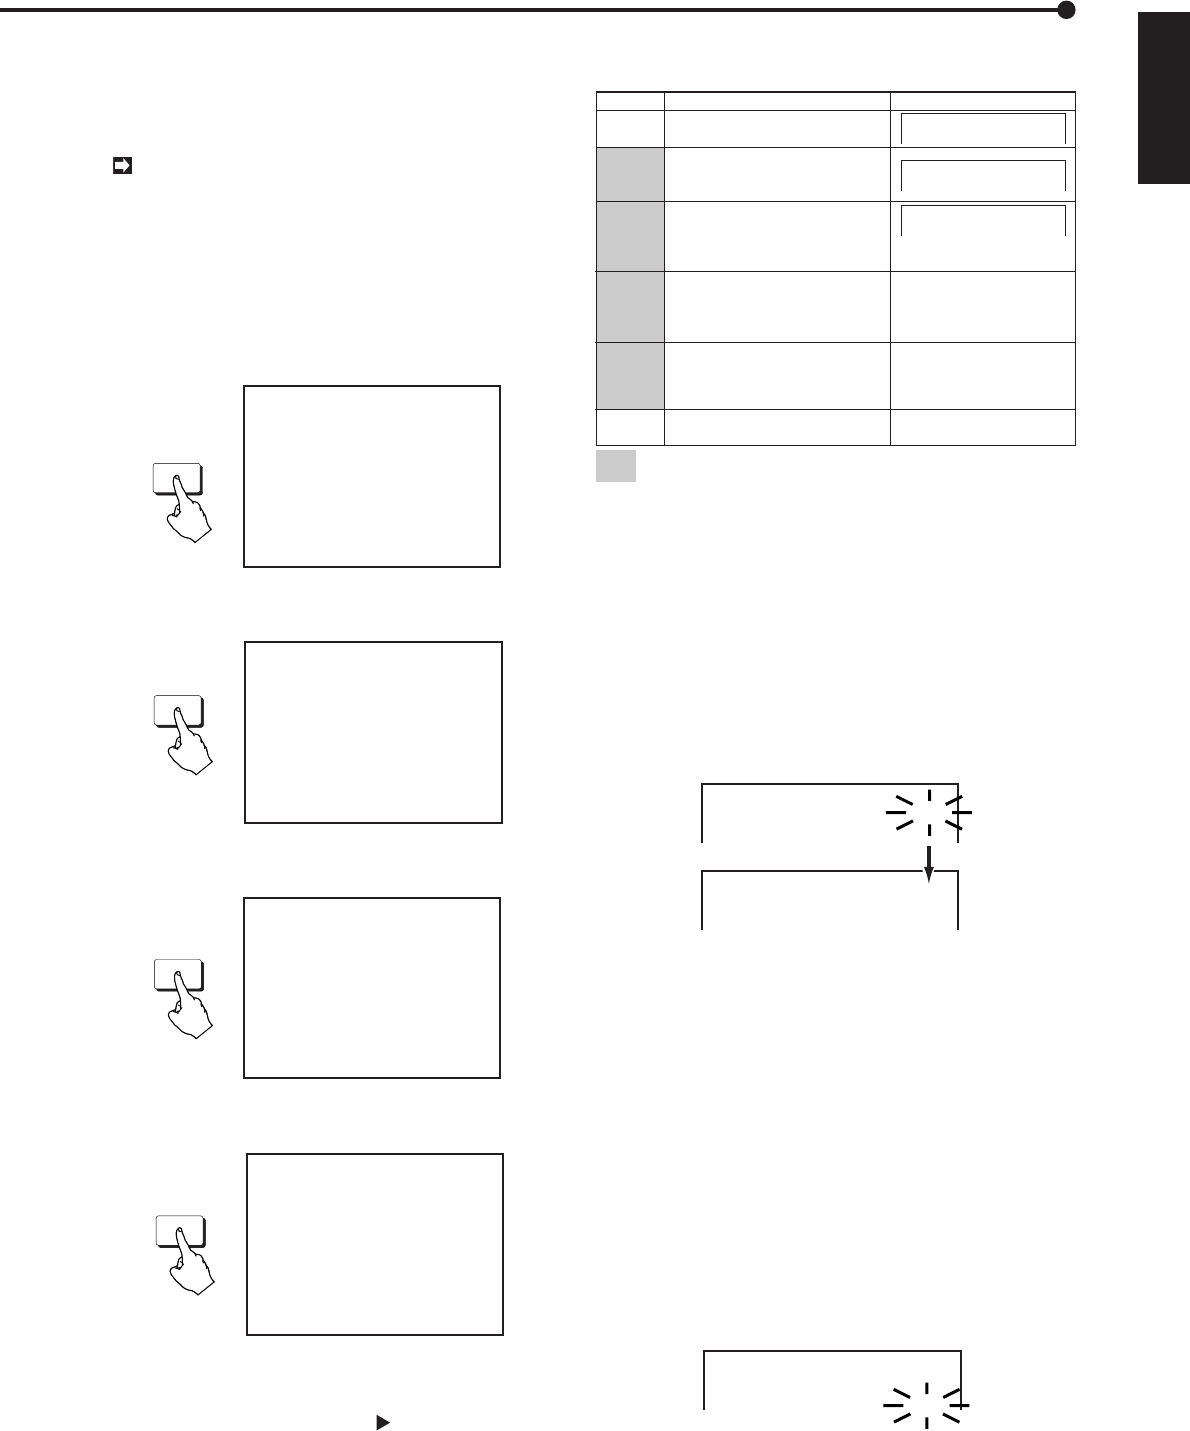
■ Setting Display Mode
Type and setting of display.
Display Mode
Display Sample
1
2
Date, Day of the week, Present time,
Recording interval, Camera number
display
Date, Day of the week, Present time,
Recording interval, Camera number
display, Recording capacity of HDD
will be displayed.
3
4
Date, Present time,Camera number
display
09-06-2001 11:39:10 C01
09-06-2001 SAT
11:39:10 25F C01
09-06-2001 SAT
11:39:10 25F 99% C01
No indication
(When alarm signal is input, Date, Day of
the week, Present time, Recording interval
will be displayed.)
No indication
(When warning signal is input,
warining indicator will be displayed.)
5
6
No indication
Display mode 2 to 5 are only available when single screen is displayed or
"CH. TITLE" is set to "NONE" on the <MPX DISPLAY> menu.
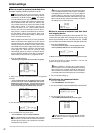
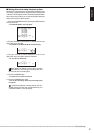
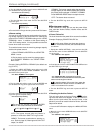
Example: Selecting DISPLAY MODE to “3” (the default
setting is “1”).
1. Display the <MENU SETTING> menu on the screen. Check
the cursor is next to TIME DATE DISPLAY and turn the
SHUTTLE ring to the right.
• The <TIME DATE DISPLAY> menu appears.
2. Check that the cursor is next to “DISPLAY MODE” and turn
the SHUTTLE ring to the right.
• The sub-item will start flashing.
3. Turn the JOG dial until “3” flashes and turn the SHUTTLE
ring to the right.
<TIME DATE DISPLAY>
@DISPLAY MODE 1
CHARACTER SIZE SMALL
<TIME DATE DISPLAY>
@DISPLAY MODE 3
CHARACTER SIZE SMALL
4. Turn the SHUTTLE ring to the left or press the SET UP
button, to exit.
♦ Setting character size
Refer to page 10 “Basic Operations” for the setting of char-
acter size.
♦ Setting Display Position
1. Repeat steps 1 to 2 of display mode to display the <TIME
DATE DISPLAY > menu.
2. Turn the JOG dial until the cursor is next to “CLOCK
LOCATION” and turn the SHUTTLE ring to the right.
• The sub-item will start flashing.
3. Check that the “ON” is flashing. Turn the SHUTTLE ring to
the right.
• The monitor display switches to the display position setting
menu.
<TIME DATE DISPLAY>
DISPLAY MODE 3
CHARACTER SIZE SMALL
@CLOCK LOCATION ON