


47
•
••••••••••••••••••••••••••••••••••••••••••••••••••••••••••••••••••••••••••••••••••••••••••••••••••••••••••••••••••••••••••••
Operations
ENGLISH
Operation examples
■ Operation example 1: Simultaneous
Backup using the Timer
The Timer can be used for making weekly data backups
when the unit is running in continuous recording mode. The
unit will automatically eject the storage medium upon com-
pletion of the backup, and a new one may then be inserted
into the machine.
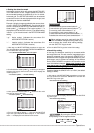
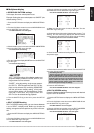
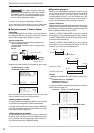
System configuration
Example of a system using the following peripherals:
• 16 video cameras
• Archive device connected to ID4
• Monitor
Monitor
(Up to 16 cameras)
ID4: archive device
1 2 3 4 5 6 7 8 9 10 11 12 13 14 15 16
CAMERA IN
1 2 3 4 5 6 7 8 9 10 11 12 13 14 15 16
CAMERA OUT
VIDEO OUT
Y/C
CLOCK ADJ
REC
POWER ON
POWER OFF
ALARM OUT
MODE OUT
CALL OUT
CALL OUT GND
GND
GND
DC 5V OUT
MAX 30mA
GND
RS-232C
ETHERNET
RESET
ON
SCSI
TERMINATION
GNDGND
16
15
14
13
12
11
10
9
8
7
6
5
4
3
2
1
ALARM IN
SCSI
OFF
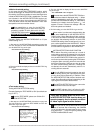
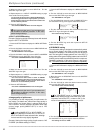
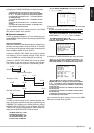
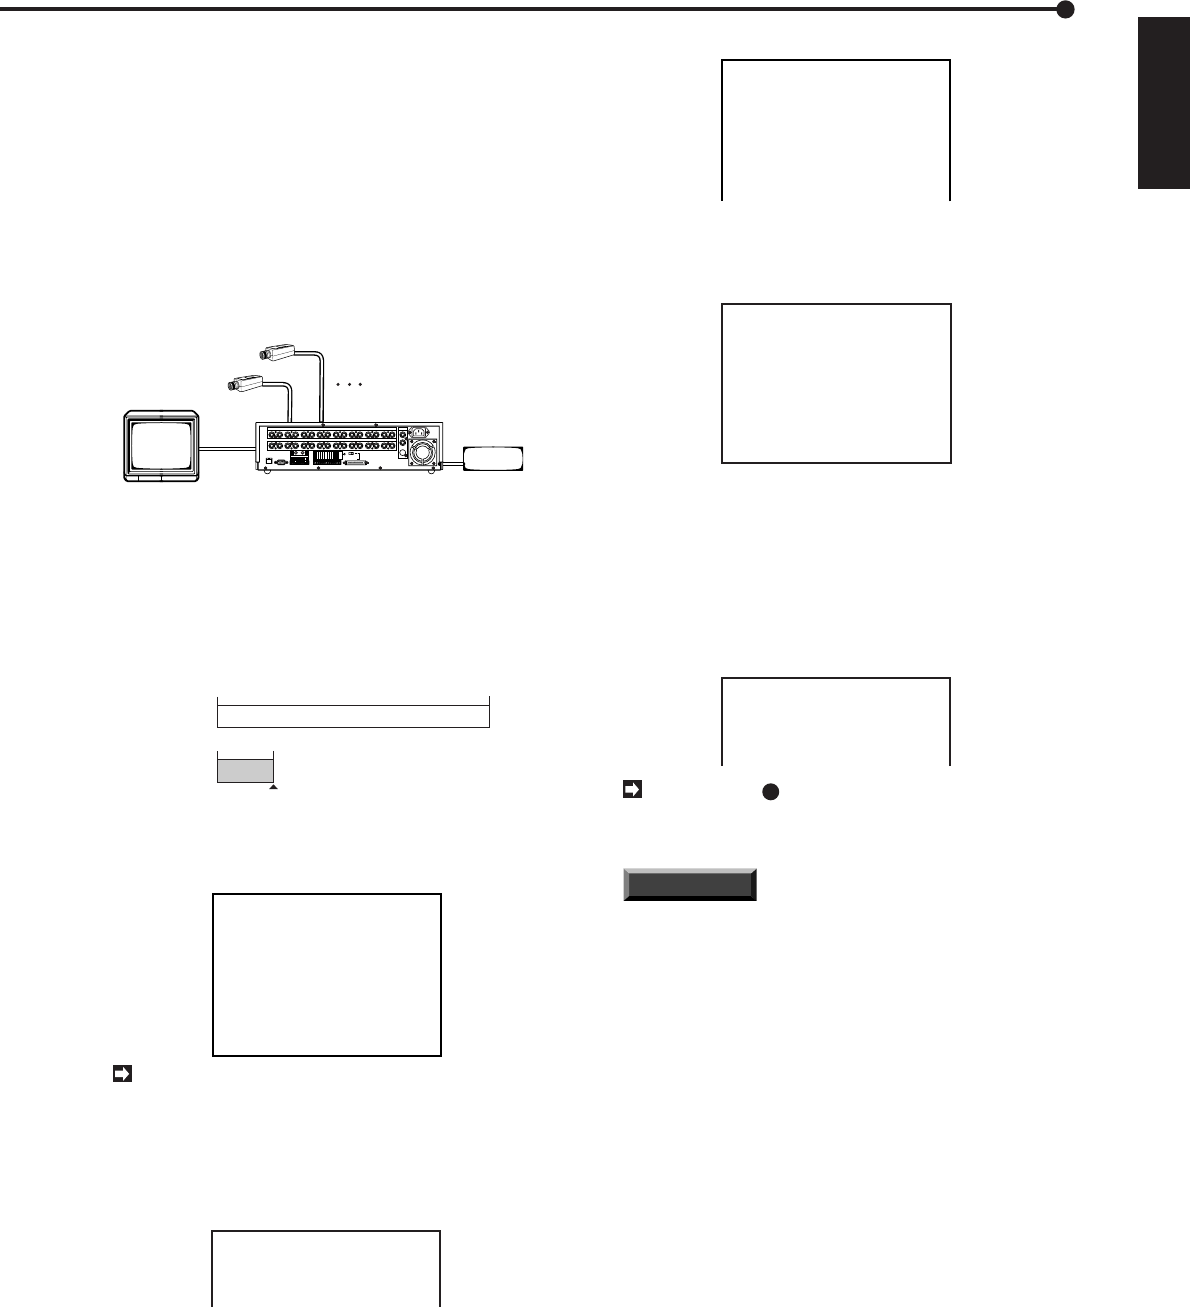
Images provided by each of the connected cameras
are recorded 24 hours a day, and the unit will make
a backup of one week’s volume of image data while
it continues to record current images. The unit
records one field per second and IMAGE QUALITY
is set to “BASIC”, a recording rate of one field per
16 seconds for each camera.
From Monday
to Sunday
Sunday
00 : 00
00 : 00 05 : 00
24 : 00
24-hours recording
Archive
Archive media auto eject
Settings
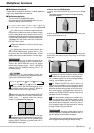
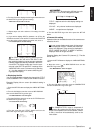
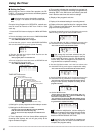
1) Record settings are made as follows.
• Set IMAGE QUALITY to “BASIC”.
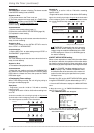
<NORMAL REC SETTING>
@IMAGE QUALITY BASIC
MAX REC FIELDS 1F
SELECT REC MODE (A)
DEFINE GROUP SETTING
<ESTD TIME> 48D21H31M
The capability to record continuously over a one-
week period is dependent on the settings for IM-
AGE QUALITY and MAX REC FIELDS. For details
on the relationship between intervals and image
quality, refer to “Recording time table” on page 81.
• Set MAX REC FIELDS to “1F”.
• Set HDD FULL to “REPEAT”.
<INITIAL SET UP>
TIME DATE ADJUST
@HDD FULL
HDD PB REPEAT
ARCHIVE OVERWRITE
REPEAT
STOP
OFF
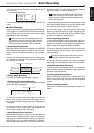
2) Camera settings and camera title settings are made as
follows.
• Make the settings for the 16 cameras listed under (A) on the
<DEFINE GROUP SETTING> menu.
<DEFINE GROUP> (A)
CH PRI FILD CH PRI FILD
@Q 1 0.09 O 1 0.09
W 1 0.09 P 1 0.09
E 1 0.09 { 1 0.09
R 1 0.09 } 1 0.09
T 1 0.09 q 1 0.09
Y 1 0.09 w 1 0.09
U 1 0.09 e 1 0.09
I 1 0.09 r 1 0.09
The number of cameras used in each of the opera-
tional modes A, B, C can be adjusted. Refer to page
13 for details.
<CAMERA TITLE>
CH TITLE
@
1
ENTRANCE........
2
ATM1............
3
ATM2............
4
COUNTER1........
5
COUNTER2........
6
COUNTER3........
7
VAULT...........
8
EXIT............
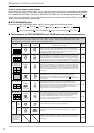
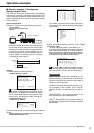
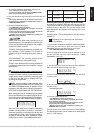
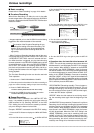
3) Enter the following settings under P1 on the <TIMER
PROGRAM> menu:
• In Timer programming number 1, set the action to “A– 1”
for the daily start time of 00:00 to the next day’s end time of
00:00. (This setting activates, for all of the cameras in
operational mode A, a recording rate of one frame per second.)
• In Timer programming number 2, set the action to “EJECT”
for Sunday’s start time of 00:00 to end time of 05:00.
<TIMER PROGRAM> P1
DW START END MODE
@ DAY 00:00•00:00 A– 1
2 SUN 00:00 05:00 EJECT
3 ––– ––:–– ––:–– ––––––
4 ––– ––:–– ––:–– ––––––
The symbol “ ” will appear between the start-
time and end-time columns. This symbol indicates
that recording will continue until the following day.
INFORMATION
“SKIP”: This is set when timer recording is to be
paused temporarily. Then the power will be switched
off and the specified time period for that program
number will not be recorded.
“POWER”: During the specified time, the power sup-
ply is stopped in “ON” condition. This is used for
execution of alarm recording during timer reserva-
tion.
“ARC”(ARCHIVE): The recording contents of the
HDD are backed up to the backup device.
“EJECT”: After backup of the recording contents of
the HDD to the backup device, the medium is ejected
automatically.