65
••••••••••••••••••••••••••••••••••••••••••••••••••••••••••••••••••••••••••••••••••••••••••••••••••••••••••••••••••••••••••••
Operations
ENGLISH
■ RS-232C settings
This connection can be used for remote control and re-
cording supplementary information when the main unit is
connected to a PC.
♦ Transmission speed
Example: Transmission speed is set for 4800 bps.
1. Press the SET UP button to display the <MENU SETTING>
menu.
2. Turn the JOG dial to move the cursor to COMMUNICA-
TION SETTING then turn the SHUTTLE ring to the right.
• The <COMMUNICATION SETTING> menu will appear.
<COMMUNICATION SETTING>
@RS-232C SETTING
TCP/IP SETTING
3. Check that the cursor is next to RS-232C SETTING and
turn the SHUTTLE ring to the right.
• The <RS-232C SETTING> menu will appear.
<RS-232C SETTING>
@TRANSMISSION RATE
DATA BIT LENGTH
PARITY BIT
STOP BIT LENGTH
DELIMITER
1200
8BIT
NONE
1BIT
CR
4. Check that the cursor is next to TRANSMISSION RATE
and turn the SHUTTLE ring to the right to flash the sub-item.
<RS-232C SETTING>
@TRANSMISSION RATE
DATA BIT LENGTH
PARITY BIT
STOP BIT LENGTH
DELIMITER
1200
8BIT
NONE
1BIT
CR
5. Turn the JOG dial to select “4800” and turn the SHUTTLE
ring to the right to finish setting.
<RS-232C SETTING>
@TRANSMISSION RATE
DATA BIT LENGTH
PARITY BIT
STOP BIT LENGTH
DELIMITER
4800
8BIT
NONE
1BIT
CR
6. Press the SET UP button.
• The <RS-232C SETTING> menu will disappear.
■ TCP / IP settings
The IP address, subnet mask setting, and MAC address
used to specify the connected recorder can be referred to
here (refer to page 8).
Press the COMMUNICATION button on the unit’s
front face to activate the TCP/IP communication
function.
1. Press the SET UP button to display the <MENU SETTING>
menu.
2. Turn the JOG dial to move the cursor to COMMUNICA-
TION SETTING then turn the SHUTTLE ring to the right.
• The <COMMUNICATION SETTING> menu will appear.
<COMMUNICATION SETTING>
@RS-232C SETTING
TCP/IP SETTING
3. Turn the JOG dial to move the cursor to TCP / IP SETTING
then turn the SHUTTLE ring to the right.
• The <TCP / IP SETTING> menu will appear.
<TCP/IP SETTING>
@SELF IP ADDRESS
000.000.000.000Ł
SUBNET MASK
000.000.000.000Ł
<MAC ADDRESS>
08-00-70-2E-3F-FF
4. Check that the cursor is next to SELF IP ADDRESS and
turn the SHUTTLE ring to the right to flash the sub-item .
<TCP/IP SETTING>
@SELF IP ADDRESS
000.000.000.000Ł
SUBNET MASK
000.000.000.000Ł
<MAC ADDRESS>
08-00-70-2E-3F-FF
5. Turn the JOG dial to input the SELF IP ADDRESS and turn
the SHUTTLE ring to the right to finish setting.
<TCP/IP SETTING>
@SELF IP ADDRESS
192.168.001.100Ł
SUBNET MASK
255.255.255.000Ł
<MAC ADDRESS>
08-00-70-2E-3F-FF
6. Press the SET UP button or turn the SHUTTLE ring to the
left.
• The <TCP/IP SETTING> menu will disappear.
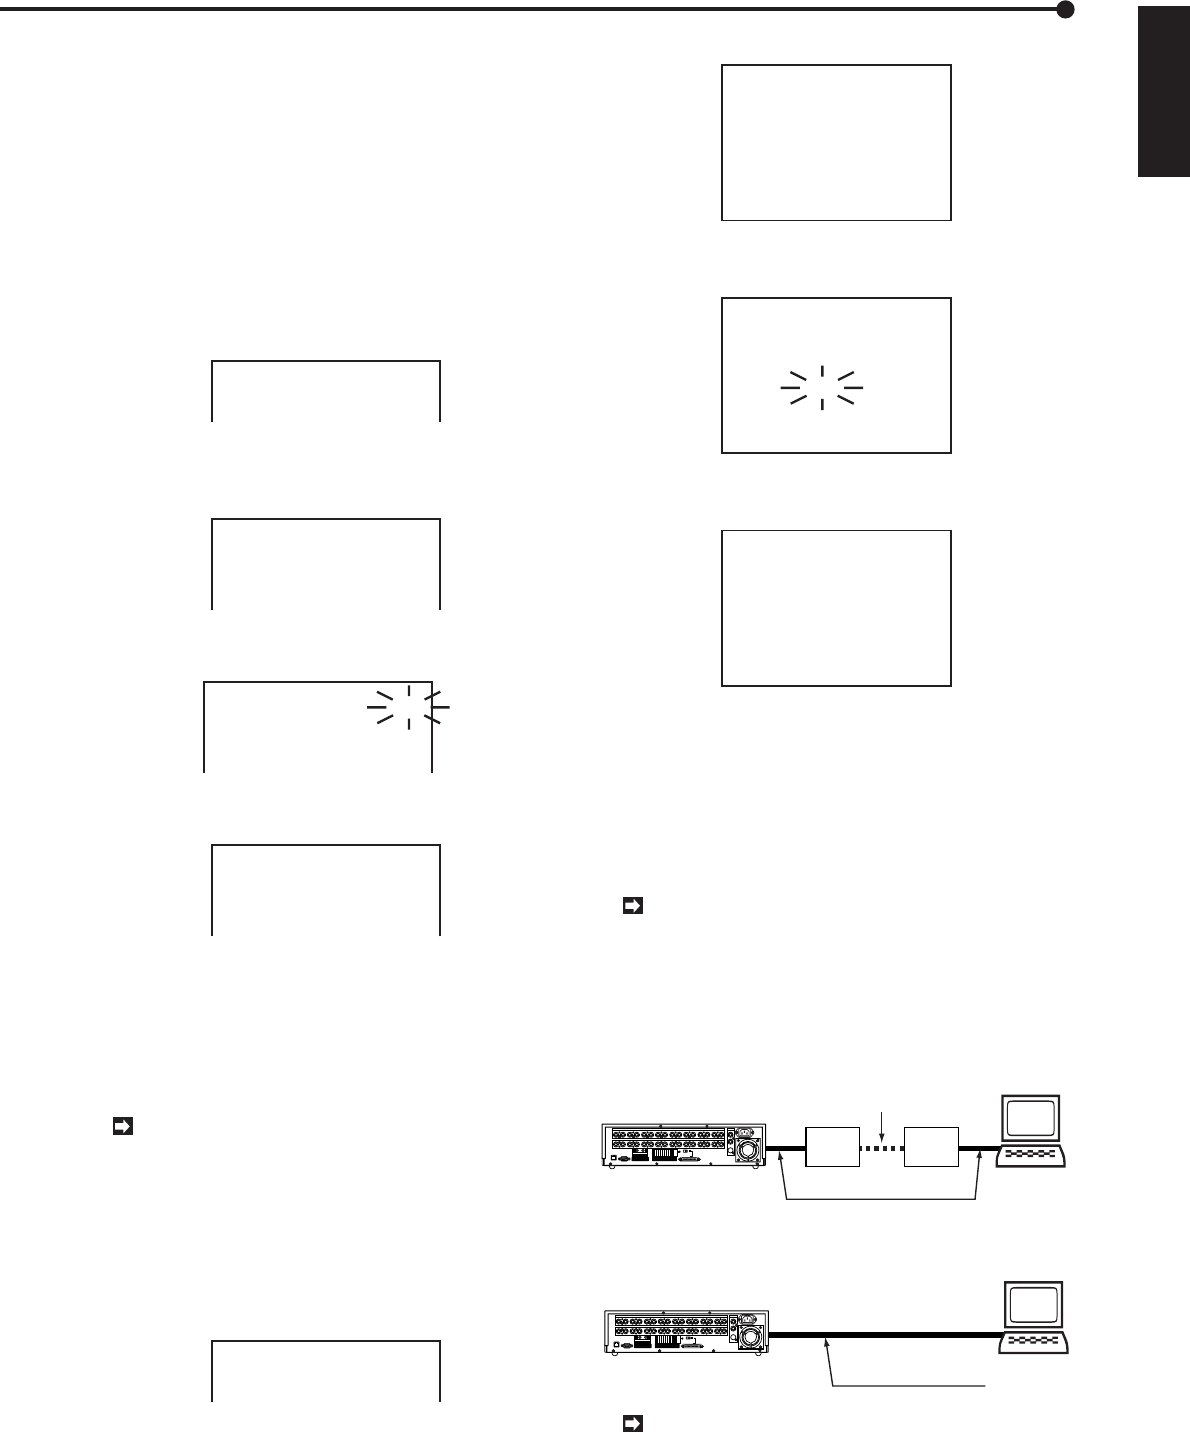
■ Connecting with a personal computer
This connection can be used for remote control and re-
cording supplementary information when the main unit is
connected to a PC.
Please use RS-232C Straight cable (9pin) to con-
nect a modem with this unit. The setting of CTS
should be set to “HIGH” or “ON”. Please refer to the
instruction manual of a modem for details about con-
nection.
♦ Connection via modem
Modem Modem
Personal Compu
RS-232C straight cable (9 pin)
phone line
12345678910111213141516
CAMERA IN
12345678910111213141516
CAMERA OUT
VIDEO OUT
Y/C
CLOCK ADJ
REC
POWER ON
POWER OFF
ALARM OUT
MODE OUT
CALL OUT
CALL OUT GND
GND
GND
DC 5V OUT
MAX 30mA
GND
RS-232C
ETHERNET
RESET
ON
SCSI
TERMINATION
GNDGND
16
15
14
13
12
11
10
9
8
7
6
5
4
3
2
1
ALARM IN
SCSI
OFF
♦ Direct connection
Personal Computer
RS-232C crossover cable
1 2 3 4 5 6 7 8 9 10 11 12 13 14 15 16
CAMERA IN
1 2 3 4 5 6 7 8 9 10 11 12 13 14 15 16
CAMERA OUT
VIDEO OUT
Y/C
CLOCK ADJ
REC
POWER ON
POWER OFF
ALARM OUT
MODE OUT
CALL OUT
CALL OUT GND
GND
GND
DC 5V OUT
MAX 30mA
GND
RS-232C
ETHERNET
RESET
ON
SCSI
TERMINATION
GNDGND
16
15
14
13
12
11
10
9
8
7
6
5
4
3
2
1
ALARM IN
SCSI
OFF
Please use RS-232C crossover cable (9pin) to
connect a modem with a personal computer. RS -
232C Crossover cable differs depending on the per-
sonal computer.
COMMUNICATION settings / Connecting to a personal computer


