


61
•
••••••••••••••••••••••••••••••••••••••••••••••••••••••••••••••••••••••••••••••••••••••••••••••••••••••••••••••••••••••••••••
Operations
ENGLISH
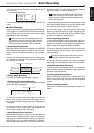
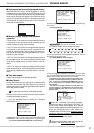
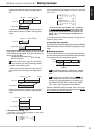
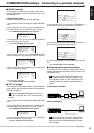
1) When the amount of data in the copy source is
larger than the amount of data in the copy destina-
tion.
Copy source
Copy destination
Start point End point
**
(Auto)
2) When the amount of data in the copy source is
smaller than the amount of data in the copy desti-
nation.
Copy source
Copy destination
Start Point
End Point
**
(Auto)
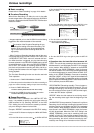
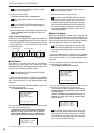
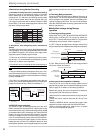
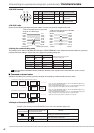
b) Copying the newest copyable data from the hard disk
Copy range is automatically adjusted to the copy medi-
um’s available storage space using the end-point of re-
cording on the hard disk.
• Set start-time and end-time in the (
**
-
**
-
**
**
:
**
:
**
) field.
When the unit is set to copy the last function
from the hard disk, the actual recording proceeds
as shown in the following chart.
1) When the amount of data in the copy source is
larger than the amount of data in the copy destina-
tion.
Copy source
Copy destination
Start Point
**
(Auto) End Point
2) When the amount of data in the copy source is
smaller than the amount of data in the copy desti-
nation.
Copy source
Copy destination
Start Point
**
(Auto)
End Point
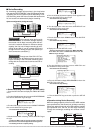
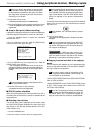
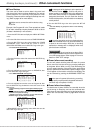
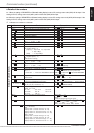
♦ Procedure for setting “
**
”
1. Use steps 1 to 3 from “Manual settings for Copy range ”
written on the previous page.
TRANSFER PERIOD MAN
@ FROM:29-01-01 09:25:24
TO:05-02-01 10:22:53
EXECUTE OFF
2. Turn the SHUTTLE ring clockwise to select the “Year” field
of the Copy start/end-time display, and use the JOG dial to
select “
**
” .
TRANSFER PERIOD MAN
@ FROM:28-05-01 12:25:34
TO:
**
-
**
-
**
**
:
**
:
**
EXECUTE OFF
TRANSFER PERIOD MAN
FROM:
**
-
**
-
**
**
:
**
:
**
@ TO:
**
-
**
-
**
**
:
**
:
**
EXECUTE OFF
• When the start point of a) is specified, “
**
” is displayed
at the Year position of the end-point. When copying using
method b), “
**
” is displayed at the Year position of the
start-point. When the Year position of the start point is set to
display “
**
” , the end-time display is automatically set to
display “
**
” .
3. Use steps 5 and 6 from “Manual settings for Copy range ” to
initiate the Copy function.
♦ Cancelling Copy operation
The COPY process can be stopped by pressing the WARN-
ING RESET button while the recorder is operating in COPY
mode.
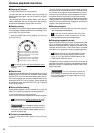
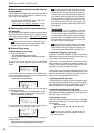
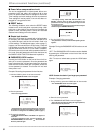
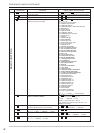
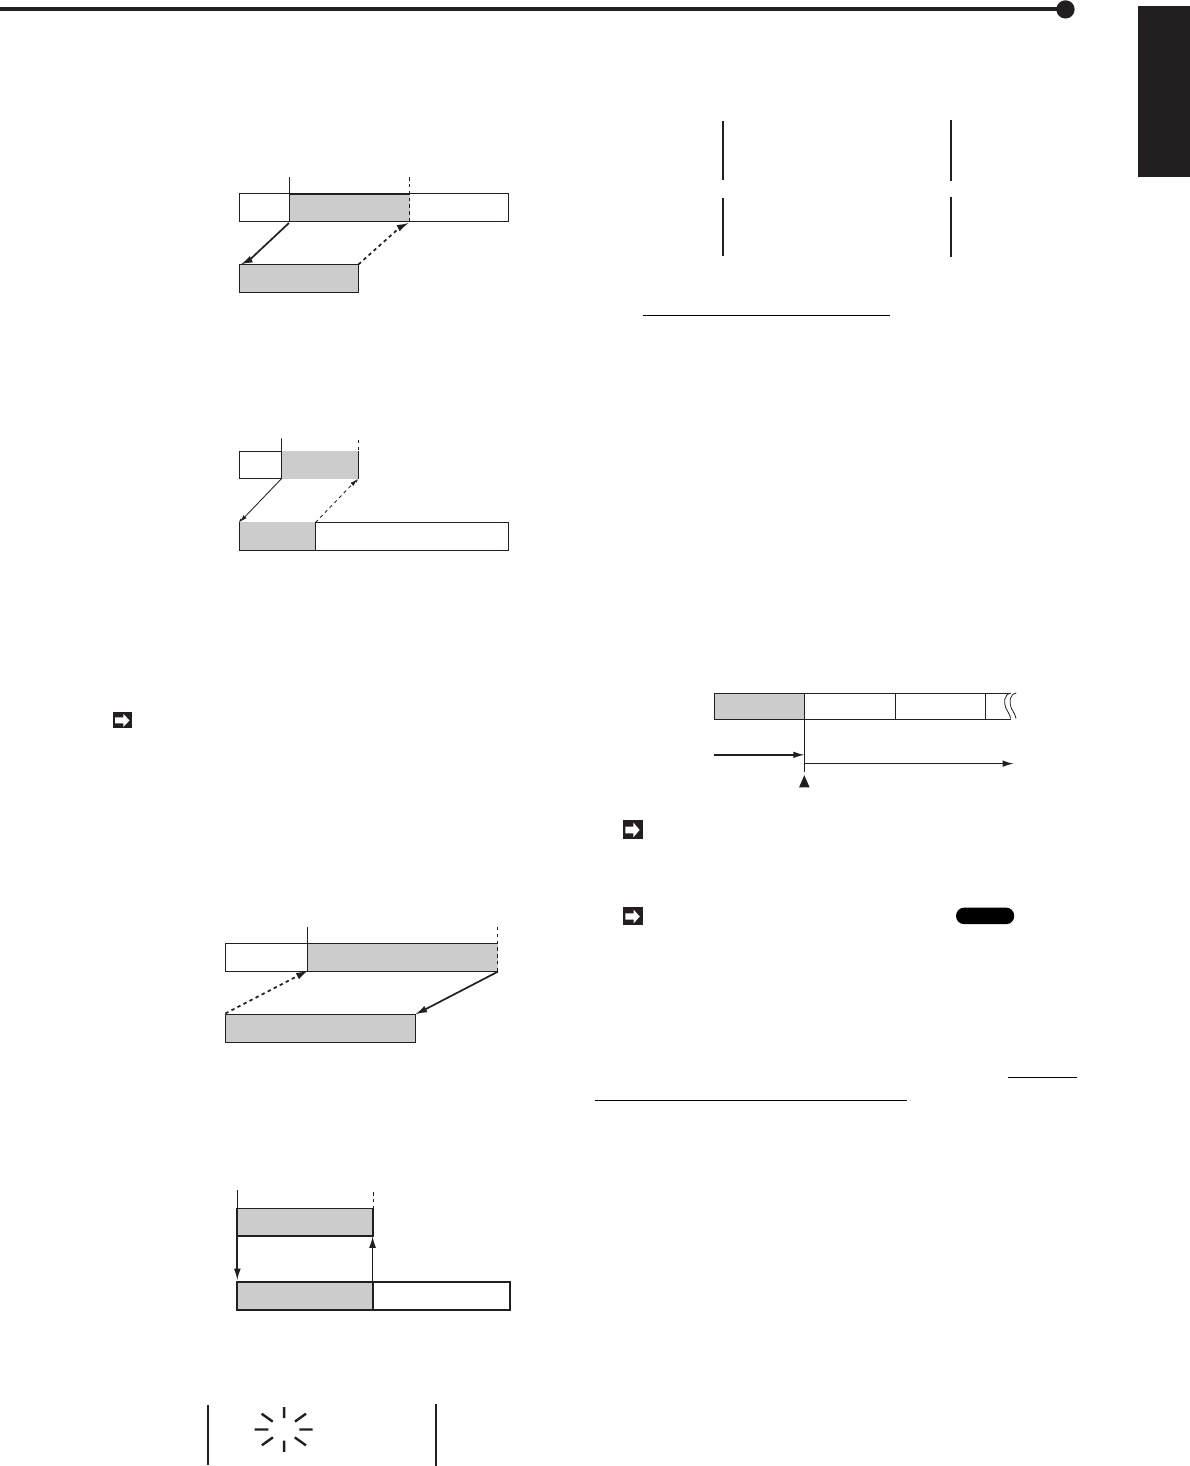
■ Backup operation
The unit can be made to record unsaved hard disk data in
its archive device each time the ARCHIVE button is pressed.
This backup process is conducted as follows:
Recording
on HDD
Archive Pointer
Tuesday Wednesday Thursday
Previous backup
range
During Backup operation, backups are created
starting with the oldest data stored on the hard disk
drive.
The position of the Archive Pointer
Glossary
will
not be erased when the unit’s main power switch is
turned off. To cancel the position of the pointer, use
the “ARCHIVE POINT RESET” setting in the <SERV-
ICE> menu. Refer to page 28 for more details.
When the ARCHIVE button is pressed, the unit will use its
archive device to make backups of data recorded
after the
point indicated by the Archive Pointer.
Making backups
Making copies (continued) /