


29
•
••••••••••••••••••••••••••••••••••••••••••••••••••••••••••••••••••••••••••••••••••••••••••••••••••••••••••••••••••••••••••••
Operations
ENGLISH
3. Turn the JOG dial until the cursor is next to ARCHIVE POINT
RESET and turn the SHUTTLE ring to the right.
• The sub-item will start flashing.
4. Turn the JOG dial until “ON” flashes.
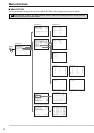
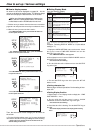
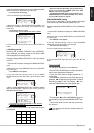
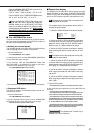
<SERVICE>
POWER FAILURE
@ARCHIVE POINT RESET ON
MENU INITIALIZE OFF
IM-CHECK MODE OFF
5. When the message, “TURN THE SHUTTLE RING >> TO
EXECUTE.” is shown on the screen, turn the SHUTTLE ring
to the right.
• The Archive Pointer is now reset.
• If not executing, turn the JOG dial until “OFF” is shown.
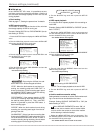
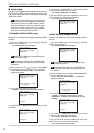
<SERVICE>
POWER FAILURE
@ARCHIVE POINT RESET ON
MENU INITIALIZE OFF
IM-CHECK MODE OFF
TURN THE SHTTLE RING
>> TO EXECUTE.
6. Turn the SHUTTLE ring to the left or press the SET UP
button.
♦ Initializing menus
Selecting “ON” of MENU INITIALIZE in the <SERVICE>
menu initializes the setting ,except for the built-in HDD
and the peripheral recording device.
Example: Setting MENU INITIALIZE to “ON” (the default
is “OFF”).
1. Press the SET UP button to display the <MENU SETTING>
menu.
2. Move the cursor next to SERVICE then turn the SHUTTLE
ring to the right.
• The <SERVICE> menu appears.
3. Turn the JOG dial until the cursor is next to MENU
INITIALIZE and turn the SHUTTLE ring to the left to show
“ON”.
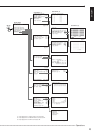
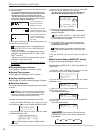
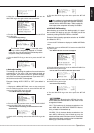
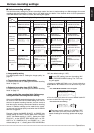
<SERVICE>
POWER FAILURE
ARCHIVE POINT RESET OFF
@MENU INITIALIZE ON
IM-CHECK MODE OFF
4. When “PUSH WARNING RESET KEY THEN ALL MENU
WILL BE INITIALIZED.” appears on the screen, press the
WARNING RESET button.
<SERVICE>
POWER FAILURE
ARCHIVE POINT RESET OFF
@MENU INITIALIZE ON
IM-CHECK MODE OFF
PUSH WARNING RESET KEYŁ
THEN ALL MENU
WILL BE INITIALIZED.
• If not executing, change the sub-item to “OFF” and turn
the SHUTTLE ring to the right.
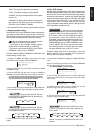
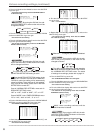
5. SPLIT 16 screen will be shown on the monitor and all menus
are initialized.
Q
W
T
Y
U
I
O
ER
P{
}
q
w
e
r
06-09-2000 12:12:05
• Please note that time date display, timer program setting,
the title of all cameras set in CAMERA TITLE of the <MPX
DISPLAY> menu are not initialized.
• The SELECTED PATTERN setting will be initialized to P1 of
TIMER PROGRAM on the <MENU SETTING> menu. Please
refer to the Menu displays on page 50.
♦ IM-CHECK MODE setting
This function is designed to confirm whether alterations
have been made to the data recorded by the unit.
Example: Setting IM-CHECK MODE to “ON” (the default is
“OFF”).
1. Press the SET UP button to display the <MENU SETTING>
menu.
2. Move the cursor next to SERVICE then turn the SHUTTLE
ring to the right.
• The <SERVICE> menu appears.
3. Turn the JOG dial until the cursor is next to IM-CHECK
MODE and turn the SHUTTLE ring to the right.
• The sub-item will start flashing.
4. Turn the JOG dial until “ON” flashes.
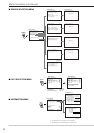
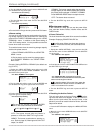
<SERVICE>
POWER FAILURE
ARCHIVE POINT RESET OFF
MENU INITIALIZE OFF
@IM-CHECK MODE ON
5. Turn the SHUTTLE ring to the left or press the SET UP
button.
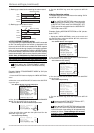
INFORMATION
To distinguish alterations to recorded data:
• Use the PLAY DEVICE button to select the device
that is to be inspected for alterations.
• Press the PLAY button to begin playback of re-
corded data.
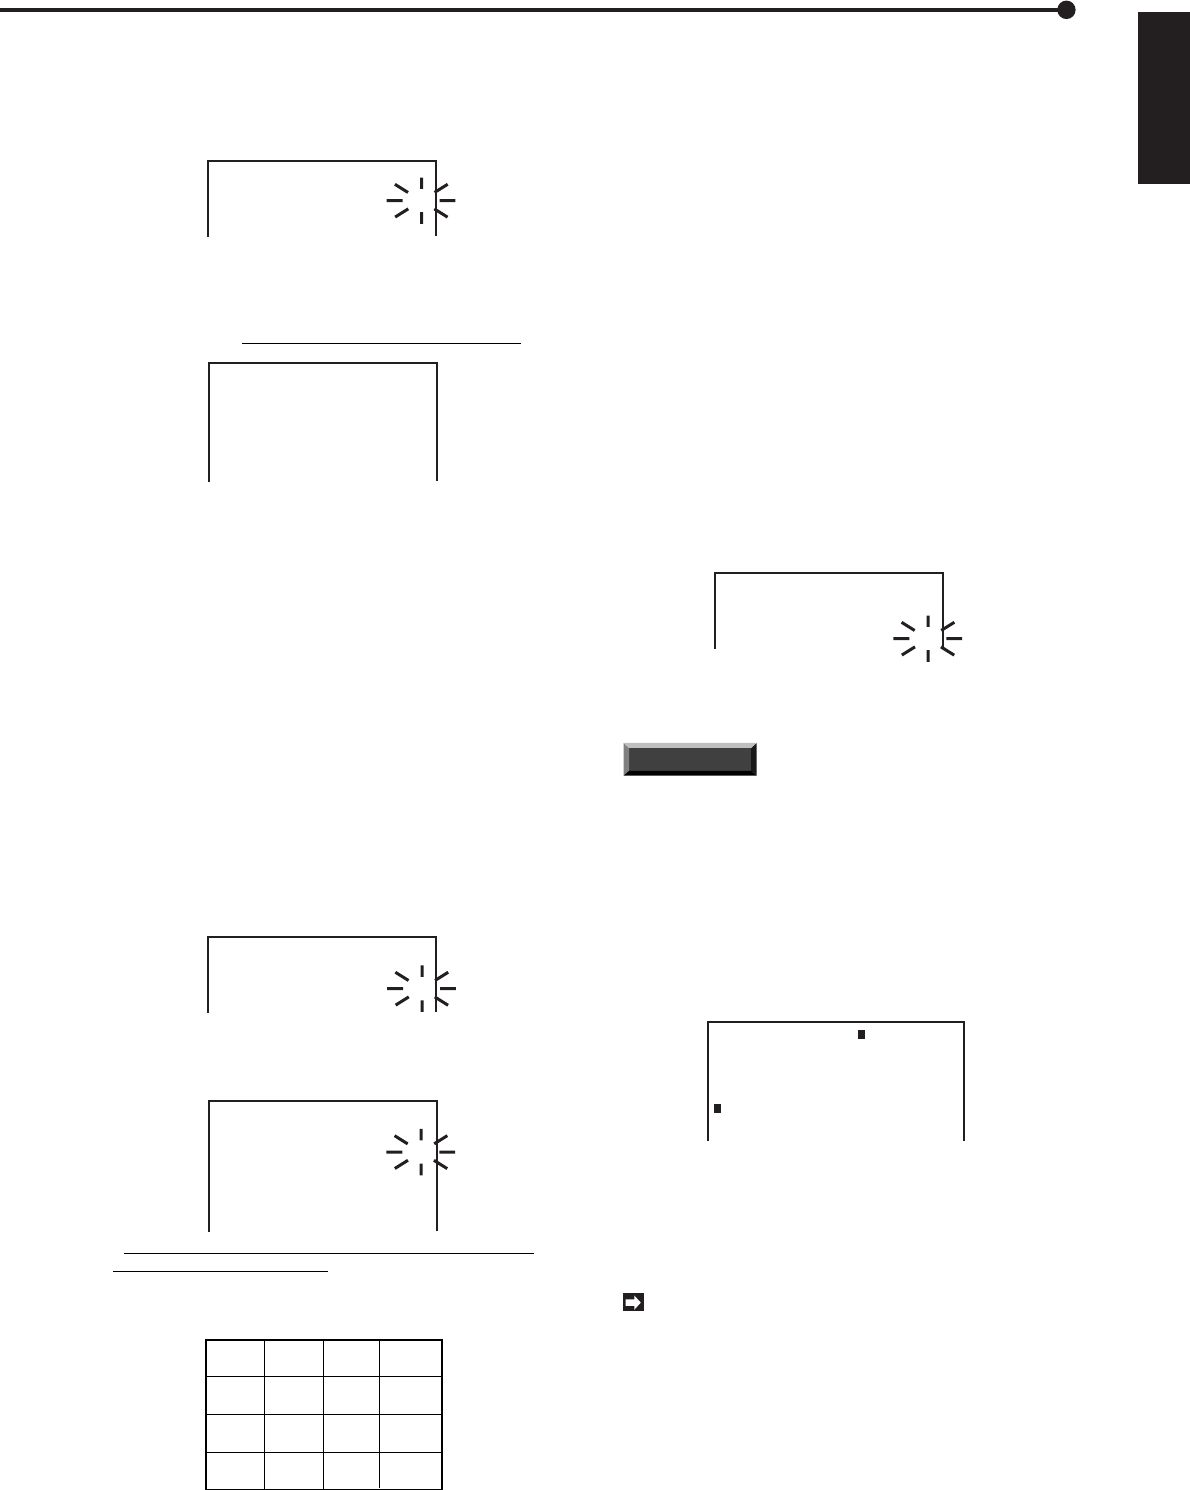
• If an alteration is detected on part of the data during
playback, “ ■ ” will appear to the right of the “A” (Alarm
Recording number) in the Time Display. “ ■ ” indi-
cates the CAMERA channel of the altered data.
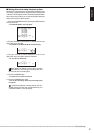
28-10-2001 SUN A
00:00:00 25F 50% C16
WARNING: MODIFIED IMAGE
(
QWERTYUIOP{}qwer
)
• The displayed “ ■ ” and the WARNING display can
be cleared by pressing the WARNING RESET but-
ton.
• This function does not work with the communica-
tion function.
If you don’t use this function, please select the
sub-item “OFF”.