


109
● Baud Rate
Select communication speed for data transmission with
a connected device from the following.
2 400/4 800/9 600/19 200/38 400 bps
● Data Bit
It is impossible to change the value for this setting.
8 bit
● Parity
Select a method to check a transmission error at com-
munication from the following.
NONE: No parity check
EVEN: Even parity
ODD: Odd parity
● Stop Bit
Select a stop bit from the following.
1 bit/2 bit
● Retry Timing
Select a retransmission interval when data reception is
not confirmed from the following.
OFF/100 ms/200 ms/400 ms/1 000 ms
● Alarm Data
Select a method to inform the connected controller of
an event occurrence from the following.
OFF: Does not function.
0 s: Informs the controller every time an event is detect-
ed.
1 s/5 s: Informs the controller when specified time has
passed after detecting an event.
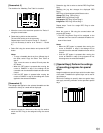
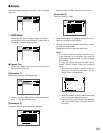
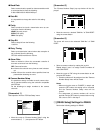
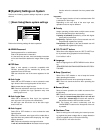
● Camera Number Setup
It is possible to assign a number to each camera chan-
nel to operate cameras using the controller compatible
with PS·Data.
Do the followings to assign numbers to the camera
channels.
[Screenshot 1]
Start operation from the "PS·Data Setup" menu.
z Move the cursor to "Camera Number Setup" using the
arrows button (D C) and press the SET button.
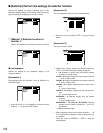
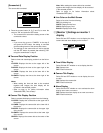
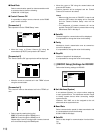
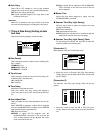
[Screenshot 2]
The "Camera Number Setup" pop-up window will be dis-
played.
x Move the cursor to a desired "CAM No." of "CAM PORT"
using the arrows button.
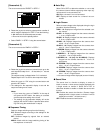
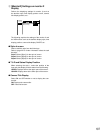
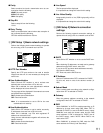
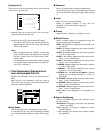
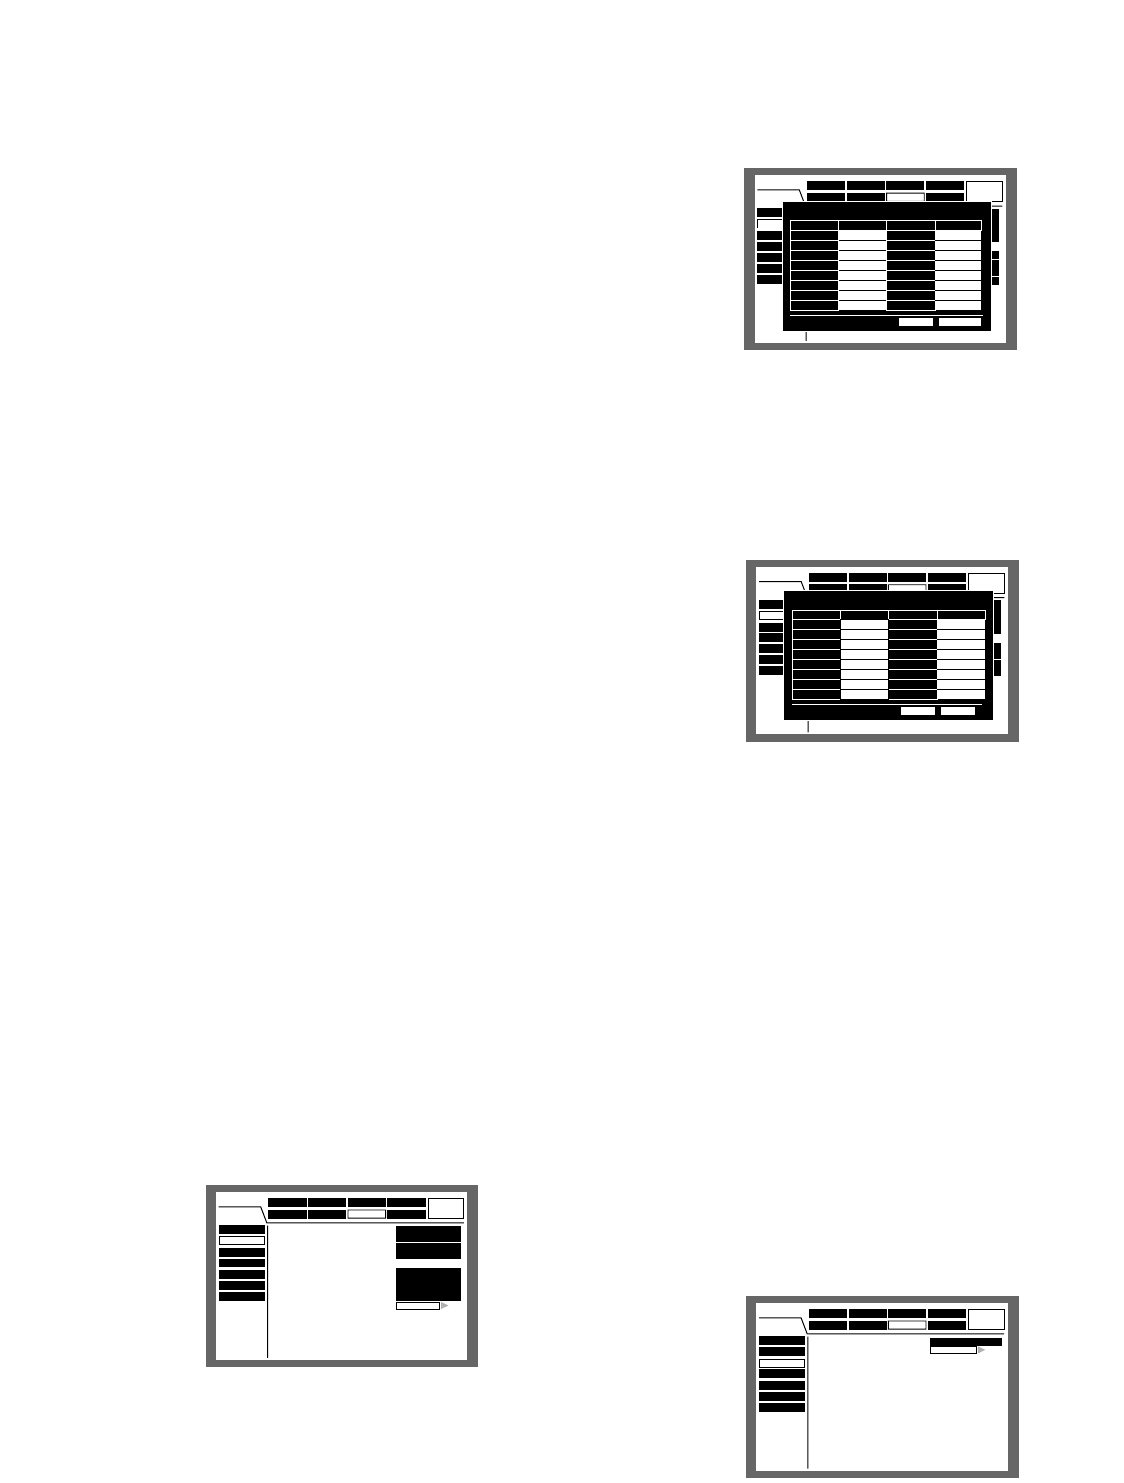
[Screenshot 3]
The cursor will move to the selected "CAM No." of "CAM
PORT".
c Select a camera number by rotating the jog dial.
Repeat steps 2 and 3 to assign camera numbers of
other CAM PORT.
v Move the cursor to "OK" using the arrows button to and
press the SET button.
→ Camera numbers will be assigned and the "Camera
Number Setup" menu will be closed.
Notes:
• When moving the cursor to "CANCEL" in step 4 and
press the SET button, the setting will be canceled
and the "Camera Number Setup" menu will be
closed.
• The assignment of camera numbers will not be
applied until the SET button is pressed after moving
the cursor to "OK" in the step 4.
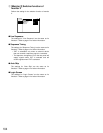
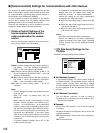
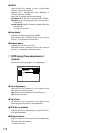
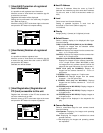
e [RS485 Setup] Settings for RS485
Perform the following settings for RS485.
Schedule
System
Com
Switcher
SETUP MENU
LIVE
Maintenance Recording Event
Display
Camera Control
PS.DATA Setup
RS485 Setup
RS232C Setup
NW Setup 1
NW Setup 2
NTP Setup
SETUP
001
001
1s
OFF
1
NONE
8
9600
OFF
■
Unit Adress(System)
■
Unit Adress(Controller)
■
Cascade
■
Baud Rate
■
Data Bit
■
Parity
■
Stop Bit
■
Retry Timing
■
Alarm Data
■
Camera Number Setup
O K CANCEL
CAM No. CAM PORT CAM No.CAM PORT
1
2
3
4
5
6
7
8
001
002
003
004
005
006
007
008
9
10
11
12
13
14
15
16
009
010
011
012
013
014
015
016
■
Camera Number Setup
Schedule
System
Com
Switcher
SETUP MENU
LIVE
Maintenance Recording Event
Display
Camera Control
PS.DATA Setup
RS485 Setup
RS232C Setup
NW Setup 1
NW Setup 2
NTP Setup
SETUP
001
1s
OFF
1
NONE
8
9600
OFF
001
■
Unit Adress(System)
■
Unit Adress(Controller)
■
Cascade
■
Baud Rate
■
Data Bit
■
Parity
■
Stop Bit
■
Retry Timing
■
Alarm Data
■
Camera Number Setup
CAM No.
O K CANCEL
CAM PORT CAM No. CAM PORT
1
2
3
4
5
6
7
8
■
Camera Number Setup
9
010
011
012
013
014
015
016
009
10
11
12
13
14
15
16
002
003
004
005
006
007
008
001
Schedule
System
Com
Switcher
SETUP MENU
LIVE
Maintenance Recording Event
Display
Camera Control
PS.DATA Setup
RS485 Setup
RS232C Setup
NW Setup 1
NW Setup 2
NTP Setup
■
Baud Rate
■
Control Camera CH
■
Data Bit
■
Parity
■
Stop Bit
19200
8
1
NONE
SETUP