59
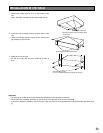
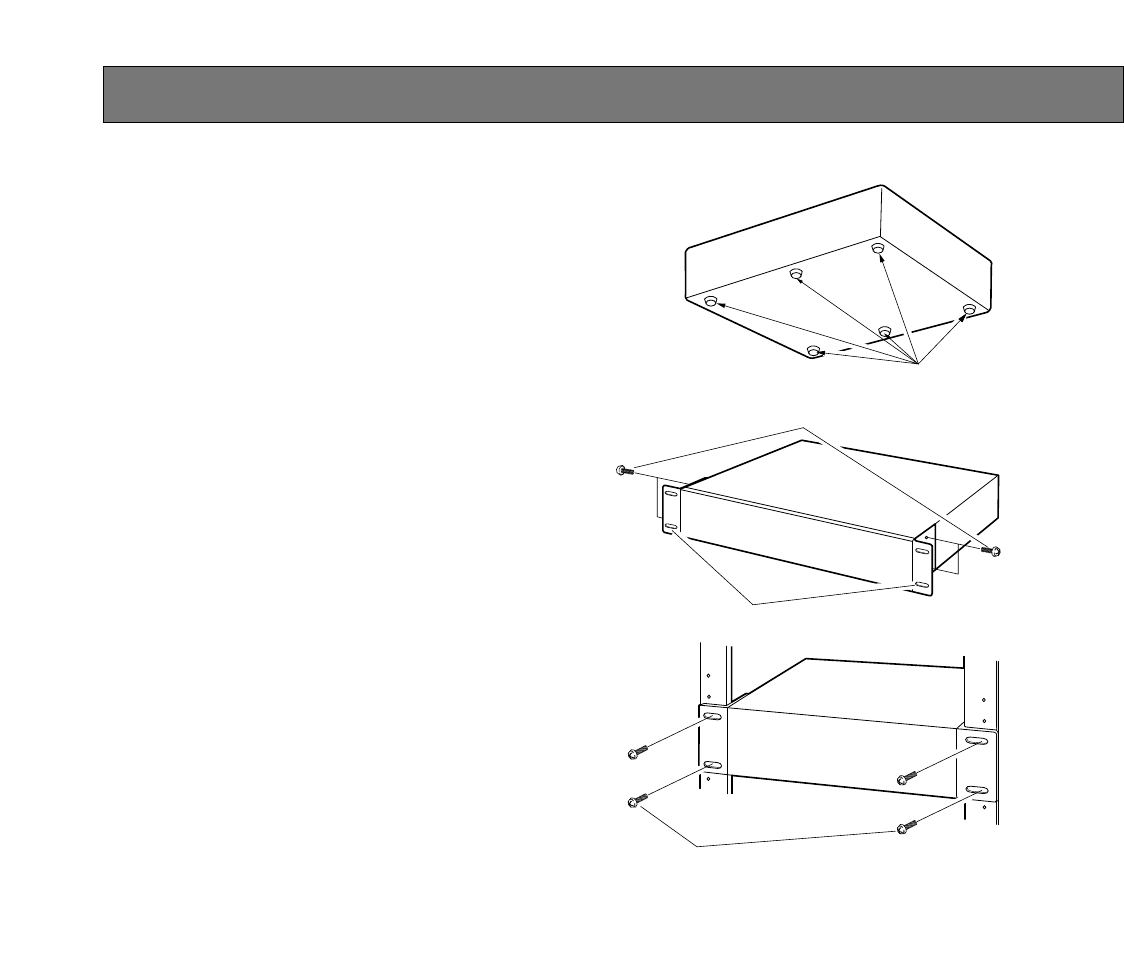
1. Remove the rubber legs (6 pcs.) on the bottom of the
unit.
• Use a flat-blade screwdriver and remove the screws.
2. Install the rack mounting brackets on both sides of the
unit.
• Using the mounting screws (4 pcs.) for the rack mount-
ing brackets, fix them firmly.
3. Install the unit in the rack.
• Fix the unit firmly with the rack mounting screws (4
pcs.).
INSTALLATION IN THE RACK
Remove the rubber legs.
Mounting screws for rack mounting brackets
(accessories)
Rack mounting brackets (accessories)
Rack mounting screws
For our rack: Nominal diameter 5 tapping (accessory)
Important:
• The cooling fan inside the unit is perishable and necessary to be replaced periodically.
• Do not block the ventilation openings or slots in the cover to prevent the unit from overheating.
• If the rack is subject to vibration, secure the rear of the unit to the rack using additional mounting brackets (procured local-
ly).


