


41
206-4272
Channels
Aspect Ratio
16:9
Sleep Timer
O
Quick
Picture
Sound
General
Safety
Accessibility
QUICK SETTINGS
^
Custom Master STB Setup (Cont.)
(Continued from previous page)
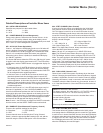
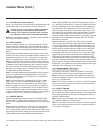
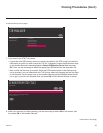
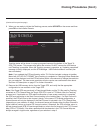
4. Set up STB/display panel features.
On-screen setup menus control the features of the STB/display.
Press MENU on the Installer Remote to access the STB setup
menus, and then set Channel, Picture, Sound, etc. options to the
desired configurations. See “Clonable STB Setup Menu Features” list
on page 39 and also notes below.
Note: If you intend to use the Zoning feature(s) on this STB, make
sure to assign the appropriate TV Zone # and/or Wi-Fi Zone # at this
time as described in Reference section, “Using the STB’s Zoning
Features.”
Note: If desired and if appropriate, you can run Auto Tuning (see
step 5) prior to completing this step.
5. (Optional) Run Auto Tuning.
If you are creating a Master STB Setup and you wish to retain the
default Pass-through Mode for the Target STB(s), do NOT run Auto
Tuning. If you Learn an auto-tuned/edited channel lineup from a
Master STB Setup, thereby creating a TLX file with an FTG Channel
Map, and then Teach the TLX file to a Target STB, this will put the
Target STB in FTG Mode. See also notes below.
Note: When you Teach a TLX file that contains an FTG Channel
Map to a Target STB (for FTG Mode configuration), you may have
the option to select either logical or physical channel tuning. For
either selection, the channel sequence will be based on the order in
which the channels appear in FTG Channel Map. You can view and/
or edit the channel sequence in the FTG File Manager, as required.
Note: Decryption of Pro:Idiom encrypted channels will not be
enabled unless you use the FTG File Manager to set the channel
attributes.
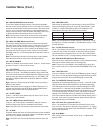
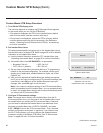
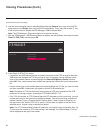
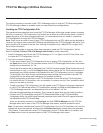
a) Use the Installer Remote to access the Quick Settings Menu.
Then, select Channels > Channel Tuning and follow the
on-screen instructions to search for all available analog and
digital channels.
b) Use the Channel Manager option in the Channels Menu to edit
the channel lineup, as necessary. Add/delete channels per your
system requirements.
6. Verify the STB/display panel setup.
Make sure the STB/display features are set per your requirements.
Also, if applicable, verify that the channel lineup is correct.
The Master STB Setup is now ready to be saved to a USB memory
device. See “Cloning Procedures” on pages 42 to 47.
Use the STB setup menus to set
the display features to the desired
configuration for the end user.
(Optional) Use Channels Menu
options to run Auto Tuning and
edit the channel lineup.
Quick
Picture
Sound
General
Safety
Accessibility
CHANNELS
Channel Tuning
Channel Manager
Channel Label
Multi Audio
MONO
MONO
Audio Language
None
^
^