12 C642M (11/03)
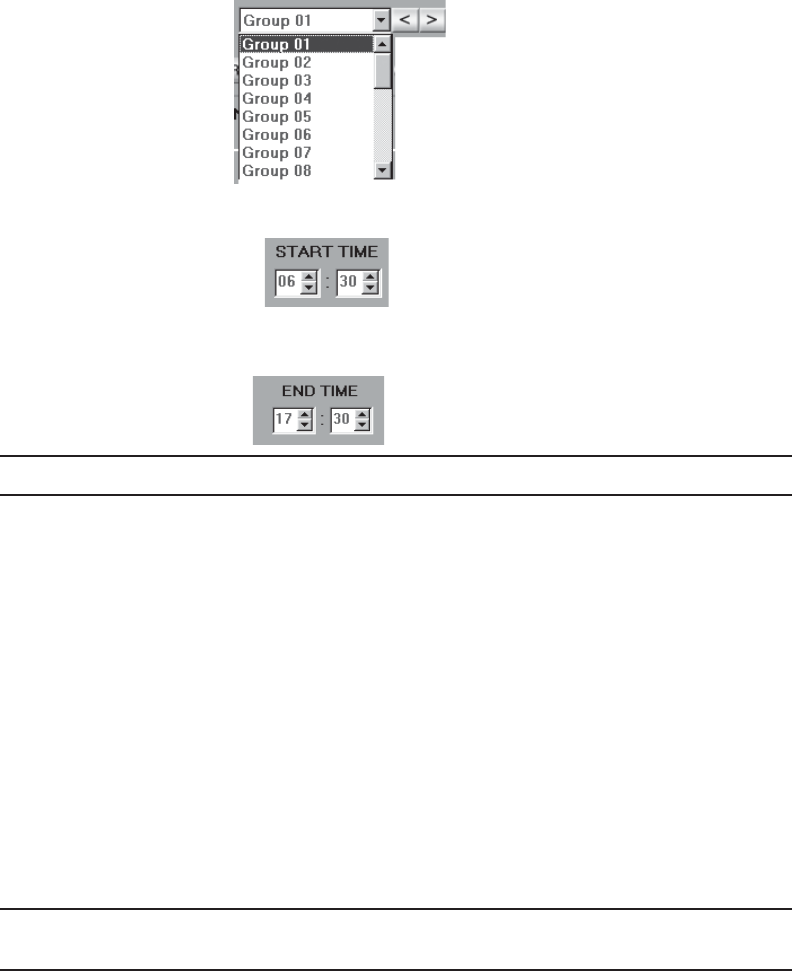
2 START TIME – Program the time to start recording. If you want Group 1 to start recording at 6:30 in the morning, use the
arrow keys and set the START TIME to
3 END TIME – Program the time to stop recording. If you want Group 1 to stop recording at 5:30 in the evening, use the
arrow keys and set the END TIME to
1 SCHEDULE (Group 01-24) – Use the drop down menu or arrow buttons to select a group (schedule).
NOTE: For continuous recording, set the start and stop times to 00:00.
4 CLEAR ALL SCHEDULE – CAUTION: Clears all group schedules.
FULL RECORD – This button automatically programs Group 1. It turns on all cameras enabled in the Camera menu. It
sets all days of the week for continuous recording. This button may be a useful programming tool if you want to record
many cameras continuously. After you press the button, you can change the settings; for example, you can turn
cameras off or deselect days of the week. CAUTION: Pressing this button clears all other group schedules.
SENSOR TO CAMERA – This button automatically assigns alarm input sensors to cameras and groups. Sensor 1 is
assigned to Camera 1, Group 1; Sensor 2 to Camera 2, Group 2; etc. Sensors are assigned only to the first eight
cameras and groups. This may be a useful programming tool for quickly assigning sensors to cameras and groups.
However, if you do not want to use this format, you can manually assign sensors as desired; for example, assign
Sensor 1 to Cameras 2, 9, and 16 in Group 9 (refer to item 8). CAUTION: Pressing this button clears all other
schedules.
5 DAY OF WEEK – Select the days of the week a group schedule will record.
6 REMOTE ALARM – Check the remote alarm box to notify a remote site when an alarm is activated.
TARGET IP ADDRESS – Enter the IP address of the remote site to alert when an alarm is activated.
NOTE: The Emergency Agent software must be installed on the remote site PC for the remote alarm function to work.
Refer to the
Emergency Agent Software
section of this manual for more information.
7 AUTO REBOOT – Set the day and time the system will reboot automatically. It is recommended that the DX7100 be
programmed to reboot weekly. The system will be momentarily unavailable during the reboot; recording and playback
functions will not be operational.
8 CAMERA, MOTION, SENSOR, AND RELAYS Buttons – Select the cameras, recording triggers, and relay outputs for the
group schedule.
If a camera button is enabled, that camera will record between the times specified in the start and end times.
If a motion button is enabled, that camera will record only if motion is detected between the times specified in the start
and end times. The corresponding camera button also must be enabled for motion detection to work.
If a sensor button is enabled, recording will occur if there is an alarm between the times specified in the start and end
times. Enable the camera or cameras that you want to record.
Both the motion and sensor buttons can be enabled for the same camera.
9 GROUP INFORMATION – Click the checkbox to list schedule conflicts between groups.
