6 C642M (11/03)
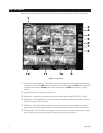
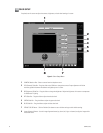
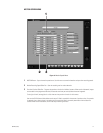
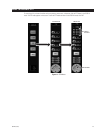
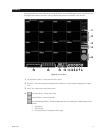
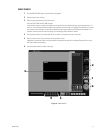
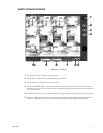
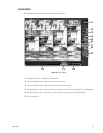
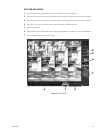
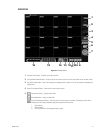
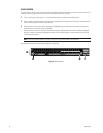
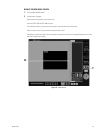
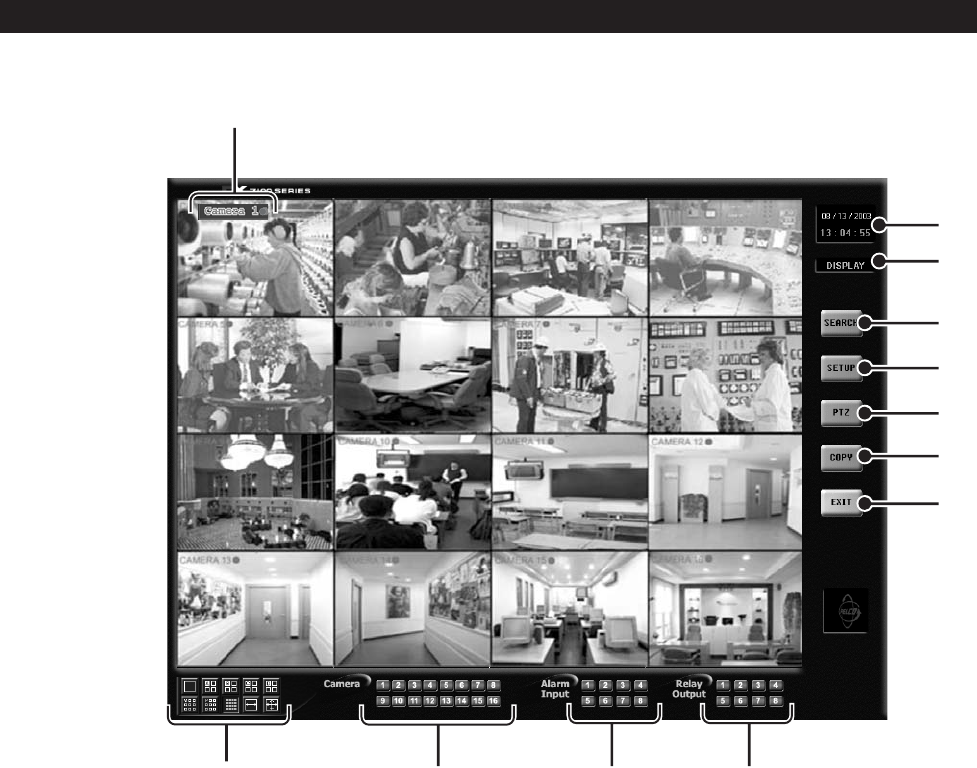
Figure 1. Display Mode
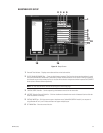
1 Camera Name and Recording Status – The colored circle located to the right of the on-screen camera name indicates the
recording status of the camera. RED indicates that the video is being recorded continuously, BLUE means recording was
triggered by motion detection, YELLOW indicates sensor input recording, and CLEAR means the video is not being
recorded.
2 Date and Time Indicator – Displays current date and time.
3 Mode Identifier – Identifies the mode displayed on the screen. Available modes are DISPLAY, SETUP, PTZ, and COPY.
4 SEARCH Button – Click the SEARCH button to search and play back recorded video by date and time. Refer to the
Search
section of this manual for more information.
5 SETUP Button – Click the SETUP button to program camera settings, customize a recording schedule, set up multiple
password levels, and show pan and tilt protocol. Refer to the
System
Setup
section of this manual for more information.
6 PTZ Control Button – Click the PTZ button to control pan, tilt, and zoom functions and to set and operate patterns, preset
tours, and presets. Refer to the
How to Operate PTZ
section of this manual for more information.
1
4
9
5
6
7
8
11
12
10
2
3
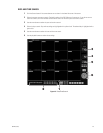
DISPLAY MODE
Display mode is the main screen of the DX7100 Series DVR. Use this screen to access Search, Setup, PTZ, and Copy modes.