C642M (11/03) 25
PATTERNS
The DX7100 can be programmed for one pattern for each camera. A pattern is a user-defined, viewable camera path with a
definite beginning and end. The pattern can consist of any standard pan and tilt or lens commands. Once defined the pattern is
easily activated with the press of an on-screen menu button. The pattern will run continuously until it is deactivated with
another press of the menu button.
HOW TO PROGRAM A PATTERN
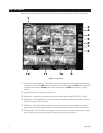
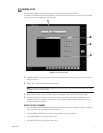
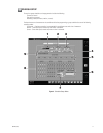
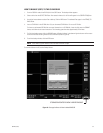
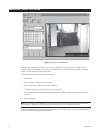
1. Click the PTZ button in the DISPLAY mode. The PTZ mode appears.
2. Select a camera by moving the mouse pointer to the desired camera view and clicking the left mouse button. The
selected camera number is displayed in the center of the PTZ controls.
3. Click P-SET. ON appears on the P-SET button. Move the camera through a series of movements using the pan, tilt, zoom,
and focus commands.
4. To stop programming the pattern, click the P-SET button.
5. To run the pattern, click the P-RUN button. ON appears on the P-RUN button. To stop the pattern, click the P-RUN button.
HOW TO CLEAR A PATTERN
Programming a new pattern will replace (clear) the pattern previously programmed.
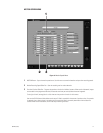
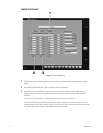
PRESETS
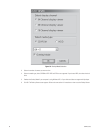
NOTE: Spectra
®
or Esprit
®
programming menus can be accessed through preset 95 with a KBD200A or KBD300A keyboard in
the direct mode. Preset 95 does not work with the DX7100 controls.
A preset is a user-defined camera position using pan, tilt, zoom, and focus commands. The DX7100 Series DVR has program-
ming capacity for 12 preset locations.
HOW TO PROGRAM A PRESET
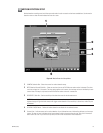
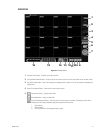
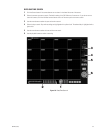
1. Click the PTZ button in the DISPLAY mode. The PTZ mode appears.
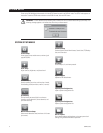
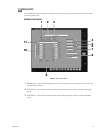
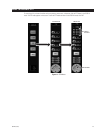
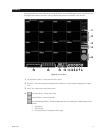
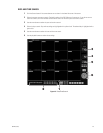
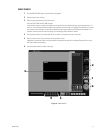
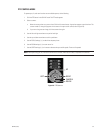
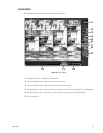
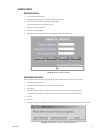
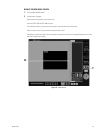
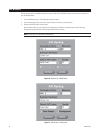
2. Click PRESET. The preset bar appears (refer to Figure 11).
3. Select a camera by moving the mouse pointer to the desired camera view and clicking the left mouse button. The
selected camera number is displayed in the center of the PTZ controls.
4. Move the camera to a desired position.
5. Click the SET button to turn on the preset programming.
6. Click a preset button 1-12. To set another preset for the same camera, move the camera and click another preset button.
7. Click the SET button to stop programming preset positions.
8. Repeat steps c-g to program a different camera.
HOW TO MOVE TO A PRESET
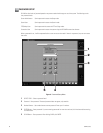
1. Click the PTZ button in the DISPLAY mode. The PTZ mode appears.
2. Click PRESET. The preset bar appears (refer to Figure 11).
3. Select a camera by moving the mouse pointer to the desired camera view and clicking the left mouse button. The
selected camera number is displayed in the center of the PTZ controls.
4. Click MOVE. ON appears on the button.
5. Click a preset button 1-12. The camera moves to the programmed preset position.
6. Click MOVE to turn off preset positioning.
HOW TO CLEAR A PRESET
1. Click the PTZ button in the DISPLAY mode. The PTZ mode appears.
2. Click PRESET. The preset bar appears (refer to Figure 11).
3. Select a camera by moving the mouse pointer to the desired camera view and clicking the left mouse button. The
selected camera number is displayed in the center of the PTZ controls.
4. Click CLEAR.
5. Click a preset button 1-12.
6. Click CLEAR to turn off clearing of presets.