VIEWING CAMERA IMAGES
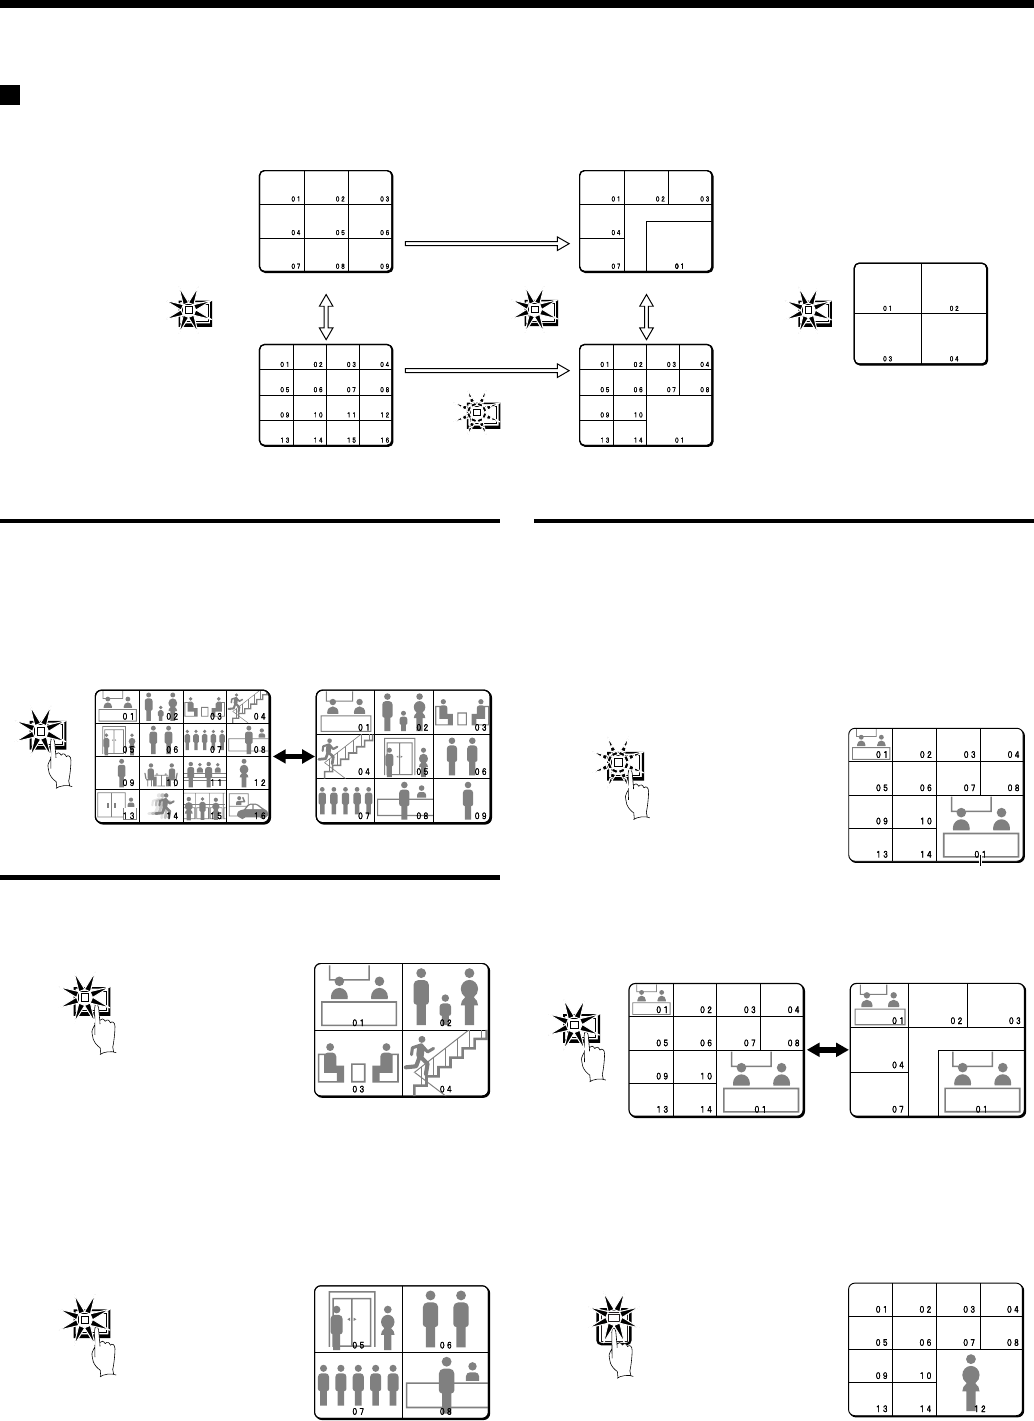
Viewing multiple-screen images
Images from the cameras that are connected to the digital video recorder can be displayed in several split-screen formats. Furthermore, the
images from each camera can be displayed in any position within the split screen. (See page 81.)
Viewing images as 9-screen or 16-screen displays
1
Press the MULTI button.
The display switches between 9-screen and 16-screen displays
each time the MULTI button is pressed.
To return to a single-screen display, press a camera select button.
For the DSR-3009P model, only the 9-screen display is available
with no switching.
Viewing images as a 4-screen display
1
Press the QUAD button.
Images appear as a 4-screen display.
2
Press the QUAD button once more.
Camera images are switched in 4-screen display units (1 – 4, 5 – 8,
9 – 12, 13 – 16) each time the button is pressed.
To return to a single-screen display, press a camera select button.
For the DSR-3009P model, a 4-screen display of images from
cameras 1 – 4, 5 – 8, or 9 – 3 will appear each time the button is
pressed.
Plus screen viewing
The plus screen allows you to display the images from each camera
as a quarter-screen display in the lower right corner of the split-screen
display. In addition, images being recorded can be played back in the
same position.
1
Press the PLUS button.
The display changes to show a 13-screen display with a plus
screen as a quarter-screen picture in the lower-right corner.
For the DSR-3009P model, a 6-screen display appears.
2
Press the MULTI button.
The display switches between 13-screen and 6-screen each time
the MULTI button is pressed.
3
Press a camera select button (example: 12).
The images from the selected camera will be displayed in the plus
screen. To cancel the plus screen, press the PLUS button once
more.
For the DSR-3009P model, press a camera select button
numbered 9 or less.
4-screen display
9-screen display
16-screen display
6-screen display
13-screen display
MULTI
MULTI
QUAD
PLUS
MULT
QUAD
QUAD
Plus screen
PLUS
MULT
12
16
English


