


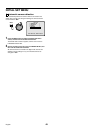

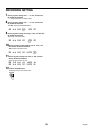
RECORDING SETTING
9
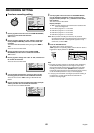
Use the jog dial to change the setting to “OFF” , and then
turn the shuttle dial clockwise.
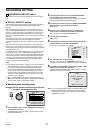
“25” flashes in the FPS column.
10
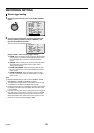
Use the jog dial to set the recording cycle to “12.50” , and
then turn the shuttle dial clockwise.
“OFF” flashes in the SET column.
Note: The image quality for timer recording will be the image quality
that was set by PICTURE QUALITY in the NORMAL REC
MODE SET sub-menu.
Example: The recording will be NORMAL. Then recording
speed the same as the speed previously set. In addition, the
recording speed will be the speed that was set using the
NORMAL REC MODE SET menu.
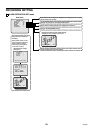
11
Use the jog dial to change “OFF” to “ON” , and then turn
the shuttle dial clockwise.
The cursor moves to MON.
12
Press the EXIT/OSD button.
The display returns to the normal screen.
Note:
•
If you want to use different days, times, and recording speeds for
timer recording, select the respective WEEK column and make the
required settings.
•
If timer reservations overlap each other, the one that starts first will
have priority.
•
To delete all timer reservations (including time settings), press the
MENU RESET button of the front panel.
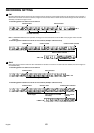
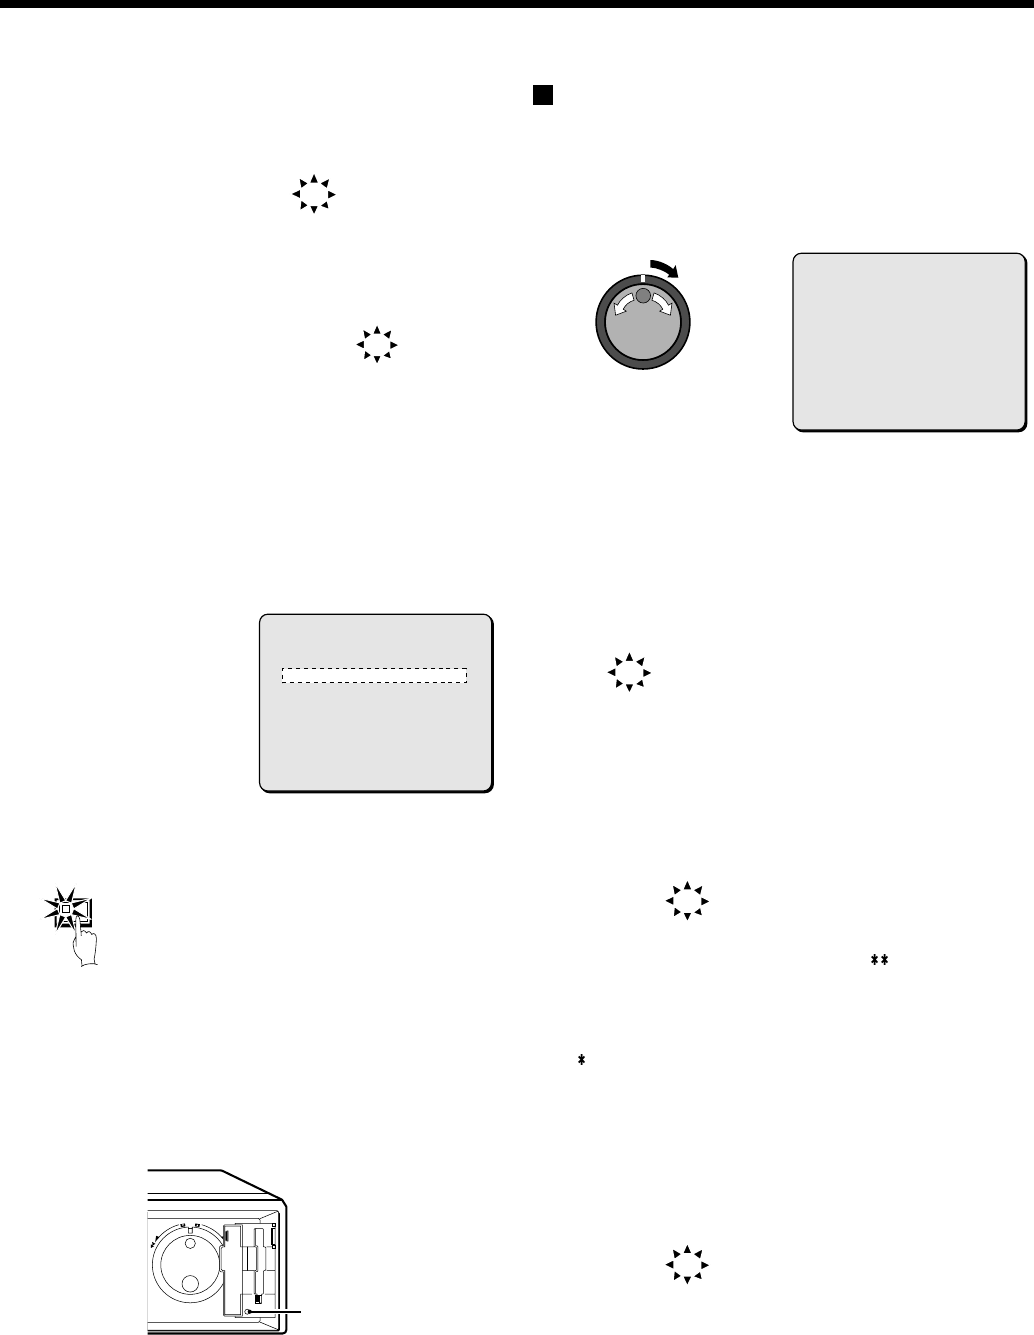
Timer reservations spanning more than
24 hours
24-hour timer reservations can be made using the 7th row (SAT) and
8th row (DLY) in the TIMER SET screen.
Example: To set timer recording from 10.30 a.m. on
Monday to 8.30 p.m. on Wednesday
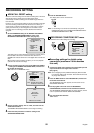
1
Use the jog dial to move the cursor to the 7th line (SAT), and
then turn the shuttle dial.
“SAT” flashes in the WEEK column.
2
Use the jog dial to change from “SAT” to “MON” , and then
turn the shuttle dial clockwise.
“– –” (hours) flashes in the START column.
Note: This can also be set using the numeric keys. (See page 43.)
3
Use the jog dial to change from “– –” to “10” , and then turn
the shuttle dial clockwise.
“– –” (minutes) flashes in the START column.
4
Use the jog dial to change from “– –” to “30” , and then turn
the shuttle dial clockwise.
“– –” (hours) flashes in the STOP column.
5
Use the jog dial to change from “– –” to “ ” , and then turn
the shuttle dial clockwise.
The DLY setting on the 8th line automatically changes to the
following day (TUE) of the weekday indicated in the 7th line
changed to “TUE”. Parts which do not need to be set appear with
a “ ” symbol.
6
Use the jog dial to change from “TUE” to “WED” , and then
turn the shuttle dial clockwise.
“– –” (hours) flashes in the STOP column.
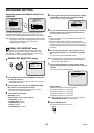
DLY 08:30 18:30 OFF 25FPS OFF
DLY 08:30 18:30 OFF 12.50FPS OFF
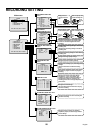
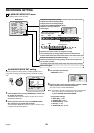
<TIMER SET>
WEEK START STOP PROGRAM FPS SET
SUN 08:30 18:30 OFF 12.50FPS ON
MON --:-- --:-- OFF 30FPS OFF
THE --:-- --:-- OFF 30FPS OFF
WED --:-- --:-- OFF 30FPS OFF
THU --:-- --:-- OFF 30FPS OFF
FRI --:-- --:-- OFF 30FPS OFF
SAT --:-- --:-- OFF 30FPS OFF
DLY --:-- --:-- OFF 30FPS OFF
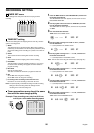
EXIT/OSD
JOG
SHUTTLE
E
N
T
E
R
C
L
E
A
R
MENU
RESET
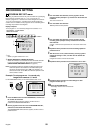
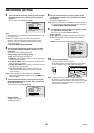
<TIMER SET>
WEEK START STOP PROGRAM FPS SET
SUN --:-- --:-- OFF 25FPS OFF
MON --:-- --:-- OFF 25FPS OFF
THE --:-- --:-- OFF 25FPS OFF
WED --:-- --:-- OFF 25FPS OFF
THU --:-- --:-- OFF 25FPS OFF
FRI --:-- --:-- OFF 25FPS OFF
SAT --:-- --:-- OFF 25FPS OFF
DLY --:-- --:-- OFF 25FPS OFF
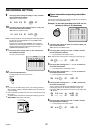
MON --:-- --:-- OFF 25FPS OFF
MON 10:30 --:-- OFF 25FPS OFF
MON 10:30 **:** *** ****FPS ***
TUE --:-- --:-- OFF 25FPS OFF
WED **:** --:-- OFF 25FPS OFF
English
57