


RECORDING IMAGES IN THE NORMAL RECORDING AREA
Timer recording
The monitored images can be recorded automatically by setting start and end times for each day of the week.
1
1
Setting the time
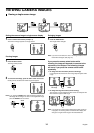
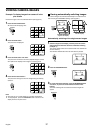
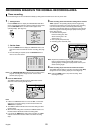
Press the MENU button to display the LANGUAGE/CLOCK SET
menu, and set the date and time. After the setting has been made,
press the EXIT/OSD button, the date and time appear in the
operating display. (See page 44.)
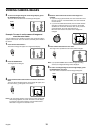
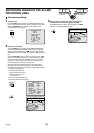
2 Set the timer.
•
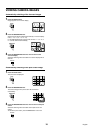
Press the MENU button to display the TIMER SET menu, and
then set the start and end times for timer recording. (See page
56.)
•
Once the setting is complete, press the EXIT/OSD button to
return to the normal screen.
Note: If the “PROGRAM REC SET” setting is set in the menu screen,
program recording of the images for each camera will be
possible. (See page 55.)
2
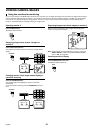
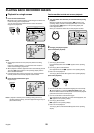
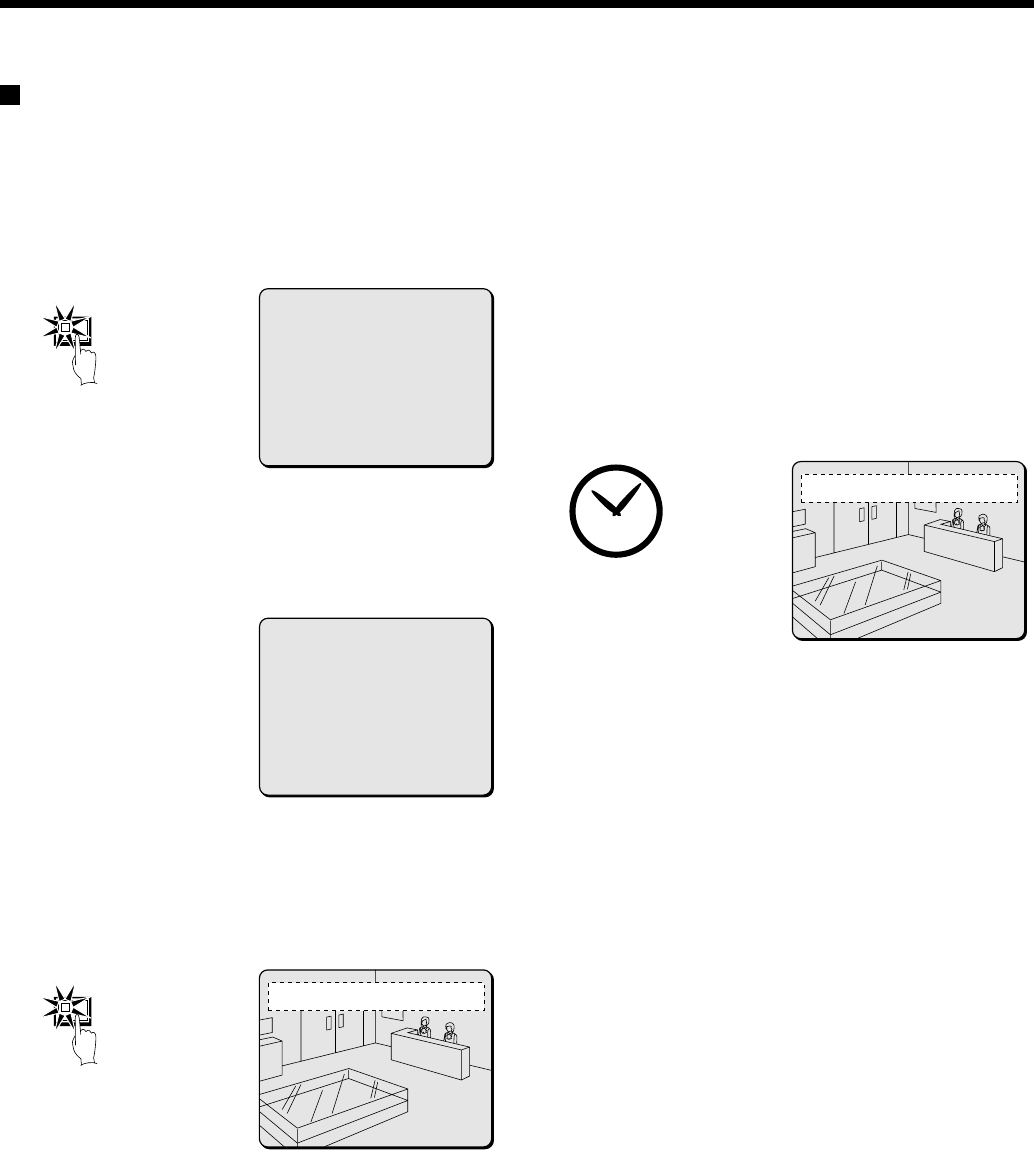
Press the TIMER button.
The TIMER indicator illuminates and the digital video recorder
switches to timer recording standby mode.
Note:
•
If SET in the TIMER SET menu is not set to “ON”, or if the timer
settings are not made correctly, an alarm will sound when the
TIMER button is pressed.
•
The TIMER indicator illuminates when the timer setting has been
made correctly.
•
When the timer setting time is reached, the TIMER indicator and
the REC indicator illuminate and timer recording starts.
•
If you press the TIMER button during timer recording, the TIMER
indicator and the REC indicator switch off and timer recording
stops.
3
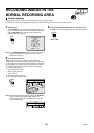
Timer recording starts when the timer setting time is reached.
“REC” appears in the operating display and the images being
monitored are recorded in the normal recording area. Recording
onto the hard disk proceeds automatically (default setting)
according to the following settings. The settings can be changed
between long-period recording and high-quality recording in five
steps. (See page 54.)
•
Hard disk recording areas:
Normal recording area: 80%
Alarm recording area: 19%
Archive area: 1%
•
Picture quality: EN (Enhanced)
•
Recording speed: 8.33 FPS (81H)
Note: Playback is possible during recording. When the PLAY/STOP
button is pressed during recording, “c” appears in the
operating display and images are played back from the point
where recording began.
4
Timer recording stops when the set end time is reached.
The TIMER indicator swithes off and the recording symbol (REC)
disappears from the operating display and recording stops.
Note: Press the TIMER button to stop timer recording. Timer
recording then stops.
<LANGUAGE/LANGUE/SPRACHE/IDIOMA>
ENGLISH
<CLOCK SET>
01-01-2002 TUE 00:00:00
<SUMMER TIME SET>
MODE : USE
WEEK MONTH TIME
ON LST-SUN 03 02:00
OFF LST-SUN 10 02:00
<EXT.CLOCK SET>
ADJUST.TIME 01:00
MENU
<TIMER SET>
WEEK START STOP PROGRAM FPS SET
SUN --:-- --:-- OFF 8.33FPS OFF
MON 08:00 18:00 OFF 8.33FPS ON
THE 08:00 18:00 OFF 8.33FPS ON
WED 08:00 18:00 OFF 8.33FPS ON
THU 08:00 18:00 OFF 8.33FPS ON
FRI 08:00 18:00 OFF 8.33FPS OFF
SAT --:-- --:-- -- 8.33FPS OFF
DLY --:-- --:-- -- 8.33FPS OFF
TIMER
01
EN 10-05-02 17:30:25
01
REC REPEAT EN 10-05-02 19:30:00
English
21