


RECORDING SETTING
5
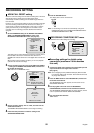
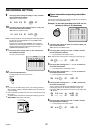
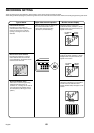
Turn the shuttle dial clockwise, use the jog dial to set audio
recording (example: “ON” ), and then turn the shuttle dial
clockwise.
The cursor moves to ALARM RECORDING.
Note:
•
Audio recording can be set when the REC RATE setting is 5 FPS
or 10 FPS or more.
•
When set to “ON”, the letter “A” (audio recording indicator)
appears in front of the REC RATE recording speed, and the
maximum number of recordings appears underneath it (at the
bottom of the screen).
=> (30200 ALARMS CAN BE RECORDED)
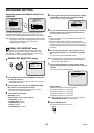
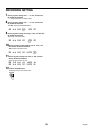
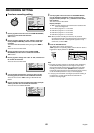
6
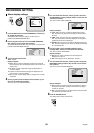
Turn the shuttle dial clockwise, use the jog dial to set alarm
recording mode (example: “ENABLED” ), and then turn the
shuttle dial.
The cursor moves to ALARM INTERLEAVE.
Display example: Alarm recording settings
•
OFF: Alarm recording is not carried out.
•
ENABLED: Alarm recording is always carried out regardless of
the timer recording settings.
•
AL-REC ON TIMER: Alarm recording is only carried out when
timer recording is in progress.
•
AL-REC OFF TIMER: Alarm recording is only carried out when
timer recording is not in progress
•
OLY AL-RC ON TMR: Alarm recording is carried out only
during the times set by the timer. This cannot be used for
normal recording.
Note: If alarm recording is set to a setting such as ENABLED,
PRE-ALARM RECORDING setting will be enabled (“ ” will
change to “OFF”).
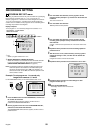
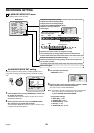
7
Turn the shuttle dial clockwise, use the jog dial to select the
ALARM INTERLEAVE setting (example: “SW” ), and then turn
the shuttle dial clockwise.
The cursor moves to PROGRAM GROUP.
Display examples:
•
ONLY: (See page 61.)
•
SW: (See page 61.)
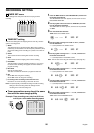
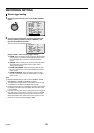
8
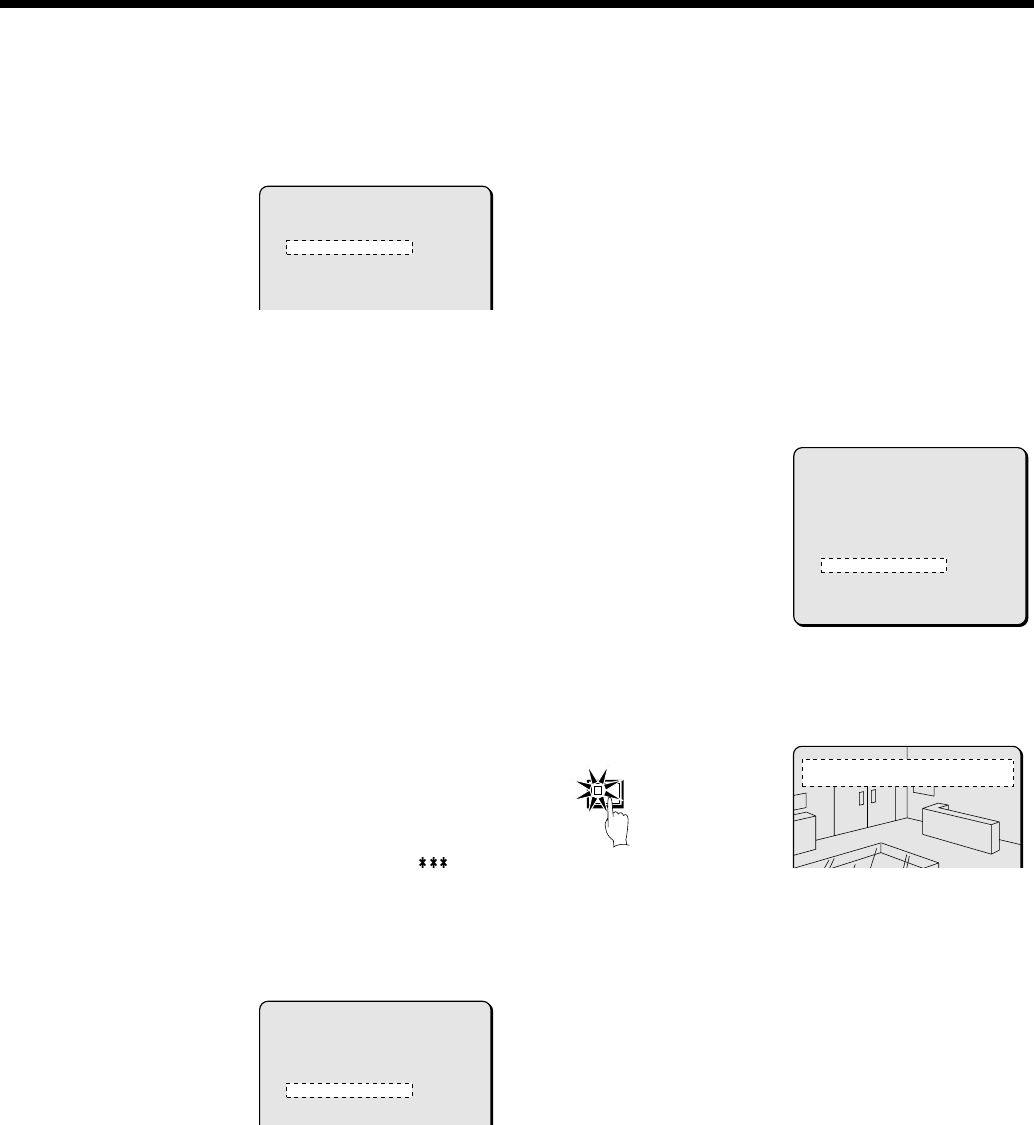
Turn the shuttle dial clockwise, use the jog dial to set the
recording speed (example: “8.33” ), and then turn the shuttle
dial clockwise.
DURATION of “5SEC” flashes.
Note: When the recording speed is selected, the maximum number of
recordings appears underneath it (at the bottom of the screen).
=> (20480 ALARMS CAN BE RECORDED)
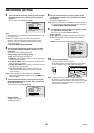
9
Use the jog dial to set the recording time duration (example:
“5” ), and then turn the shuttle dial.
The cursor moves to PRE-ALARM RECORDING.
Display examples:
•
5S – 15M: The same duration has been set for all cameras.
•
CC: Operates while an alarm is being received (minimum
1 second).
•
INDIV: Individual durations have been set for each camera.
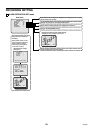
10
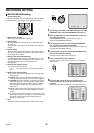
Press the EXIT/OSD button.
The display returns to the normal screen.
Alarm settings appear in the operating display section. When
an alarm is triggered, the number of alarms is displayed.
Note: If another alarm occurs at another channel while alarm
recording is in progress, the alarm count increases and the
alarms are treated as two alarms. If another alarm occurs at the
same channel, the alarms are treated as a single alarm (the
alarm count is not increased).
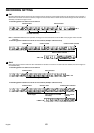
<ALARM REC MODE SET>
PICTURE QUALITY : SUPER FINE
AUDIO RECORDING : ON
ALARM RECORDING : OFF
ALARM INTERLEAVE : ONLY
PROGRAM GROUP : OFF
REC RATE: @ 25FPS, DURATION: 5SEC
PRE-ALARM RECORDING : ¤¤¤
<ALARM REC MODE SET>
PICTURE QUALITY : SUPER FINE
AUDIO RECORDING : ON
ALARM RECORDING : ENABLED
ALARM INTERLEAVE : SW
PROGRAM GROUP : OFF
REC RATE: @ 25FPS, DURATION: 5SEC
PRE-ALARM RECORDING : ¤¤¤
<ALARM REC MODE SET>
PICTURE QUALITY : SUPER FINE
AUDIO RECORDING : ON
ALARM RECORDING : ENABLED
ALARM INTERLEAVE : SW
PROGRAM GROUP : P-1
REC RATE: @ 8.33FPS, DURATION: 5SEC
PRE-ALARM RECORDING : ¤¤¤
REC RATE: @ **** FPS, DURATION: ***
=> (16000 ALARMS CAN BE RECORDED )
ALARM TRIGGER : ALARM
EXIT/OSD
01
ALARM 0000 SF 01-01-02 05:53:44
60
English