RECORDING SETTING
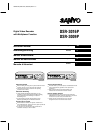
Relationship between RECORDING AREA SET and
OVERWRITE
If the normal recording area and alarm recording area become full,
select AREA FULL RESET for the normal recording area or alarm
recording area in the RECORDING AREA SET menu. (See page 52.)
Note: No audio input is provided from the digital video input terminals.
Audio signals can be input as analog signals via the audio input
terminals (such as the MIC terminal). For details on
CONNECTIONS, see page 8.
C
NORMAL REC MODE SET menu
This describe how to make the settings for image quality, audio
recording and recording speed for images recorded in the normal
recording area. In addition, you can also specify program numbers
that have been set in REC PROGRAM GROUP.
NORMAL REC MODE SET setting
1
Press the MENU button to select RECORD SET, and then turn
the shuttle dial clockwise.
The RECORD SET sub-menu appears, and the cursor moves to
RECORDING AREA SET.
2
Use the jog dial to move the cursor to NORMAL REC MODE
SET, and then turn the shuttle dial clockwise.
The NORMAL REC MODE SET sub-menu appears, and the
cursor is positioned at PICTURE QUALITY.
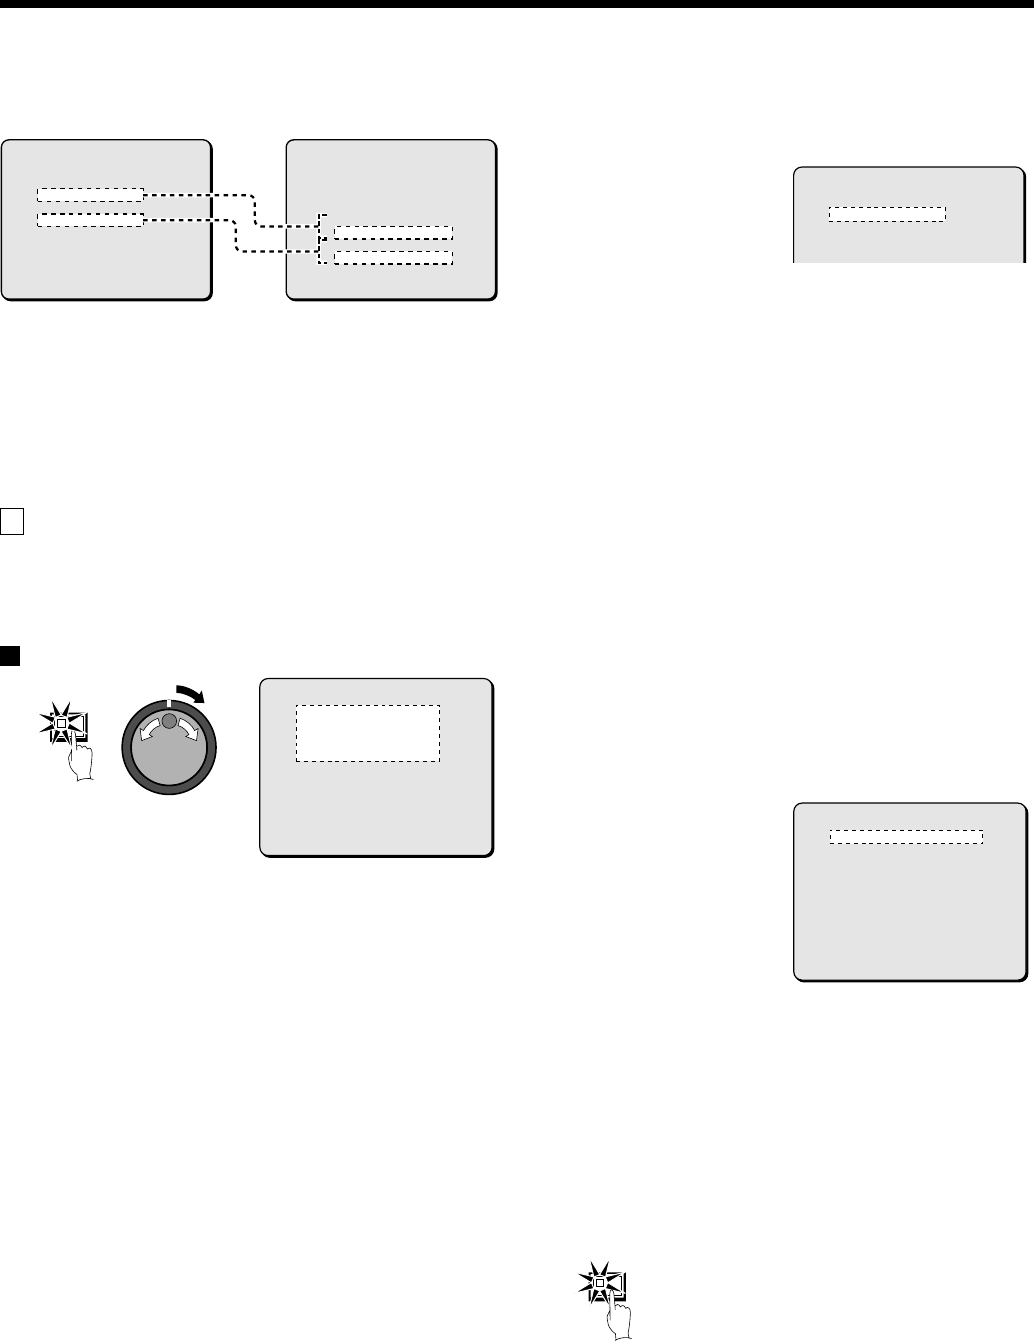
3
Turn the shuttle dial clockwise.
“ENHANCED” flashes.
Display examples: Picture quality selection
•
BASIC (BQ): (15 KB)
•
NORMAL (NQ): (22 KB)
•
ENHANCED (EN): (30 KB)
•
FINE (FI): (42 KB)
•
SUPER FINE (SF): (56 KB)
4
Use the jog dial to change select the image quality (example:
“SUPER FINE” ), and then turn the shuttle dial clockwise.
The cursor moves to AUDIO RECORDING.
5
Turn the shuttle dial clockwise, use the jog dial to set audio
recording (example: “ON” ), and then turn the shuttle dial.
The cursor moves to REC RATE.
Note:
•
Audio recording can be set when the REC RATE setting is from
8.33FPS to 50FPS.
•
When set to “ON”, the letter “A” (audio recording indicator)
appears in front of the REC RATE recording rate. This is because
the audio recordings are also made in the normal recording area,
so that the image recording capacity of the normal recording area
is reduced.
6
Turn the shuttle dial clockwise, use the jog dial to set the
recording speed (example: “0.1” ), and then turn the shuttle
dial.
The cursor moves to REC PROGRAM GROUP.
Note: The field and frame recording speeds vary depending on the
PICTURE QUALITY setting. Refer to the Recording speed
table for details. (See page 12.)
7
Turn the shuttle dial clockwise, use the jog dial to set the
program number (example: P-1), and then turn the shuttle dial
clockwise.
The cursor moves to PICTURE QUALITY.
Display examples:
•
OFF: Images from all cameras are recorded.
•
P-1: When program no. 1 is recorded.
•
P-2: When program no. 2 is recorded.
•
P-3: When program no. 3 is recorded.
•
P-4: When program no. 4 is recorded.
Note: When specifying a program number, carry out the settings in
“PROGRAM REC SET menu”. (See page 55.)
8
Press the EXIT/OSD button.
The display returns to the normal screen.
<RECORDING CONDITIONS SET>
DIGITAL SERIES RECORDING : OFF
TOTAL NUMBER : 1
NORMAL RECORDING AREA
OVERWRITE : OFF
ALARM RECORDING AREA
OVERWRITE : OFF
REMAINING DISK WARNING : 1 %
<RECORDING AREA SET>
TOTAL CAPACITY : 80GB
NORMAL RECORDING AREA : 80 %
AREA FULL RESET ->
ALARM RECORDING AREA : 19 %
AREA FULL RESET ->
ARCHIVE AREA : 1 %
AREA FULL RESET ->
CAUTION : WHEN THE AREA SETTING IS CHANGED,
THE WHOLE AREA WILL BE INITIALIZED !
MENU
<NORMAL REC MODE SET>
PICTURE QUALITY : ENHANCED
AUDIO RECORDING : OFF
REC RATE : 25FPS ( 11H)
REC PROGRAM GROUP : OFF
<NORMAL REC MODE SET>
PICTURE QUALITY : SUPER FINE
AUDIO RECORDING : ON
REC RATE : 25FPS ( 11H)
REC PROGRAM GROUP : OFF
<NORMAL REC MODE SET>
PICTURE QUALITY : SUPER FINE
AUDIO RECORDING : ON
REC RATE : A***FPS ( 75H)
REC PROGRAM GROUP : P-1
EXIT/OSD
54
English