


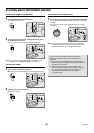
SEARCHING FOR RECORDED IMAGES
8
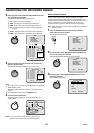
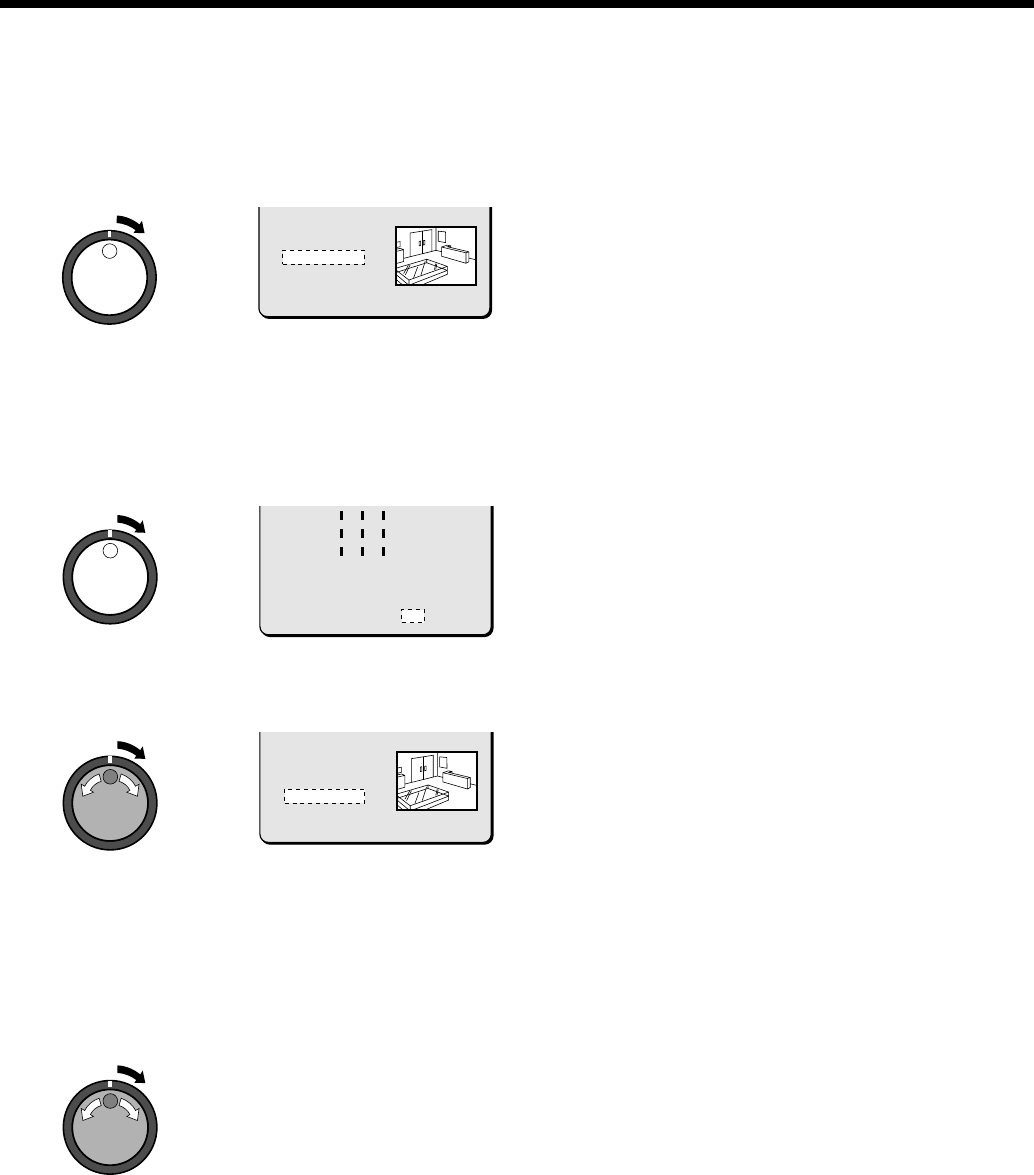
Turn the shuttle dial clockwise.
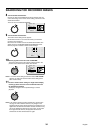
Use the jog dial to set the END date and time (example: 8.00 pm
on the current day) for the motion sensor setting, and then turn the
shuttle dial clockwise.
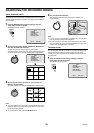
The cursor moves to MOTION SENSOR.
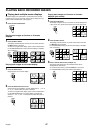
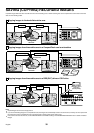
9
Turn the shuttle dial clockwise.
The motion sensor setting screen appears.
Set the motion sensor to cover the area where you would like
movement to be observed.
Move the cursor to EXIT and turn the shuttle dial clockwise. The
display returns to the MOTION DETECTION SEARCH screen.
Refer to page 67 for details on motion sensor settings.
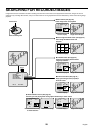
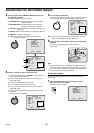
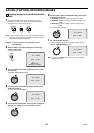
10
Use the jog dial to move the cursor to PREVIEW.
The screen showing the motion sensor settings appear in the
preview screen each time the shuttle dial is turned.
Note: If no motion sensor settings have been made, “NOT FOUND”
appears, so make sure that the motion sensor settings have
been made correctly.
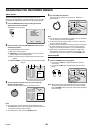
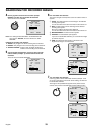
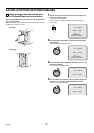
11
To view a motion sensor setting in a single-screen display,
use the jog dial to move the cursor to VIEW and then turn
the shuttle dial clockwise.
The display changes from the specified image to normal
playback.
Note: If the camera number has been specified as a channel when
carrying out motion detector searches, only images for the
specified camera number will be played back. Furthermore, the
digital video recorder title information and date information may
not be fully displayed at this time in some cases. To play back
the images from all cameras, the playback has first to be
switched off and then switched back on again.
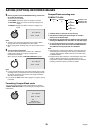
28-10-01 10:00
END :
28-10-01 20:00
MOTION SENSOR ->
PREVIEW ->
VIEW ->
MOVE:JOG SELECT:SHUTTLE
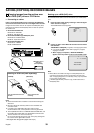
---úúú----
---úúú----
---úúú----
----------
----------
----------
LEVEL : 6 EXIT
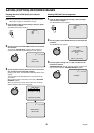
28-10-01 10:00
END :
28-10-01 20:00
MOTION SENSOR ->
PREVIEW ->
VIEW ->
MOVE:JOG SELECT:SHUTTLE
34
English