


96
••••••••••••••••••••••••••••••••••••••••••••••••••••••••••••••••••••••••••••••••••••••••••••••••••••••••••••••••••••••••••••••••••••••••••••••••••••••••••
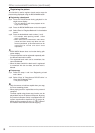
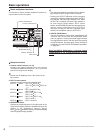
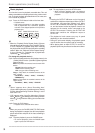
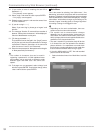
Basic multiplexer functions
This function is used to activate multiplexer functions us-
ing the buttons on the front panel.
Camera number buttons
DIGITAL ZOOM button
SPLIT screen buttons
Move buttons
SEQUENCE button
OUTPUT A/B button
Multiplexer buttons
1. Camera number buttons (1 to 16)
Displays the picture supplied from the cameras
connected to CAMERA IN terminals 1 to 16 on the rear
panel in the single screen display.
• Pictures can be displayed even if the camera is not
set to record.
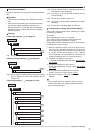
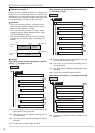
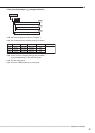
2. SPLIT screen buttons
Displays the split screen in the following order.
SPLIT4 (
) button : SPLIT 4a SPLIT 4b
SPLIT 4c SPLIT 4d SPLIT 4a
• • •
SPLIT9 ( ) button : SPLIT 9a SPLIT 9b
SPLIT 9a • • •
SPLIT10 ( ) button : SPLIT 10a SPLIT 10b
SPLIT 10a • • •
SPLIT13 (
) button : SPLIT 13a SPLIT 13b
SPLIT 13a • • •
SPLIT16 (
) button : SPLIT 16 screen
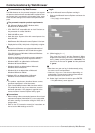
3. SEQUENCE button
Displays the sequential screen in the split screen or the
single screen display. Make the detailed settings of this
display in the <Multiplexer Setting> (Setup
Menu
System Multiplexer Setting). Sequential display
does not appear during playback.
Basic operations
• The sequential display is cancelled when a different
type of split screen or single screen is selected.
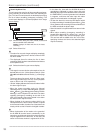
• Pressing the OUTPUT A/B button on the front panel
switches the multiplexer video output. When OUTPUT
A is selected, the button light indicator is off. When
OUTPUT B is selected, the button light indicator is
on, and camera number buttons, SPLIT screen
buttons, and SEQUENCE button are operated for the
monitor screen connected to the OUTPUT B
connector. Pressing the OUTPUT A/B button again
switches the multiplexer output to OUTPUT A.
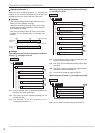
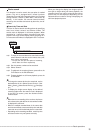
4. DIGITAL ZOOM button
Pressing this button in single screen mode displays the
screen at 100%. At this time, the magnification centre
point (X) appears. Pressing the button again switches
the magnification to 200%, and then 400%. By pressing
the MOVE buttons, the centre point moves vertically or
horizontally. (
see “DIGITAL ZOOM button operations”
on page 64)
When the DIGITAL ZOOM button is pressed, camera
number buttons 11, 14, 15, and 16 move the “X” in the
screen.