


82
••••••••••••••••••••••••••••••••••••••••••••••••••••••••••••••••••••••••••••••••••••••••••••••••••••••••••••••••••••••••••••••••••••••••••••••••••••••••••
•“Alarm Recording Area” can be set when “Alarm
Recording Area” (System Menu
Memory Data
Management Setting for Main Memory Change
Partition Setting) is set to other than “0 %.”
•“LPA Recording Area” can be set when “Long Pre-
Alarm Area” (System Menu
Memory Data
Management Setting for Main Memory
Change
Partition Setting) is set to other than “0 %.”
• The warning is displayed as “ALERT” on the screen.
The last 16 warnings are stored, however, the warning
occurred before that is reset and its display is cleared.
• In the long pre-alarm area, the data is not overwritten
chronologically.
• If the warning message of disk full appears while the
alarm recording area is set, recording for both areas
will stop.
• When the repeat recording setting for “Alarm
Recording Area” (System Menu
Memory Data
Management Setting for Main Memory) is set to
“Repeat Off” and all of the alarm area is used up, the
alarm recording stops. If an alarm is input after that,
recording is not performed though the indicator
flashes. Switch “Alarm Recording Area” to “Repeat
On” or clear the data in the alarm area to restart
recording.
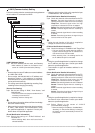
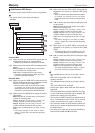
(Change Partition Setting)
step2. Set the partition for the main device.
• Select the desired capacity for the alarm recording
area and long pre-alarm area.
• When the alarm recording area is set to other
than “0 %,” the HDD of the main device is
partitioned so that the specified alarm recording
area is used as the independent capacity for the
alarm recording.
• See pages 54 and 55 for the detail of the
long pre-alarm recording.
• The normal recording area is referred to as “normal
area,” and the alarm recording area (PARTITION area)
is referred to as “alarm area,” and the long pre-alarm
area is referred to as “LPA.”
• When total value of the normal, alarm, and LPA
reaches 100 %, the capacity is not increased.
• You cannot set “Normal Recording Area” to “0 %.”
• Playback, search, information display, remain setting,
mode out setting, call out setting, and data clear
function are performed independently for “normal
area” and “alarm area.”
• The normal area or the alarm area is selectable when
copying the recorded data.
• In the case that “Alarm CH” is set, and an alarm signal
is input during normal recording for the camera
number which is not set for normal recording, pre-
alarm recording may not be performed.
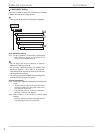
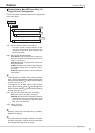
Add/Remove DVD/CD Drive
This item is used to set the DVD/CD drive device for the
DVD/CD group of the copy 1 or 2 device.
• You cannot set this item during recording or
playback.
Add/Remove DVD/CD Drive
Memory5
2
System Menu
step1. Make sure that the DVD/CD drive connected is
displayed in the <Add/Remove DVD/CD Drive>.
• When you select “Eject,” the access LED on the
device illuminates and the disc tray opens.
step2. Select the desired copy device number (1 or 2) to
be set.
Copy1: Registers for the copy 1 device.
Copy2: Registers for the copy 2 device.
• The button changes in the order of “Copy1” and
“Copy2” each time you press the button.
• Only one DVD/CD drive can be used (including built-
in CD/DVD drive).
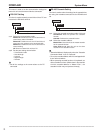
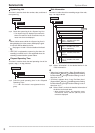
Data Management Setting for Main Memory
This item is used to set the operation of the unit when
space of the main device becomes full during recording.
And also used to set the partition of the main device.
• You cannot set this item during recording or
playback.
step
1
step
2
Data Management Setting for Main Memory
Memory5
3
Change Partition Setting
4
System Menu
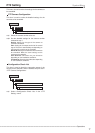
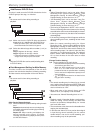
(Main Device Repeat Settings)
step1. Select the desired repeat recording setting for each
area.
Repeat On: Automatically returns to the beginning
of the HDD and resumes recording (by overwriting
the existing data).
Repeat Off: Stops recording and displays the
warning message on the screen. To resume
recording, clear the warning display and then press
the REC/STOP button.
Memory (continued) System Menu