


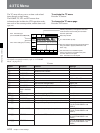
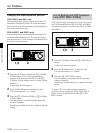
4-3 TC Menu
4-26 Chapter 4 Menu Settings
Chapter 4 Menu Settings
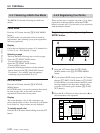
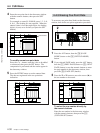
Changing the superimposition position
DVW-A500/1 and 500/1 only
The superimposition position can be moved up to 37
increments (hexadecimal 00 to 24) in the horizontal
direction and up to 106 increments (hexadecimal 00 to
6A) in the vertical direction.
DVW-A500P/1 and 500P/1 only
The superimposition position can be moved up to 35
increments (hexadecimal 00 to 22) in the horizontal
direction and up to 129 increments (hexadecimal 00 to
81) in the vertical direction.
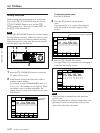
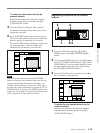
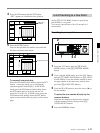
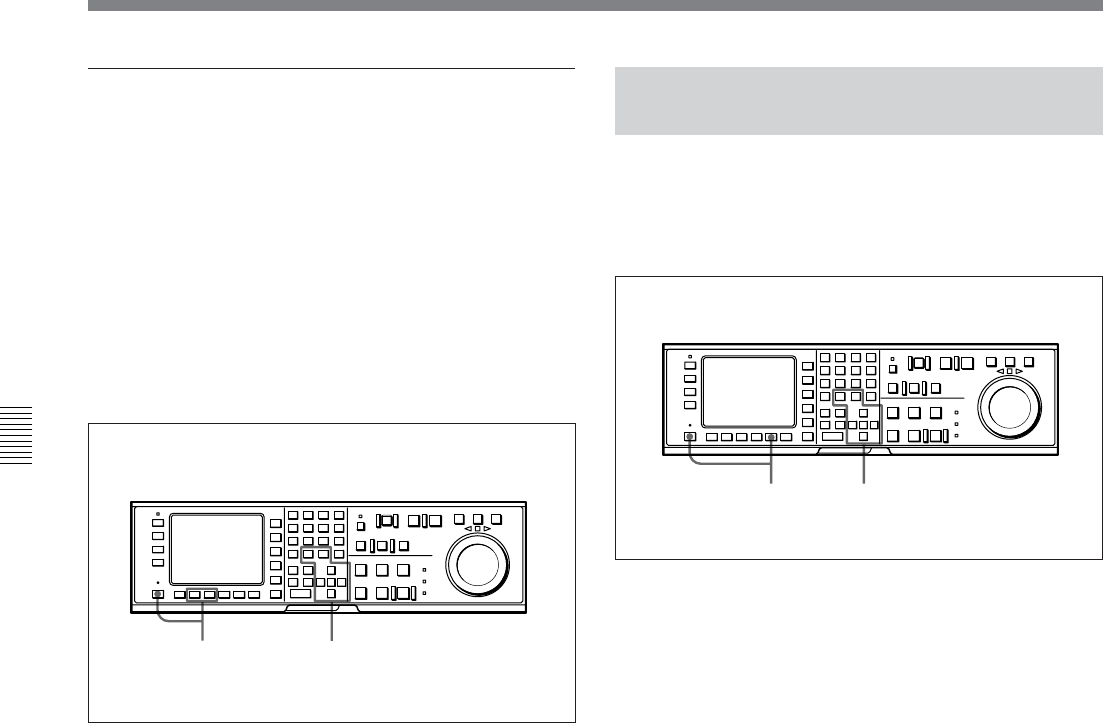
Changing the superimposition position
1 Press the ALT button and then the [F7] (CHARA
H-POS) button to move the superimposition
position in the horizontal direction, or the [F8]
(CHARA V-POS) button to move it in the vertical
direction.
A data entry window appears.
2 Press the G or g button to change the value.
You can also use the + or – button.
3 Press the [F7] (CHARA H-POS) or [F8] (CHARA
V-POS) button.
The data setting is completed and the data entry
window disappears.
Switching to another menu also completes the data
setting.
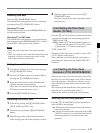
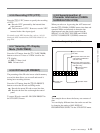
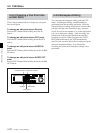
4-3-10 Setting the VITC Insertion
Line (VITC POS-1/POS-2)
VITC signals can be inserted at two positions between
the 12th line and 20th line (DVW-A500/1 and 500/1)
or between the 9th line and 22nd line (DVW-A500P/1
and 500P/1).
Setting the VITC insertion line (VITC POS-1/POS-2)
1 Press the ALT button, then the [F9] (VITC POS-1)
button.
A data entry window appears.
2 Press the G or g button to change the value.
You can also use the +or – button.
3 Press the [F9] (VITC POS-1) button.
The data setting is completed and the data entry
window disappears.
Switching to another menu also completes the data
setting.
To place VITC on another position, repeat the
procedure above, pressing the [F10] (VITC POS-2)
button in Steps 1 and 3 instead of the [F9] (VITC
POS-1) button.
1,3
2
2
1,3