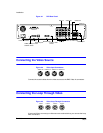
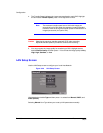
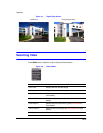
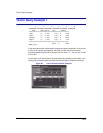
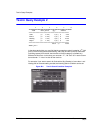
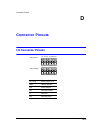
Configuration
Rev 3.03 45 Document 900.0315
02/07
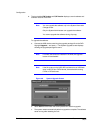
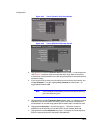
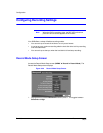
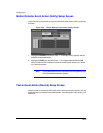
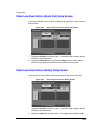
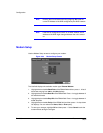
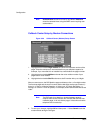
Note The maximum recording speed is 30 images per second (25 ips
for PAL) when the resolution is set to Standard. However, when
set to High, the recording speed will decrease to 15 images per
second (12.5 ips for PAL).
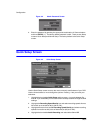
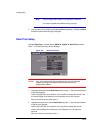
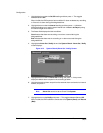
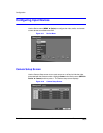
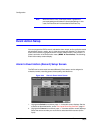
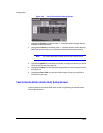
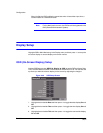
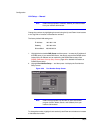
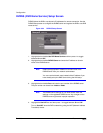
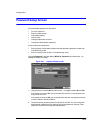
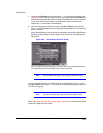
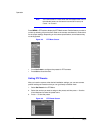
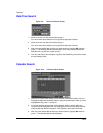
2. Highlight the box beside End Of Disk and then press . This toggles between
Overwrite and Stop.
In Overwrite mode, the DVR continues recording when the hard disk drive is full
by overwriting the oldest video.
In Stop mode, the DVR stops recording when the hard disk drive is full.
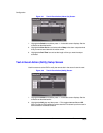
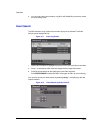
3. If the DVR is set to Stop mode, you can set it to beep or activate the Alarm Out
port when the hard disk drive is full. Highlight the box beside On Disk Full Beep
and press to toggle between On and Off. Highlight the box beside On Disk Full
Alarm Out and then press to toggle between On and Off.
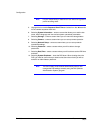
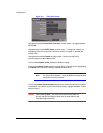
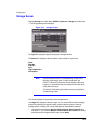
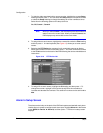
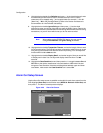
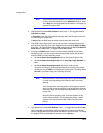
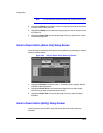
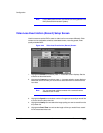
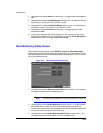
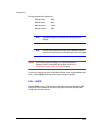
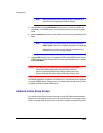
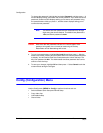
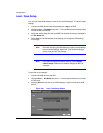
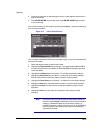
4. Pressing the PANIC button on the front panel causes the DVR to enter Panic
Recording mode. You can program the recording speed, quality and duration
when the DVR is in Panic Recording mode.
a. Set the On Panic Recording Speed field from 0.5 to 30 ips (25 ips PAL).
b. Set the On Panic Recording Quality field to Very High, High, Standard, or
Low.
c. Set the On Panic Recording Duration field from 5 to 60 minutes.
The panic recording will be stopped automatically according to the preset
duration as long as PANIC is not pressed to stop the panic recording. Select
No Limit if you want to stop panic recording manually.
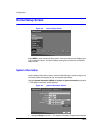
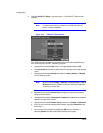
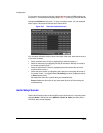
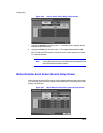
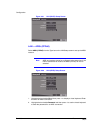
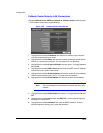
Note When the DVR is in Panic Recording mode, it ignores time-lapse
or event recording settings and follows the panic recording
settings.
The maximum panic recording speed is 30 images per second
(25 ips for PAL) when the resolution is set to Standard. However,
when set to High, the recording speed decreases to 15 ips (12.5
ips for PAL).
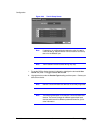
When the DVR is recording video, a red dot appears on the
screen. When the DVR is in Panic Recording mode, a white !
appears in the red dot and the REC LED on the front panel
flickers.
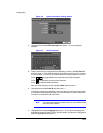
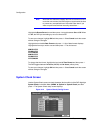
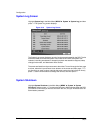
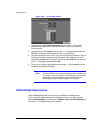
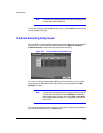
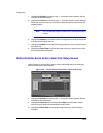
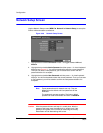
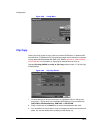
5. Highlight the box beside Auto Deletion. Press . to toggle between On and Off.
When set to On, the DVR deletes video recorded earlier than the user-defined
period. Highlight the second box beside Auto Deletion and then press . to select
the length of time recorded data will be kept, from 1 to 99 days.