


Configuration
Rev 3.03 47 Document 900.0315
02/07
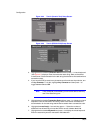
3. You can set the DVR to record video based on Time-lapse Recording Schedule
defined during Time-Lapse Record Setup. Highlighting the box beside
Time-Lapse Recording and pressing toggles between On and Off.
4. You can set the maximum amount of time-lapse video to be stored. After the DVR
reaches this amount, it will start recording over the oldest time-lapse video. The
time-lapse video is stored separate from Event video. When Keep the continuous
pictures is set to On, you can set the time from 1 Hour to the maximum allowed
by the storage capacity of your hard disk drive.
Note The maximum storage time is only an estimate because the
amount of space required to store video varies depending on
factors such as motion and image complexity.
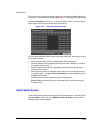
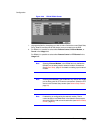
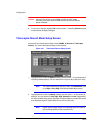
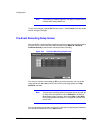
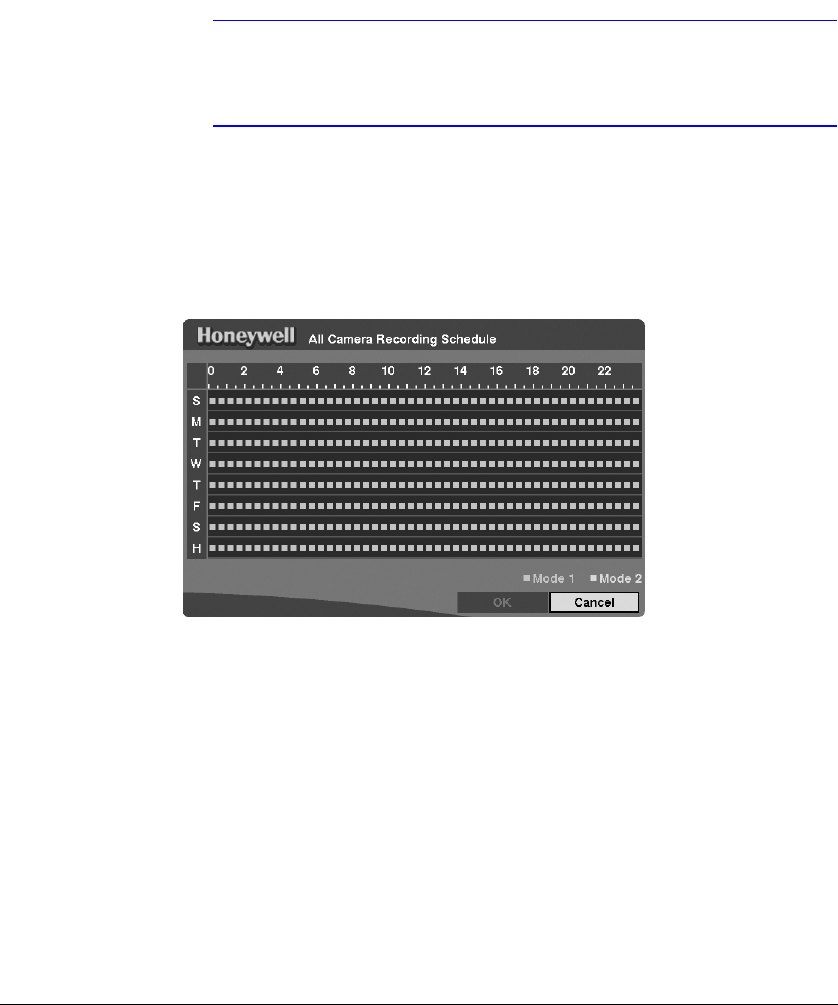
Time-Lapse Recording Schedule
Figure 3-32 Time-Lapse Recording Schedule Screen
You can program the DVR to record only during certain times based on time, day of the
week, and holidays. The smallest time segment you can use is 30 minutes. A blue
rectangle indicates the DVR is set to record during those 30 minutes. When there is no
rectangle, the DVR will not record during those 30 minutes.
There are several ways to set recording times:
• You can highlight an individual block and toggle it On or Off by pressing .
• You can change a 30-minute segment for all days by placing the cursor on the
time line and then pressing to toggle the segment On or Off.
• You can change an entire day by placing the cursor on the day of the week and
then pressing to toggle the day On or Off.
• You can change the entire calendar by placing the cursor in the upper left-hand
box (above S and to the left of the time line) and then pressing to toggle the
entire calendar On and Off.