


104
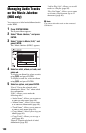
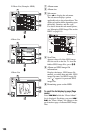
7 Select an album, and press ENTER.
A check mark appears in the check box
by the selected item.
• To clear the check mark, press ENTER
again.
• To clear all check marks, press , to
select “Single-Mode” from the sub-
menu.
8 Repeat step 7 to select all of the
albums you want to copy.
9 Press ,.
The sub-menu appears.
10
Select “Copy to DVD,” and press
ENTER.
The display asks for confirmation.
11
Select “Yes,” and press ENTER.
The selected JPEG image albums are
copied in the “PICTURE” folder on the
disc.
The JPEG image album names are
automatically labelled as
“***ALBUM.”
If you want to play the disc on other
DVD equipment, finalise the disc
(page 43).
• To cancel, select “No.”
z Hints
• See “7. Reformatting a Disc” (page 45) to format
DVD-RWs/DVD-Rs in Video mode.
• See the “Photo Album” list to check which
albums have been copied (page 105).
b Notes
• You may not be able to play the slideshow
depending on DVD equipment.
• You cannot copy JPEG image files to a
recordable DVD which has been recorded using
other recorders/devices.
• DATA DVDs finalised on this recorder may not
be able to play on other equipment.
• You can record up to 99 slideshows to a disc.
• When copying an album containing more than
99 JPEG image files to a disc, slideshows will be
created with every 99 JPEG image files and
recorded to a disc.
• For DVDs, the available disc space does not
increase even if you erase slideshows.
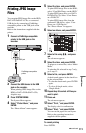
You can copy the edited JPEG image files to
a DVD-RW/DVD-R (Video mode).
A slideshow is also recorded to the disc as a
video file. You can play the slideshow on
other DVD equipment that may not be
compatible with the playback of JPEG
image files.
1 Follow steps 1 to 4 of “Copying JPEG
image albums to a disc
(HDD t DVD-RW/DVD-R)” on
page 103.
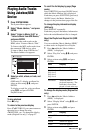
The “Photo Album” list appears.
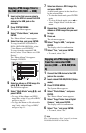
2 Select an album using M/m, and
press ENTER.
The photo list appears.
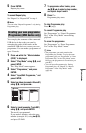
3 Select a JPEG image file using M/m,
and press ,.
The sub-menu appears.
4 Select “Multi-Mode,” and press
ENTER.
To copy the JPEG image file selected in
step 3 only, go to step 8.
5 Select a JPEG image file, and press
ENTER.
A check mark appears in the check box
by the selected item.
• To clear the check mark, press ENTER
again.
• To clear all check marks, press , to
select “Single-Mode” from the sub-
menu.
6 Repeat step 5 to select all of the JPEG
image files you want to copy.
7 Press ,.
The sub-menu appears.
8 Select “Copy to DVD,” and press
ENTER.
The display asks for confirmation.
Copying JPEG image files to a
disc (HDD t DVD-RW/DVD-R)