


108
To play a slideshow with the sound (HDD
only)
You can enjoy a slideshow while listening to
the sound stored in the HDD. First prepare
Music Playlists by adding audio tracks using
Jukebox (see “Adding audio tracks to a
Playlist (HDD only)” on page 98).
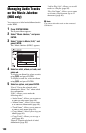
1 Select “View/Edit Photos on the HDD”
in step 3 of “Using the “Photo Album”
List” on page 105.
The “Photo Album” list appears.
Switch between the album list and JPEG
image file list, if necessary.
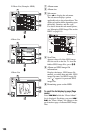
2 Select an album or JPEG image file
using M/m, and press ,.
3 Select “Start Audio Slideshow,” and
press ENTER.
4 Select the desired Music Playlist or
“Favourites” using </,.
5 Select “Start,” and press ENTER.
The slideshow and the playback from
the first track of the selected Music
Playlist start.
b Notes
• While playing a slideshow with the sound, you
cannot do the following:
– Zoom, rotate, skip or pause an image.
– Display information on the screen by pressing
DISPLAY.
• If there is no audio track in the selected Music
Playlist, the slideshow is played back with no
sound.
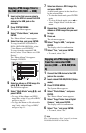
Creating a Slideshow
with Your Favourite
Music and Graphic
Effects (x-Pict Story)
(HDD only)
You can easily create and play your own
slideshow with your favourite music in
Music Playlist and graphic effects using the
JPEG image files on the HDD (x-Pict Story).
First prepare Music Playlists by adding
audio tracks using Jukebox (see “Adding
audio tracks to a Playlist (HDD only)” on
page 98). The created x-Pict Story is
automatically stored in the Title List (HDD)
and you can copy it onto a recordable disc.
1 Press SYSTEM MENU.
The System Menu appears.
2 Select “Photo Album,” and press
ENTER.
The “Photo Album” menu appears.
3 Select “View/Edit Photos on the
HDD,” and press ENTER.
The “Photo Album (HDD)” list appears.
4 Select an album, and press ,.
The sub-menu appears.
5 Select “Create x-Pict Story” using M/
m, and press ENTER.