


59
Recording
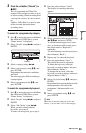
4 Select “OK,” and press ENTER.
The “Timer List” display appears.
The timer recording indicator lights up
on the front panel display and the
recorder is ready to start recording.
Unlike a VCR, there is no need to turn
off the recorder before the timer
recording starts.
• To record a satellite programme, turn
on the satellite tuner and select the
satellite programme you want to
record. Leave the satellite tuner turned
on until the recorder finishes
recording. If you connect equipment
with a timer function, you can use the
Synchro Rec function (page 64).
To stop recording during timer recording
Press x REC STOP.
Note that it may take a few seconds for the
recorder to stop recording.
On-screen instructions may appear after
pressing x REC STOP. In this case, follow
the on-screen instructions.
To make the detailed settings
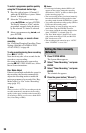
1 Select “Set Details” in step 3 above, and
press ENTER.
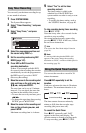
2 Select an item using M/m and set using
</,.
“Record to”: Sets the recording
destination. If there is not enough
available DVD disc space for the
recording, the recorder automatically
records the programme to the HDD even
if you select “DVD” (Recovery
Recording).
“Recording Mode”: Sets the recording
mode (page 147).
“VPS/PDC”: Sets the VPS/PDC
function. See “About the VPS/PDC
function” below.
“Update”: Sets the recorder
automatically replacing the previous
timer recording with the new one.
“Genre”: Sets the genre.
“Bilingual Recording”: Sets the sound
to be recorded (page 124).
“HDD Recording Format”: Sets the
recording format of HDD (page 128).
To enter a title name
Select “Set Title Name” in step 3 above, and
press ENTER (page 40).
About the VPS/PDC function
VPS/PDC signals are transmitted with TV
programmes in some broadcast systems.
These signals ensure that timer recordings
are made regardless of any broadcast delays,
early starts, or broadcast interruptions.
To use the VPS/PDC function
Set “VPS/PDC” to “On” (see “To make the
detailed settings” on page 59).
When you turn on this function, the recorder
starts scanning the channels before the timer
recording starts.
Rec. Mode Adjust
If there is not enough available disc space for
the recording, the recorder automatically
adjusts the recording mode to enable the
entire programme to be recorded. Set “Rec.
Mode Adjust” to “On” in the “Recording”
setup (page 127).
z Hint
When you select “AUTO” for the recording mode,
the recorder automatically maximises the
recording quality for the space available on the
inserted disc (if recording to DVD), or to fit on to
a blank DVD disc (if recording to HDD).
b Notes
• If a message indicating that the HDD is full
appears on the screen, change the recording
destination to “DVD,” or make available space
for the recording (page 76).
• Check that the clock is correctly set before
setting the timer recording. If not, the timer
recording cannot be made.
• Even if the timer is set for the same daily or
weekly programme, the timer recording cannot
be made if it overlaps with a programme that has
priority. “Overlap” will appear next to the
overlapped setting in the Timer List. Check the
priority order of the settings (page 62).
• Even if the timer is set, timer recordings cannot
be made while recording a programme that has
priority.
• The “Rec. Mode Adjust” function only works
with a timer recording and the VPS/PDC
function set to off. It does not function with
Quick Timer or Synchro Rec.
• The beginning of some recordings may not be
made when using the VPS/PDC function.
• The recording mode cannot be set to “AUTO”
when “VPS/PDC” is set to “On.”
,continued