


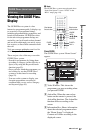
54
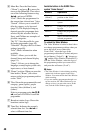
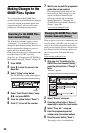
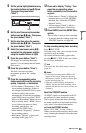
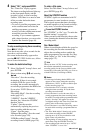
To select a programme position quickly
using the TV broadcast station logo
1 Press the yellow button (“Channels”)
while the GUIDE Plus+ system “Home
Screen” is displayed.
2 Select the TV broadcast station logo
using </M/m/,, and press ENTER.
The display returns to “Grid” and the
programme currently being broadcast
by the selected TV station is selected.
3 Select a programme using </,, and
press ENTER.
To confirm, change, or cancel a timer
recording
See “Checking/Changing/Cancelling Timer
Settings (Schedule) (For RDR-AT105/
AT107/AT205)” on page 60.
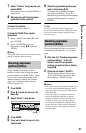
To stop recording during timer recording
Press x REC STOP.
Note that it may take a few seconds for the
recorder to stop recording.
On-screen instructions may appear after
pressing x REC STOP. In this case, follow
the on-screen instructions.
Rec. Mode Adjust
If there is not enough available disc space for
the recording, the recorder automatically
adjusts the recording mode to enable the
entire programme to be recorded. Set “Rec.
Mode Adjust” to “On” in the “Recording”
setup (page 127).
z Hint
When you select “AUTO” for recording mode, the
recorder automatically maximises the recording
quality for the space available on the inserted disc
(if recording to DVD), or to fit on to a blank DVD
disc (if recording to HDD).
b Notes
• If a message indicating that the HDD is full
appears on the screen, change the recording
destination to “DVD,” or make available space
for the recording (page 76).
• The last recording mode you selected manually
becomes the default recording mode for timer
recordings made from the GUIDE Plus+ system.
• You cannot adjust the recording quality (HDD or
DVD) once the recording starts.
• The beginning of some recordings may not be
made when using the VPS/PDC function.
• You cannot extend the recording duration time
when “VPS/PDC” is selected (page 55).
• The “Rec. Mode Adjust” function only works
with a timer recording to DVD, and the VPS/
PDC function set to off.
• The recording mode cannot be set to “AUTO”
when “VPS/PDC” is set to “On.”
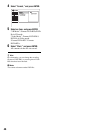
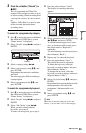
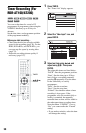
1 Press SYSTEM MENU.
The System Menu appears.
2 Select “Timer Recording,” and press
ENTER.
3 Select “Timer Recording,” and press
ENTER.
The schedule list appears.
4 Press the green button (“Manual”).
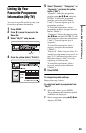
Setting the timer manually
(Schedule)