


105
Photo Album
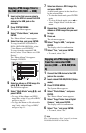
9 Select “Yes,” and press ENTER.
The selected JPEG image files are
copied in the “PICTURE” folder on the
disc.
The JPEG image file names are
automatically labelled as “PHOT****.”
If you want to play the disc on other
DVD equipment, finalise the disc
(page 43).
• To cancel, select “No.”
To select a JPEG image file from a
different album
1 Switch to the album list in step 5.
For instructions, see “To switch
between the album list and JPEG image
file list” on page 107.
2 Select an album using M/m, and press
<.
3 Switch to the JPEG image file list.
For instructions, see “To switch
between the album list and JPEG image
file list” on page 107.
4 Select a JPEG image file using M/m, and
press ENTER.
z Hints
• See “7. Reformatting a Disc” (page 45) to format
DVD-RWs/DVD-Rs in Video mode.
• See the “Photo Album” list to check which JPEG
image files have been copied (page 105).
b Notes
• You may not be able to play the slideshow
depending on DVD equipment.
• You cannot copy JPEG image files to a
recordable DVD which has been recorded using
other recorders/devices.
• DATA DVDs finalised on this recorder may not
be able to play on other equipment.
• You can record up to 99 slideshows to a disc.
• For DVDs, the available disc space does not
increase even if you erase slideshows.
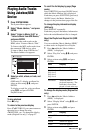
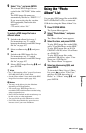
Using the “Photo
Album” List
You can play JPEG image files on the HDD,
DATA DVDs/DATA CDs, or connected
USB device using the “Photo Album” list.
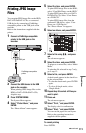
1 Press SYSTEM MENU.
The System Menu appears.
2 Select “Photo Album,” and press
ENTER.
The “Photo Album” menu appears.
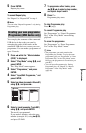
3 Select the item, and press ENTER.
To play JPEG image files on the HDD,
select “View/Edit Photos on the HDD.”
To play JPEG image files on DATA
CDs/DATA DVDs, select “View Photos
on a DVD/CD.”
To play JPEG image files on the
connected USB device, select “View
Photos on a USB Device.”
The “Photo Album” list appears.
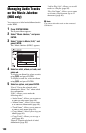
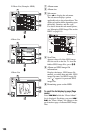
4 Select an album using M/m, and
press ENTER.
To show the 4-Photo List or 1-Photo
List, press < to select “Title View,”
and press ENTER, then select “4
Photos” or “1 Photo” using M/m, and
press ENTER.
,continued