


132
Other Settings (Options)
You can make other operation settings.
Adjusts the lighting of the front panel
display.
Changes the Command Mode of the
recorder to avoid interference with your
other Sony DVD recorder or player.
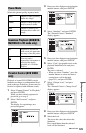
1 Select a Command Mode (“1,” “2,” or
“3 (Default setting)”), and press
ENTER.
2 Set the Command Mode for the remote
so it matches the Command Mode for
the recorder you set above.
Follow the steps below to set the
Command Mode on the remote.
1 Hold down ENTER.
2 While holding down ENTER, enter
the Command Mode code number
using the number buttons.
3 Hold down both the number and
ENTER buttons at the same time for
more than three seconds.
z Hint
You can check the Command Mode for the
recorder in the front panel display (page 13).
When the Command Mode is set to “3 (Default
setting),” “1” or “2” does not appear.
b Note
Set “Standby Mode” to “Mode 2” in the “Basic”
setup (page 118) to set “SMARTLINK” to “Pass
Through.”
Registration Code
Displays the registration code of DivX video
files for this recorder.
For more information, go to http://
www.divx.com/vod on the Internet.
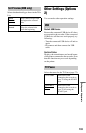
On Screen Display
On Automatically displays
information on the screen
when the recorder is turned
on, etc.
Off Displays information only
when DISPLAY is
pressed.
Front Panel Display
On Bright lighting.
Off Turns off the lighting and
saves power consumption
when the power is off.
Command Mode
b Note
The default command mode setting for this
recorder and the supplied remote is “3
(Default setting).”
The remote does not function if different
command modes are set for the recorder and
remote. Set the same command mode.
SMARTLINK
This Recorder
Only
Allows you to use the
SMARTLINK function
with the recorder when the
recorder is in standby
mode.
Pass Through Allows you to use the
SMARTLINK function
with the connected
equipment when the
recorder is in standby
mode.
DivX