


55
Recording
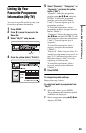
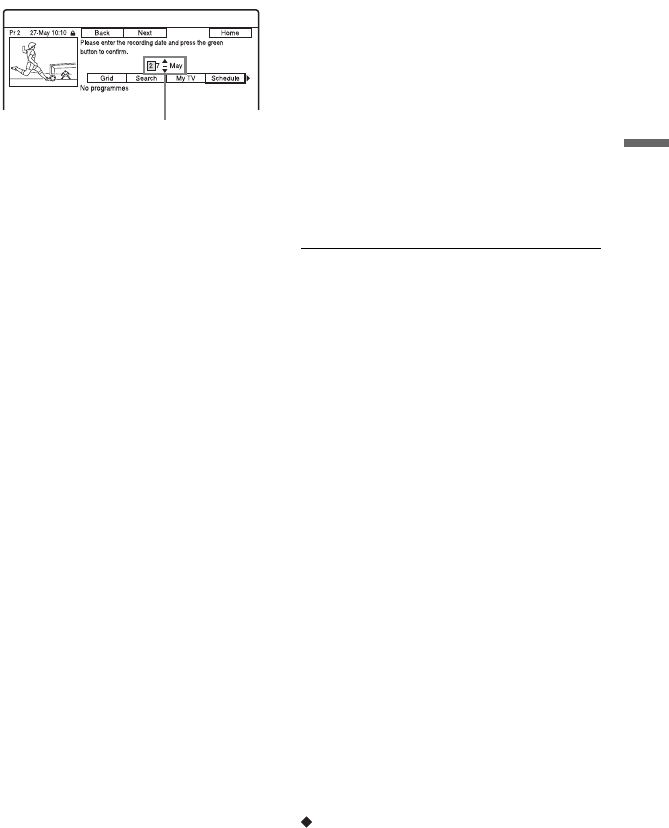
5 Set the yellow-highlighted date using
the number buttons and </M/m/,.
Then press the green button
(“Next”).
6 Set the start time using the number
buttons and </M/m/,. Then press
the green button (“Next”).
7 Set the stop time using the number
buttons and </M/m/,. Then press
the green button (“Next”).
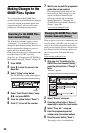
8 Select the input source using M/m,
and select the programme position
using the number buttons or M/m.
9 Press the green button (“Next”).
The display for entering characters
appears. You can change the title name,
if necessary.
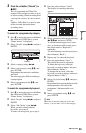
10
Press the green button (“Save”).
The date, start and stop times,
programme position, etc. settings
appear.
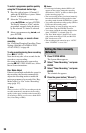
11
Press the corresponding colour
button repeatedly to set the recording
quality, frequency, or destination.
• Yellow button (“Destination”): Sets
the recording destination. If there is
not enough available DVD disc space
for the recording, the recorder
automatically records the programme
to the HDD even if you select “DVD”
(Recovery Recording). When you set a
daily or weekly timer, “HDDr” allows
you to replace the previous timer
recording with the new one
automatically (HDD only).
• Green button (“Frequency”): Selects
the recording pattern.
• Red button (“Quality”): Selects the
recording mode (page 147).
12
Press , to display “Timing,” then
press the corresponding colour
button repeatedly to set the duration
or genre.
• Green button (“Timing”): Selects the
duration time or to set the VPS/PDC
function. See “About the VPS/PDC
function” below.
• Yellow button (“Genre”): Selects a
particular HDD genre, if necessary.
13
Press GUIDE to exit the GUIDE Plus+
system.
The recorder is ready to start recording.
• To modify the timer setting such as the
VPS/PDC function, see page 60.
To stop recording during timer recording
Press x REC STOP.
Note that it may take a few seconds for the
recorder to stop recording.
On-screen instructions may appear after
pressing x REC STOP. In this case, follow
the on-screen instructions.
z Hint
You can use the “Rec. Mode Adjust” function
(page 54).
b Notes
• If a message indicating that the HDD is full
appears on the screen, change the recording
destination to “DVD,” or make available space
for the recording (page 76).
• When you set the recording destination to
“HDDr,” the previous timer recording will be
replaced with the new one even if you have not
watched it.
About the VPS/PDC function
VPS/PDC signals are transmitted with TV
programmes in some broadcast systems.
These signals ensure that timer recordings
are made regardless of any broadcast delays,
early starts, or broadcast interruptions.
To use the VPS/PDC function
Select “VPS / PDC” in step 12 above.
When you turn on this function, the recorder
starts scanning the channels before the timer
recording starts.
Date
,continued