


57
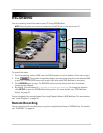
Virtual DVR
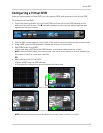
Configuring a Virtual DVR
Once you have created a Virtual DVR, you can register DVRs and cameras to that Virtual DVR.
To configure a Virtual DVR:
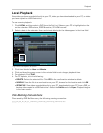
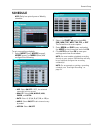
1. From Live viewing, double-click a Virtual DVR
icon from the Virtual DVR Indicator at the
bottom of the main screen. The
X indicator appears on the icon and a blank split-screen
appears on the main screen.
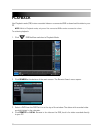
2. Use the Split-screen selector in the right of the main scr
een to a select a split-screen mode.
3. Drag a DVR from the DVR Indicator to a desired location on the screen.
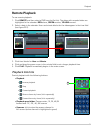
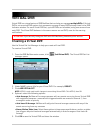
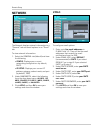
4. Add DVRs to the Virtual DVR:
• Click and drag a DVR from the DVR Indica
tor to a desired channel on the screen
NOTE: Cameras will be added in numerical order from the selected channel to the end, depending on
the number of cameras connected to the DVR
OR
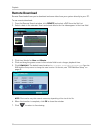
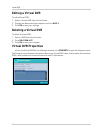
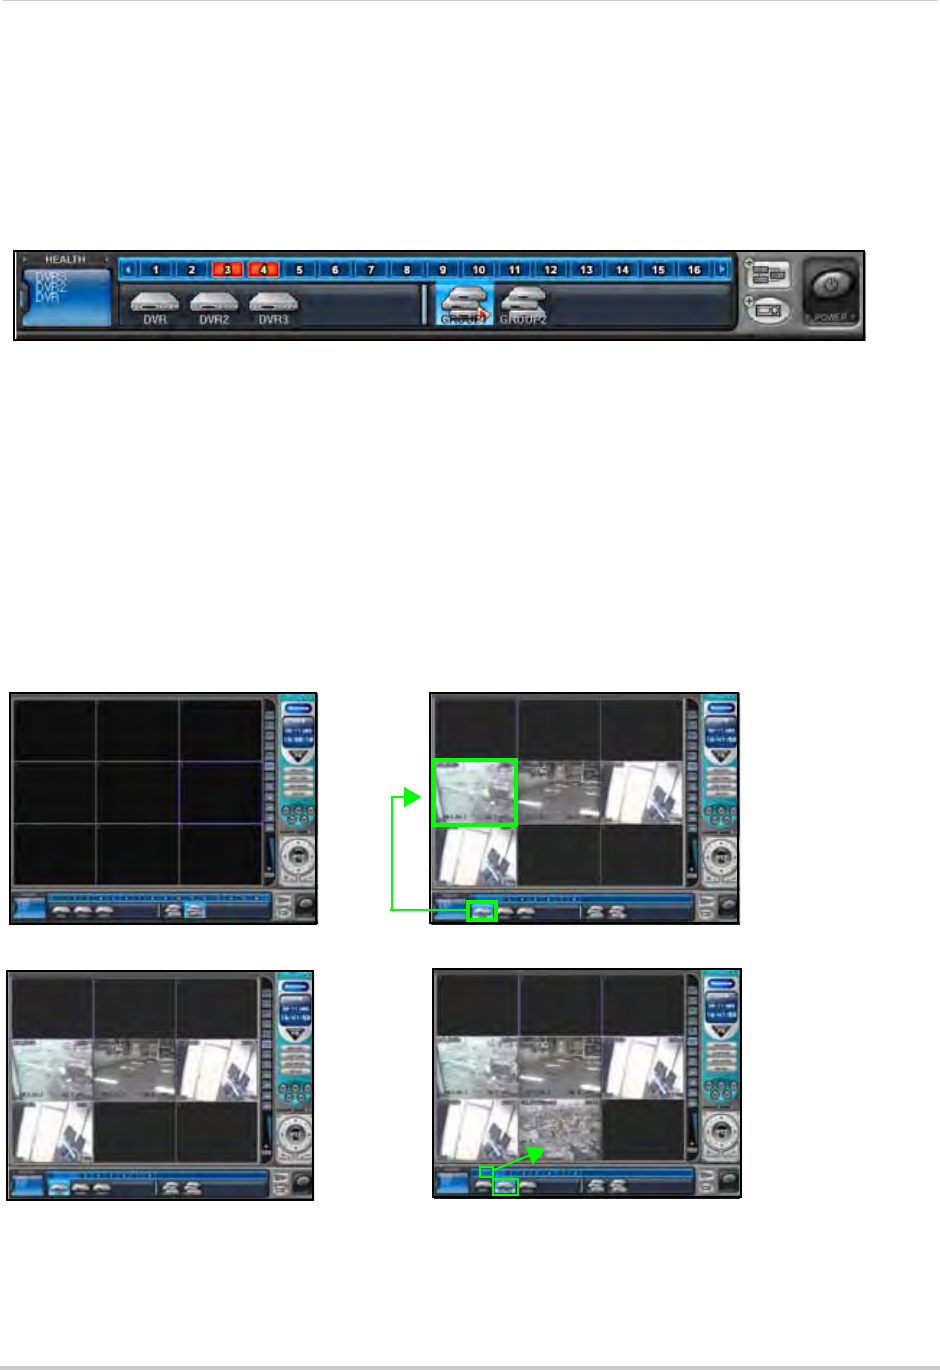
4. Add cameras to the Virtual DVR:
• Select a DVR from the DVR indicator
• Drag specific c
ameras to a desired channel on the screen
NOTE: The newly selected camera will replace the existing camera if there is a conflict.
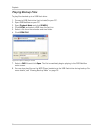
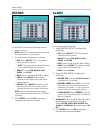
Figure 30.2 Virtual DVR Indicator
Figure 30.3 Add a DVR—DVR1 (4CH DVR) is added to channel 4 on the screen
DVR1
CH 1
DVR1
CH 2
DVR1
CH 3
DVR1
CH 4
DVR1
CH 1
DVR1
CH 2
DVR1
CH 3
DVR1
CH 4
Figure 30.4 Add a Camera—CH 1 from DVR 2 is added to channel 8 on the screen
DVR1
CH 1
DVR1
CH 2
DVR1
CH 3
DVR1
CH 4
DVR2
CH 1