


138
PD-6
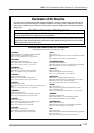
DVD Location Recorder (Exporting files using IEEE1394)
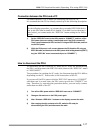
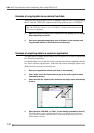
Example of exporting data to a computer application
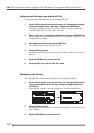
1. Start up the application software (Pro Tools, in this example).
2. Click “Audio” on the Pro Tools screen to pop up the audio region list menu
(indicated by arrow 1).
3. Select and click the “Import Audio” menu from the popup menu (indicated by
arrow 2).
The procedure example below shows how to export PD-6 data to Digidesign
Pro Tools for Macintosh.
For details about how to use Pro Tools, see the instructions supplied with the
Pro Tools software application. Note that the screen examples below may
differ from the screen you actually see.
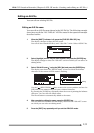
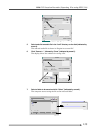
4. Select and click “PD6-DVD” (or “S001”) on the desktop (indicated by arrow 3).
The disk volume name example shown below is a default tentative name.
If you edit the volume name (Reel No.) in the disk formatting process, the
edited name is shown.
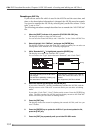
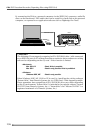
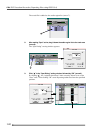
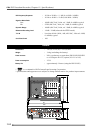
Example of copying data to an external hard disk
<Note>
While the “IEEE1394” menu is set to “CONNECT”, the keys and controls on the
PD-6 panel are disabled.
1. Make sure that the PD-6 drive icon is shown on the PC desktop (the icon design
differs depending on the PC).
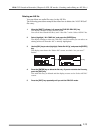
2. Start up an appropriate application such as Explorer on the computer, and
copy an audio data file in the PD-6 drive to the hard disk.
Also note that the procedure below is assumed that the PD-6 is connected to
the PC and the “IEEE1394” menu in the Utility mode is set to “CONNECT”.
1
2