


54
RECORDING – GENERAL INFORMATION
Note on recording quality
Pay attention to the recording quality, whether you set it manually or
with the timer, when you want to record a program in the HDD
archive and then transfer it to a disc at a later point.
If you select a very high recording quality, a 90 minute film might
not fit onto the disc. To record the film you will have to divide the
film into two parts.
You cannot subsequently reduce the quality of the recording.
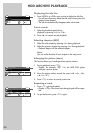
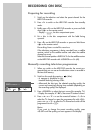
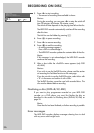
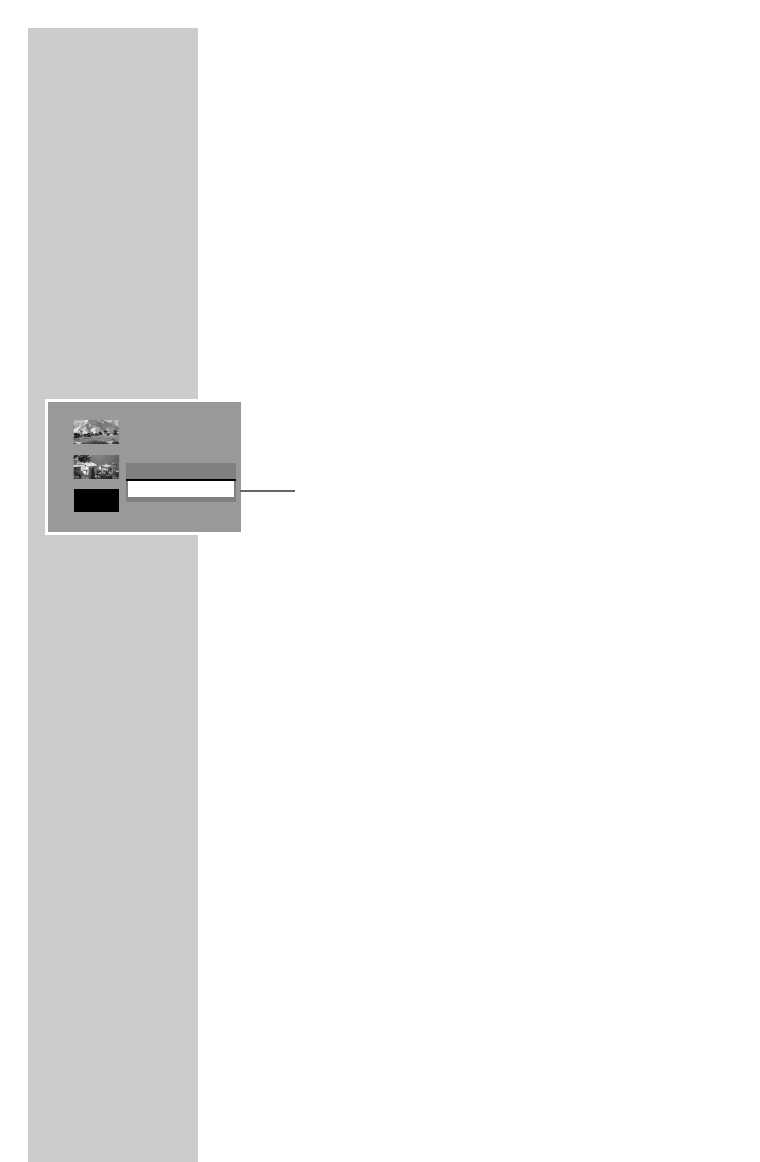
Remaining recording time
You can find information about the remaining recording time in the
»EMPTY« field in the index screen.
1 Press »
8« to select the index screen.
2 Select the »EMPTY« field with »
S
« and activate by pressing
»
s
«.
3 Select »Properties« with »
S
« and press »OK« to confirm.
– The recording time still available – depending on recording
quality – is displayed.
Recording settings
You can make settings, such as adding chapter markers, selecting
the input source and setting the recoding quality, in the setup menu.
The settings are described on page 96.
Data management in the HDD archive
If you want to record programs manually in the HDD archive that
are longer than three hours, they will be displayed in the HDD
archive separately.
As an example, you record something for 4:30 hours. In the HDD
archive the first entry with 02:59 hours will be displayed and then
the second entry with 01:31 hours.
If you want to avoid this, record the program(s) in timer mode.
1. TITLE
30/09/2004
10:05:12
SP 01:15:00
2. TITLE
30/09/2004
12:30:00
SP 00:45:00
EMPTY TITLE
SP 02:03:04
EMPTY
Record title
Property
A
a