


ENGLISH
87
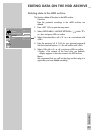
Recording pay TV programmes
Preparation
Switch on the television.
Select the »AV« channel on the television for the HDD DVD
recorder.
Put a DVD+R, DVD+RW, DVD-R or DVD-RW into the disc
compartment.
Please select the recording quality before starting the recording. See
the section on custom settings and selecting the recording quality on
page 96.
1 When you switch on the HDD DVD recorder, the current pro-
gramme that you can see on the television screen is recorded in
the time shift memory.
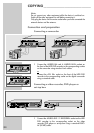
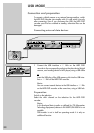
2 Press »SOURCE« to select the input source (for example, TV).
– Display: for example, »P1 ARD«, the current TV station is
shown.
3 Select the required pay TV station with »
S
« or »
A
« or with
the numerical buttons »1…0«.
4 If the programme is to be recorded on the HDD archive, start
the recording with »
●«
or
if the programme is to be recorded on disc, press » « (blue)
to switch to disc mode, confirm with »OK« and start the record-
ing with »●«.
Note:
After starting the recording, you can press »
●« to enter the
switch-off time (30 to 690 minutes in 30-minutes increments).
The HDD DVD recorder automatically switches off the recording
after this time.
5 Press »
7« to end the recording.
– A message appears.
Acknowledge it with »OK«.
Note:
If this message is not acknowledged, the HDD DVD recorder
continues the recording.
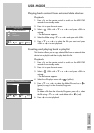
6 When recording onto a disc, the »YesDVD« menu appears after
a short while.
Note:
If you wish to use the YesDVD function, please read the section
on executing the YesDVD function on page 57.
If you do not wish to use the YesDVD function, select »No« with
»
S
« in the menu and confirm with »OK«.
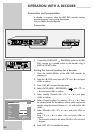
USING A DECODER _____________________