


hp dvd-writer
hp dvd-writerhp dvd-writer
hp dvd-writer
dvd100i
dvd100idvd100i
dvd100i
Technical Support Solutions Guide 10/25/01 HP Simple Backup
102
102102
102
⇐
⇐⇐
⇐
⇒
⇒⇒
⇒
16. Performing Disaster Recovery for Windows NT 4.0 Without
Disaster Recovery Diskettes
Some PC system manufacturers ship versions of the Windows NT 4.0 CD that contain
limitations affecting the Disaster Recovery feature of HP Simple Backup. If, while
creating Disaster Recovery diskettes, HP Simple Backup detects that your Windows
CD cannot be used to create Disaster Recovery diskettes, you must follow the steps
listed below to recover your data:
HP Simple Backup can protect the data on your NT Workstation in the event of a hard
drive failure. The Disaster Recovery process allows you to recover lost data and
return your system to full operation.
You may choose to back up the NT Workstation Registry by selecting it in the Options
settings under the Advanced tab. By default, HP Simple Backup will back up the
registry when the Windows Directory is selected for backup. The NT Workstation
Registry must be backed up in order to properly restore your system in the event of a
hard drive failure.
To use Disaster Recovery:
1.
1.1.
1. Replace all damaged hardware and properly format the destination drive (see
your Windows NT manual for assistance).
2.
2.2.
2. Start your computer with the Windows NT system disk in your floppy drive (or in
your CD-ROM drive if you have a bootable CD-ROM drive).
3.
3.3.
3. Follow all instructions to perform a minimal re-install of Windows NT
Workstation, including any Service Packs, and reboot your machine when
prompted. Configurations will be restored later.
4.
4.4.
4. Install HP Simple Backup.
5.
5.5.
5. When installation is complete, click the Start menu, select Programs, then select
HP Simple Backup. The startup dialog screen appears. Click Close.
6.
6.6.
6. From the Restore tab, select a device in the Restore from device drop-down list
box.
7.
7.7.
7. Insert the volume containing the last full backup of your system.
8.
8.8.
8. Select Device View, then select the last full backup on the volume.
9.
9.9.
9. From the Restore tab, click Options, General tab and select the Always replace the
file on my computer checkbox.
10.
10.10.
10. Click the Advanced tab and select the Restore Windows Registry checkbox, then
click Start.
11.
11.11.
11. Reboot your machine.
NOTE:
NOTE: NOTE:
NOTE:
Files that were reported as “busy” should be restored at this time. If you
wish to restore these files, follow the instructions below for restoring busy
files.
To restore busy files;
1.
1.1.
1. Click the Start menu, select Programs, then select HP Simple Backup. The Startup
dialog screen appears. Click Close.
2.
2.2.
2. From the Restore tab, select a device in the Restore from device drop-down list
box.
3.
3.3.
3. Insert the volume containing the last full backup of your system.
4.
4.4.
4. Select Device View, then select the last full backup on the volume.
5.
5.5.
5. From the Restore tab, check the files that were reported busy.
6.
6.6.
6. Click Options, General tab and select the Always replace the file on my computer
checkbox.
7.
7.7.
7. Click the Advanced tab and de-select the Restore Windows Registry checkbox,
then click Start.
8.
8.8.
8. Reboot your machine.
If you have any differential or incremental backups performed after the last full
backup, restore those as required.
When you have restored all the files from your backup volumes, reboot the machine
to complete your recovery.
17. Conflict With Microsoft System Restore
Microsoft System Restore periodically creates restore points to which you can return
your system in the event of a system error or data loss. If you format your hard drive,
then use HP Simple Backup to recover your system, these restore points cannot be
restored.
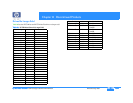
Product Information Drive Specifications Interfaces Installation and Configuration
Drive Operation Tips and Techniques Software Maintenance
Troubleshooting Warranty and Support Release Notes Discontinued Products