


hp dvd-writer
hp dvd-writerhp dvd-writer
hp dvd-writer
dvd100i
dvd100idvd100i
dvd100i
Technical Support Solutions Guide 10/25/01 Installation
85
8585
85
⇐
⇐⇐
⇐
⇒
⇒⇒
⇒
your computer, disconnecting and reconnecting the cables on the devices that no
longer work.
Check data connectors for bent pins
Check data connectors for bent pinsCheck data connectors for bent pins
Check data connectors for bent pins
Check the data connectors on the drive and controller for bent pins. If you find any
bent pins, GENTLY and CAREFULLY straighten them with needle-nosed pliers.
Check external SCSI cables
Check external SCSI cablesCheck external SCSI cables
Check external SCSI cables
You may have dislodged the SCSI cable for one of your SCSI devices when you
installed your HP drive. Inspect all SCSI cable connections, disconnecting and
reconnecting the cables on the devices that no longer work.
Change drive letter assignments
Change drive letter assignmentsChange drive letter assignments
Change drive letter assignments
If you had assigned a fixed drive letter to your old device(s), Windows may now be
assigning that letter to your HP drive, making it unavailable when the fixed letter
assignment is attempted. Cancel all fixed drive letter assignments, or manually
assign new fixed letters for all devices.
Windows assigned the wrong drive letters to your drives
Unless you specify otherwise, Windows assigns drive letters based on the hardware
features of your computer and its components. This means that, in some cases,
installing a new drive shuffles the drive letters not only of your new drive, but of
those that were already installed.
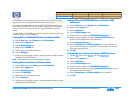
If you want to assign drive letters to your CD or DVD drives manually, follow the
procedure for your version of Windows.
Windows 95/98/Me
Windows 95/98/MeWindows 95/98/Me
Windows 95/98/Me
1.
1.1.
1. Click the Start
StartStart
Start button, point to Settings
SettingsSettings
Settings, and click Control Panel
Control PanelControl Panel
Control Panel.
2.
2.2.
2. Double-click the System
SystemSystem
System icon.
3.
3.3.
3. Click the Device Manager
Device ManagerDevice Manager
Device Manager tab.
4.
4.4.
4. Click the View devices by type
View devices by typeView devices by type
View devices by type radio button.
5.
5.5.
5. Double-click the CDROM
CDROMCDROM
CDROM icon.
6.
6.6.
6. Double-click a CD-ROM drive in the list.
7.
7.7.
7. Click the Settings
SettingsSettings
Settings tab.
8.
8.8.
8. Set the Start
StartStart
Start drive letter
drive letterdrive letter
drive letter and Finish drive letter
Finish drive letterFinish drive letter
Finish drive letter settings to the desired letter.
9.
9.9.
9. Click the OK
OKOK
OK button.
10.
10.10.
10. Repeat steps 6 through 9 for each remaining drive in the list.
11.
11.11.
11. Make sure no two drives are assigned to the same letter.
Windows NT
Windows NTWindows NT
Windows NT
1.
1.1.
1. Log on with Administrator privileges.
2.
2.2.
2. Click the Start
StartStart
Start button, point to Programs
ProgramsPrograms
Programs, point to Administrative Controls
Administrative Controls Administrative Controls
Administrative Controls
(Common)
(Common)(Common)
(Common), and click Disk Administrator
Disk AdministratorDisk Administrator
Disk Administrator.
3.
3.3.
3. Click a CD-ROM or DVD-ROM device.
4.
4.4.
4. Click the Tools
ToolsTools
Tools menu, then click Assign Drive Letter
Assign Drive LetterAssign Drive Letter
Assign Drive Letter.
5.
5.5.
5. Click the Assign Drive Letter
Assign Drive LetterAssign Drive Letter
Assign Drive Letter radio button.
6.
6.6.
6. Select the desired drive letter from the pull-down list.
7.
7.7.
7. Click the OK
OKOK
OK button.
8.
8.8.
8. Repeat steps 3 through 7 for each remaining drive.
9.
9.9.
9. Make sure no two drives are assigned to the same letter.
Windows 2000
Windows 2000Windows 2000
Windows 2000
1.
1.1.
1. Log on with Administrator privileges.
2.
2.2.
2. Click the Start
StartStart
Start button, point to Settings
SettingsSettings
Settings, then click Control Panel
Control PanelControl Panel
Control Panel.
3.
3.3.
3. Double-click Administrative Tools
Administrative ToolsAdministrative Tools
Administrative Tools.
4.
4.4.
4. Double-click Computer Management
Computer ManagementComputer Management
Computer Management.
5.
5.5.
5. Highlight the Storage
StorageStorage
Storage icon in the left pane.
6.
6.6.
6. Double-click the Disk Management
Disk ManagementDisk Management
Disk Management icon in the right pane.
7.
7.7.
7. Right-click the first drive whose drive letter you want to change.
8.
8.8.
8. Click the Assign New Drive Letter and Path
Assign New Drive Letter and PathAssign New Drive Letter and Path
Assign New Drive Letter and Path option on the popup menu.
9.
9.9.
9. Select the desired drive letter from the pull-down list.
Product Information Drive Specifications Interfaces Installation and Configuration
Drive Operation Tips and Techniques Software Maintenance
Troubleshooting
Warranty and Support Release Notes Discontinued Products