hp dvd-writer
hp dvd-writerhp dvd-writer
hp dvd-writer
dvd100i
dvd100idvd100i
dvd100i
Technical Support Solutions Guide 10/25/01 Software Errors
83
8383
83
⇐
⇐⇐
⇐
⇒
⇒⇒
⇒
DMA will not stay enabled
Reasons why DMA will not stay enabled after restarting your
Reasons why DMA will not stay enabled after restarting your Reasons why DMA will not stay enabled after restarting your
Reasons why DMA will not stay enabled after restarting your
computer
computercomputer
computer
1.
1.1.
1. The device (hard drive, HP CD drive, HP DVD drive, CD-ROM drive) does not
support DMA.
2.
2.2.
2. DMA is not available on your computer.
3.
3.3.
3. DMA has not been enabled in the computer's Basic Input/Output System (BIOS).
Refer to your computer's manufacturer for more information about using DMA on
your system.
Other problems occurred after enabling DMA
Other problems occurred after enabling DMAOther problems occurred after enabling DMA
Other problems occurred after enabling DMA
If you enabled DMA and your system locks when accessing the HP drive or you start
to have other system problems, disable DMA as a possible solution.
Other performance issues
40-conductor, 40-pin vs. 80-conductor, 40-pin IDE cables
40-conductor, 40-pin vs. 80-conductor, 40-pin IDE cables40-conductor, 40-pin vs. 80-conductor, 40-pin IDE cables
40-conductor, 40-pin vs. 80-conductor, 40-pin IDE cables
The IDE cable that came with your new HP drive is a 40-conductor, 40-pin cable.
Some computers now come with hard drives connected to faster 80-conductor,
40-pin cables, also known as ULTRA ATA66/100s.
The connectors on each of these two cables are the same, however you can note the
difference between the two configurations on the cables themselves. The
80-conductor cables have more conductors on the cable, which can increase the
performance of your hard drive.
When you installed your new HP drive, you might have replaced an 80-conductor
cable with the 40-conductor cable that came in the box with your new drive. If you
did replace an IDE cable, and your system now works slower, or you are having
performance problems with one of your hard drives or a CD-ROM or DVD-ROM
drive, examine the IDE cables. If you replaced an 80-conductor cable with a 40-
conductor cable, your performance issues could be related to this and you should
reinstall the 80-conductor cable. Although this isn't a recommended configuration,
your HP drive will function with an 80-conductor cable.
Software Errors
HP RecordNow reported it was unable to read fast enough
When HP RecordNow creates a CD, it does so in a single, continuous operation. This
operation requires that the computer's hardware and software transfer data from the
source device to the HP drive fast enough to keep the HP drive's laser turned on at all
times. If the HP drive becomes "starved" for data, the laser will turn off, and the
recording session will fail. There can be many different causes of this error.
This error is more likely when making second-generation copies, when using a slow or
unreliable CD-ROM as the source drive, or when using faster write speeds (10X or 12X)
especially when the blank media is not rated for higher speeds.
If you are prompted to "retry" following a failed CD recording, first, try the following:
1.
1.1.
1. Clean your source CD.
2.
2.2.
2. Use your HP drive as your source drive.
3.
3.3.
3. Test the performance of your CD-ROM and HP drive prior to recording.
4.
4.4.
4. Retry the operation.
HP RecordNow reported that there was a problem reading the
disc being copied
Clean the CD
Clean the CDClean the CD
Clean the CD
1.
1.1.
1. Use a mild, nonabrasive soapy solution on a nonabrasive cloth to clean the shiny
side of the disc.
2.
2.2.
2. Wipe from the center to the edge of the disc.
3.
3.3.
3. Dry the disc completely before reinserting it into your CD-ROM drive.
Try using a different source drive
Try using a different source driveTry using a different source drive
Try using a different source drive
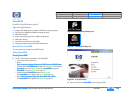
To change the source drive, click the Change button in the device panel on the lower-
right side of the RecordNow main window and select the desired drive from the pull-
down list. Insert the CD into the selected drive.
Product Information Drive Specifications Interfaces Installation and Configuration
Drive Operation Tips and Techniques Software Maintenance
Troubleshooting
Warranty and Support Release Notes Discontinued Products


