Recording Camera Images
38
1. Press the [MENU] button.
• Opens the menus in accordance with the instructions
provided in MENU Screen Operations (page 17) in the
sequence of “MENU” → “DETAIL REC” → “WEEKLY
TIMER”.
2. Set the starting day.
3. Set the starting time.
4. Set the ending day.
5. Set the ending time.
6. Select the “MODE”.
7. Select “EXEC”.
8. Set the day of recording.
(By setting “DAY” for the starting day, it is possible to select
RECORD/NOT RECORD for every day of the week.)
* Press the [CANCEL] button to delete the settings.
[S/T/W/X]: Selecting an item.
[–/+]: Changing the value settings.
Settings
SUN, MON, TUE, WED, THU, FRI, SAT:
Sets the day on which recording is to start.
DAY: When recording daily. You can set the recording day
of the week in combination with the [Recording Day],
such as Mon through Fri., etc.
00:00 to 23:59: Sets the time at which recording is to start.
SUN, MON, TUE, WED, THU, FRI, SAT:
Sets the day on which recording is to end.
00:00 to 23:59: Sets the time at which recording is to end.
STANDARD, REC PATTERN 1 to REC PATTERN 9:
Selects the appropriate setting from among multiple
recording settings. (See OPERATION SET on page
31)
OFF: Timer not executed.
ON: Executes once, and then changes to “OFF”.
WEEK: Executes the timer every week.
* When the starting day has been set to “DAY” note that only
“ON” and “OFF” can be selected for this parameter. When
“ON” has been selected, the time will be executed on a
constant basis.
Sets the day of the week to be recorded when “DAY” has been
selected for the starting day.
• The desired day of the week, “MON”, etc. will be recorded.
• Activates recording on “MON” or any other day displayed.
• [–] is displayed for days on which recording is not
activated.
9. Press the [SET] button.
• A confirmation screen will be displayed.
10. Select [SAVE] with [W/X], and then press the [SET]
button.
* If an incorrect parameter is set, a message will be
displayed on screen and it will be impossible to move the
cursor up or down or escape from the screen.
In this event, either press the [CANCEL] key and reset the
parameter, or re-enter the correct parameter.
WEEKLY TIMER
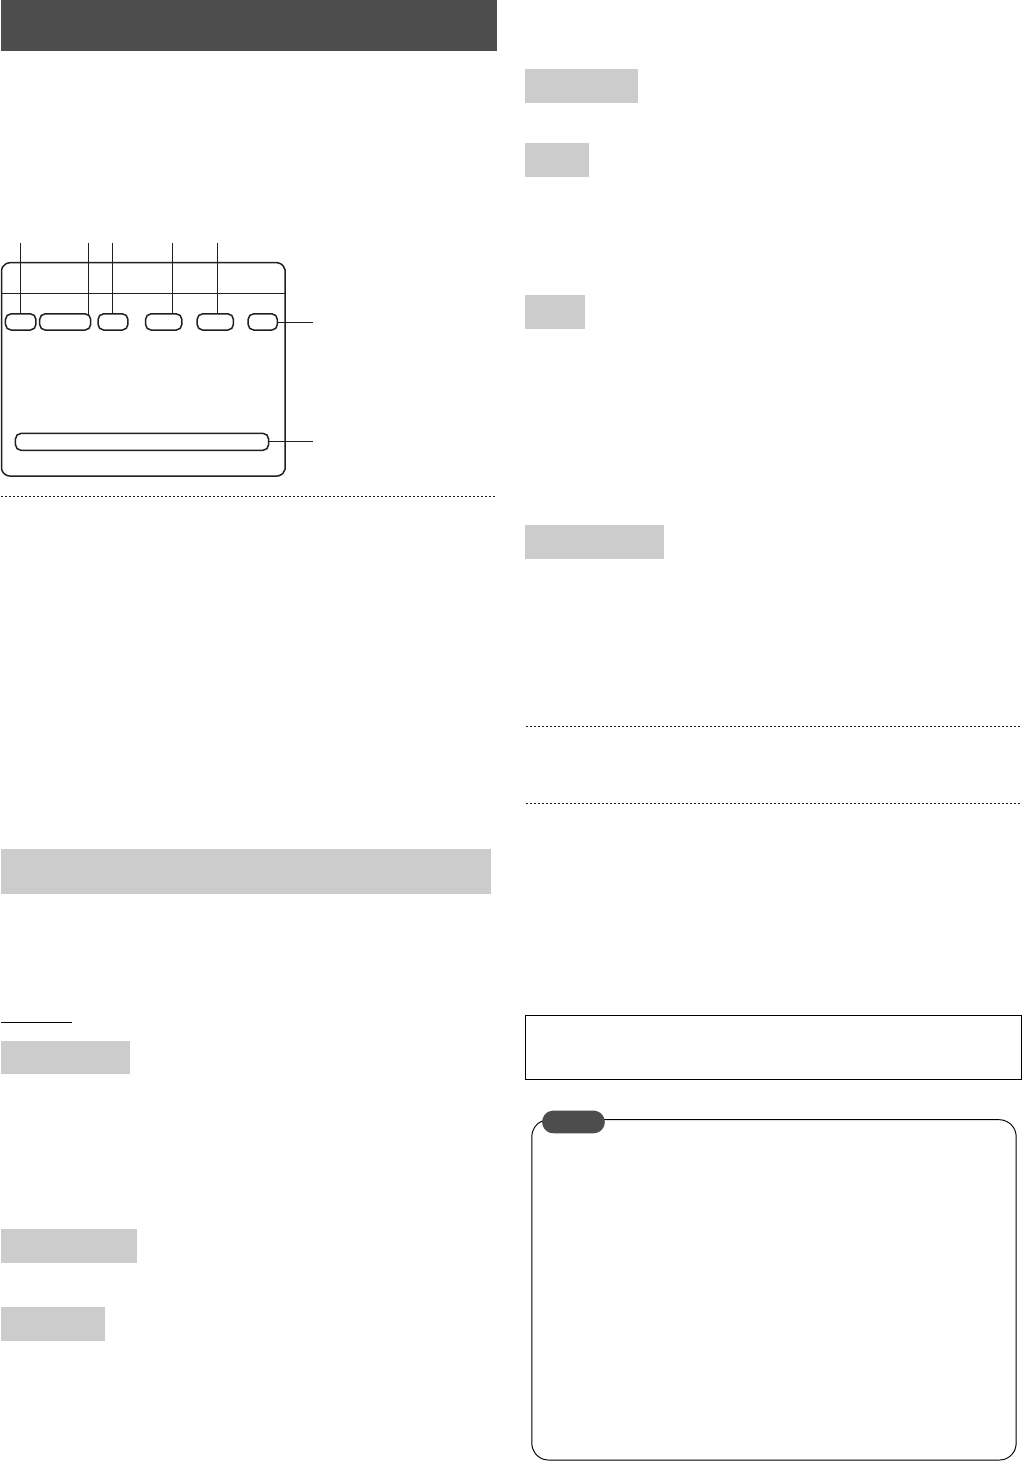
Buttons Used for Procedures 2. to 8.
“START” Day
“START” Time
“END” Day
WEEKLY TIMER
MON
* *
:
* * * * * *
:
* * * *
* * * *
SUN
* *
:
* * * *
* *
:
* * * *
* * * *
START END MODE EXEC
TUE
* *
:
* * * * * *
:
* * * *
* * * *
WED
* *
:
* * * * * *
:
* * * *
* * * *
THU
* *
:
* * * * * *
:
* * * *
* * * *
FRI
* *
:
* * * * * *
:
* * * *
* * * *
SAT
* *
:
* * * * * *
:
* * * *
* * * *
DAY
* *
:
* * * * * *
:
* * * *
* * * *
SUN MON TUE WED THU FRI SAT
8.
7.
6.5.4.3.
2.
“END” Time
MODE
EXEC
Recording Day
See page 39 for details on the operations required for timer
recording and for the timer standby mode.
• When the weekly timer and the date specification timer
have both been set for operation, the priority is given to
the date specification timer. (See page 28)
• When the program timer has been set to start up at the
same time, the priority is given to the setting higher up
the list.
• When multiple program timers have been set, the
priority is given to the first time to start, and this setting
is stored until time recording has finished.
However, if two or more program timers have been
registered after recoding has finished, the priority is
given to the setting higher up the list, regardless of the
starting time.
MEMO


