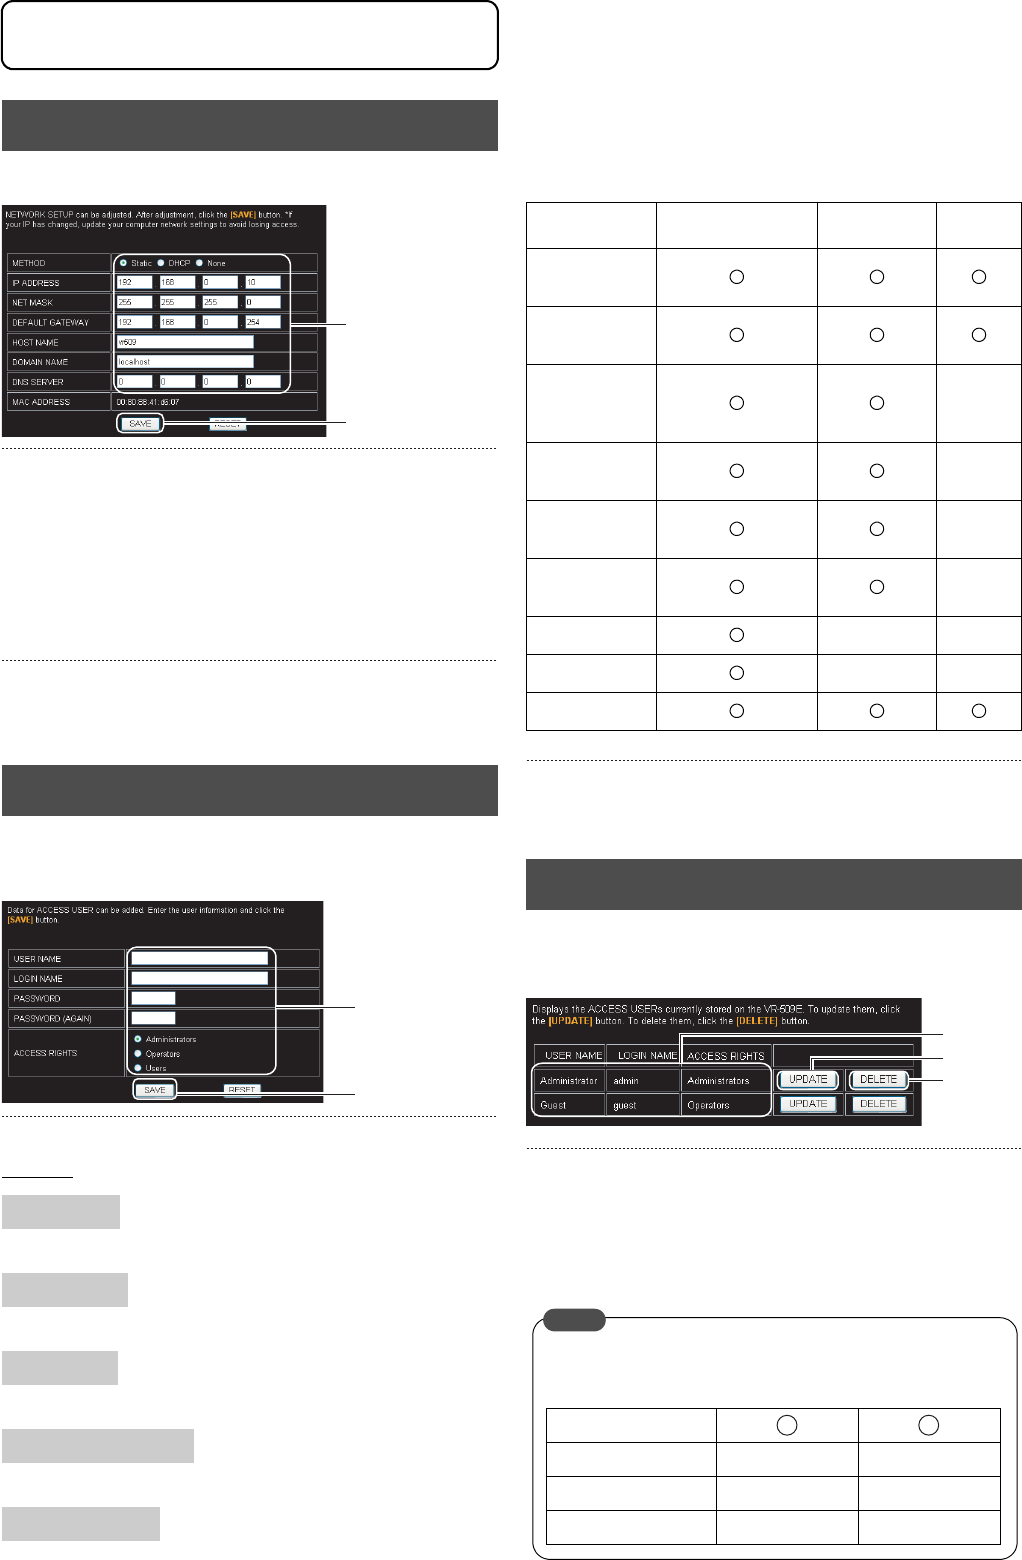
Changing Network Settings
82
0
1. Click on “NETWORK” → “ADDRESS” in that order.
2. Change the settings. (For more details, see page 66)
• When network settings of VR-509 are changed, network
settings need to be altered according at the PC. Consult
the network administrator when making alterations.
• Upon changing network settings of VR-509, change the
network settings at the PC as well, followed by restarting
the Web browser.
3. Click on the [SAVE] button.
(Click on the [RESET] button to return to the setting values
on the main unit.)
1. Click on “NETWORK” → “ACCESS USER SETUP” in
that order.
2. Enter/selection user information.
Settings
Enter within 32 single-byte characters.
Enter within 32 single-byte alphanumerals.
Enter within 8 single-byte alphanumerals.
Enter the password once again for confirmation purposes.
Select from either Administrators, Operators or Users.
Access rights for each menu:
3. Click on the [SAVE] button.
Click on [RESET] to clear the entry.
1. Click on “NETWORK” → “ACCESS USER
CONFIRMATION”.
2. This screen enables the access user profiles to be
checked.
3. Press the [UPDATE] button to make any amendments.
4. Press the [DELETE] button to delete users.
Setting a Network Address
Registering an ACCESS USER
USER NAME
LOGIN NAME
PASSWORD
PASSWORD (AGAIN)
ACCESS RIGHTS
2.
3.
2.
3.
Administrators Operators Users
Live Image
Screens
Event
Search
Timer
Recording
Reservation
×
WEB
Displays
×
Main Unit
Displays
×
Main Unit
Operations
×
Network × ×
Utilities × ×
Status
ACCESS USER Confirmation Screen
4.
3.
2.
The following two user names are registered when the VR-
509E is shipped from the factory.
USER NAME admin guest
PASSWORD vr-509 vr-509
ACCESS RIGHTS Administrators Operators
MEMO
Changing Network Settings


