


73
Viewing Playback Image Using a PC
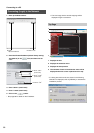
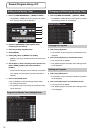
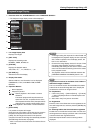
1. Click on “EVENT SEARCH” → “ALARM SEARCH” in
that order.
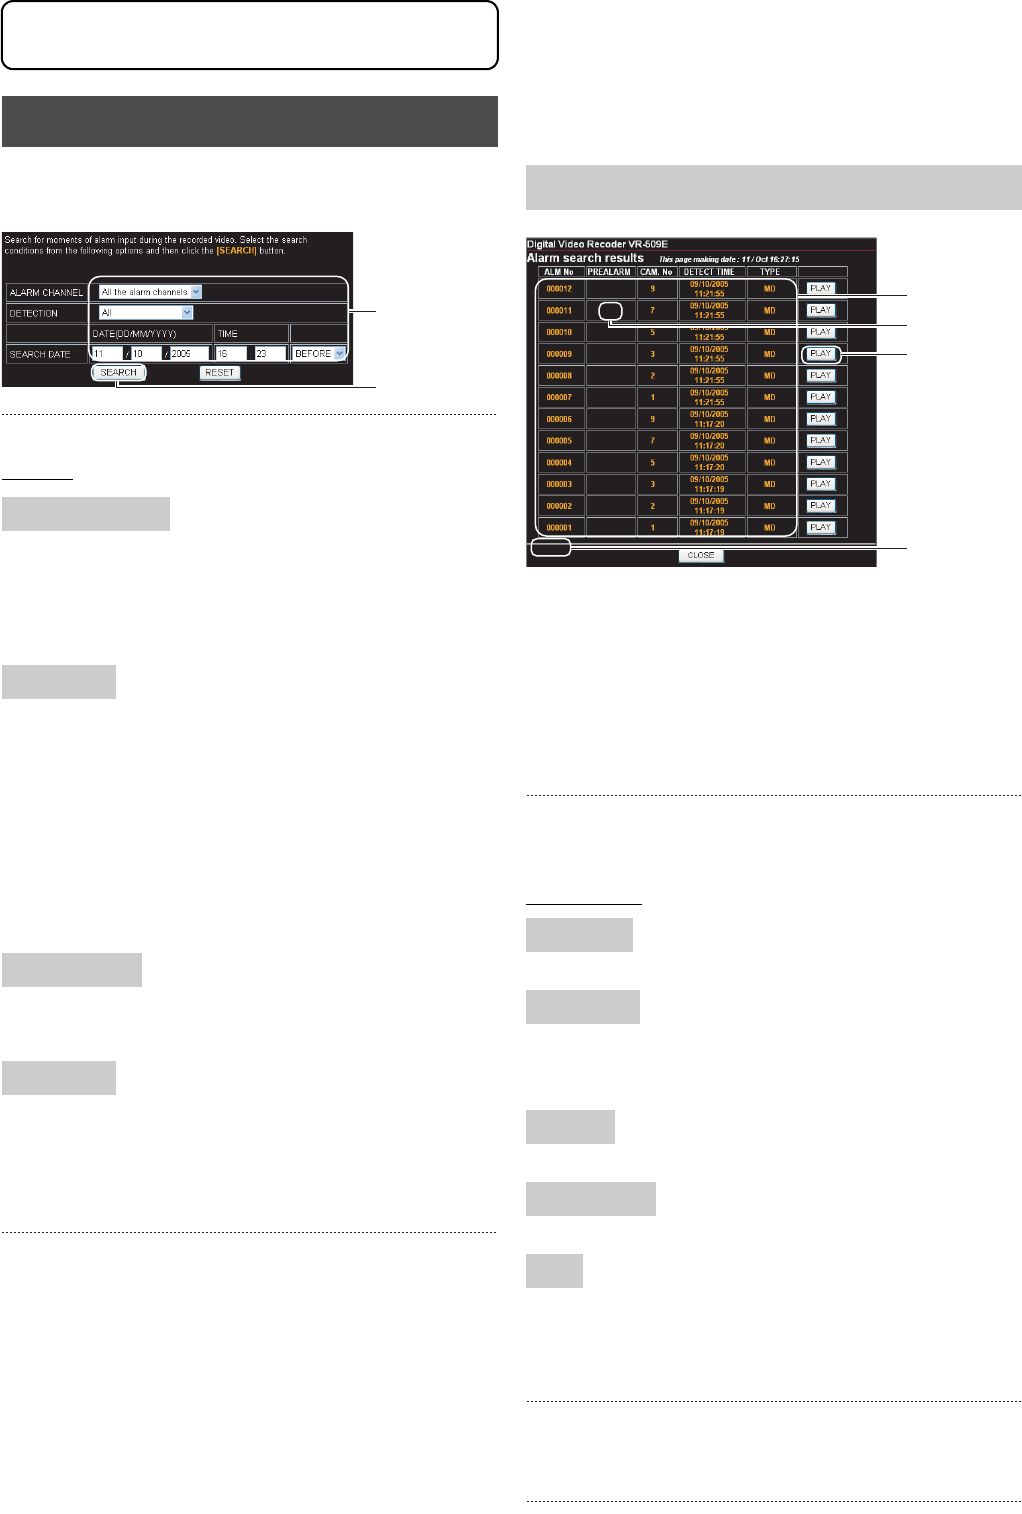
2. Select the search conditions.
Settings
All Alarm Channels: Searches for all recorded images
regardless of the channel.
ch1 to ch9: Searches for recorded images only on
the specified channel.
All: Searches for all recorded images regardless of the
alarm type.
Emergency: Searches for the images recorded with
emergency port input.
Alarm: Searches for the images recorded with alarm port
input.
M.Detection: Searches for the images recorded with motion
detection.
Enter the year, month, date, hour and minutes required for the
search.
Before: Searches for images recorded prior to the specified
date.
After: Searches for images recorded after the specified
date.
3. Click on the [SEARCH] button.
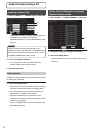
• The “ALARM SEARCH” screen will be displayed.
(Click on [RESET] to clear the entry.)
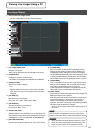
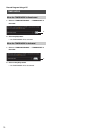
4. Select the recorded image to be played back from the
list of search results.
• 15 items will be displayed for the recording image list at
one time. Click on the button to open the page.
[CONTINUE NEXT 15 ITEMS]:
Displays the next screen.
[RETURN PREVIOUS 15 ITEMS]:
Displays the previous screen.
5. Select Recording image list.
• Select the recording image to be played back by
referring to the listed items.
Display Items
The alarm number registered in the VR-509 database.
Pre-alarm recordings will be displayed in the check-box when
available. Press the [PLAY] button after clicking on the relevant
entry to commence playback from the pre-alarm recording.
Displays the recorded camera input.
Displays the date and time of detection.
AL terminal: Alarm input terminal
MD: M.DET
EMG: Emergency input terminal
P.ERROR: Passcode error
6. Select whether to playback the pre-alarm recording.
• Add a tick to the checkbox to play-back pre-alarm
recordings.
7. Click on the [PLAY] button.
• Playback will start. (Page 75)
ALARM SEARCH
ALARM CHANNEL
DETECTION
SEARCH DATE
Before/After
2.
3.
ALARM SEARCH Screen
ALARM NO
PREALARM
CAM. NO
DETECT TIME
TYPE
5.
6.
7.
4.
Viewing Playback Image Using a PC