83
Changing VR-509 Settings Using a PC
It is possible to change the VR-509 settings with the use of a
personal computer.
See the reference page for further details of the relevant
parameters.
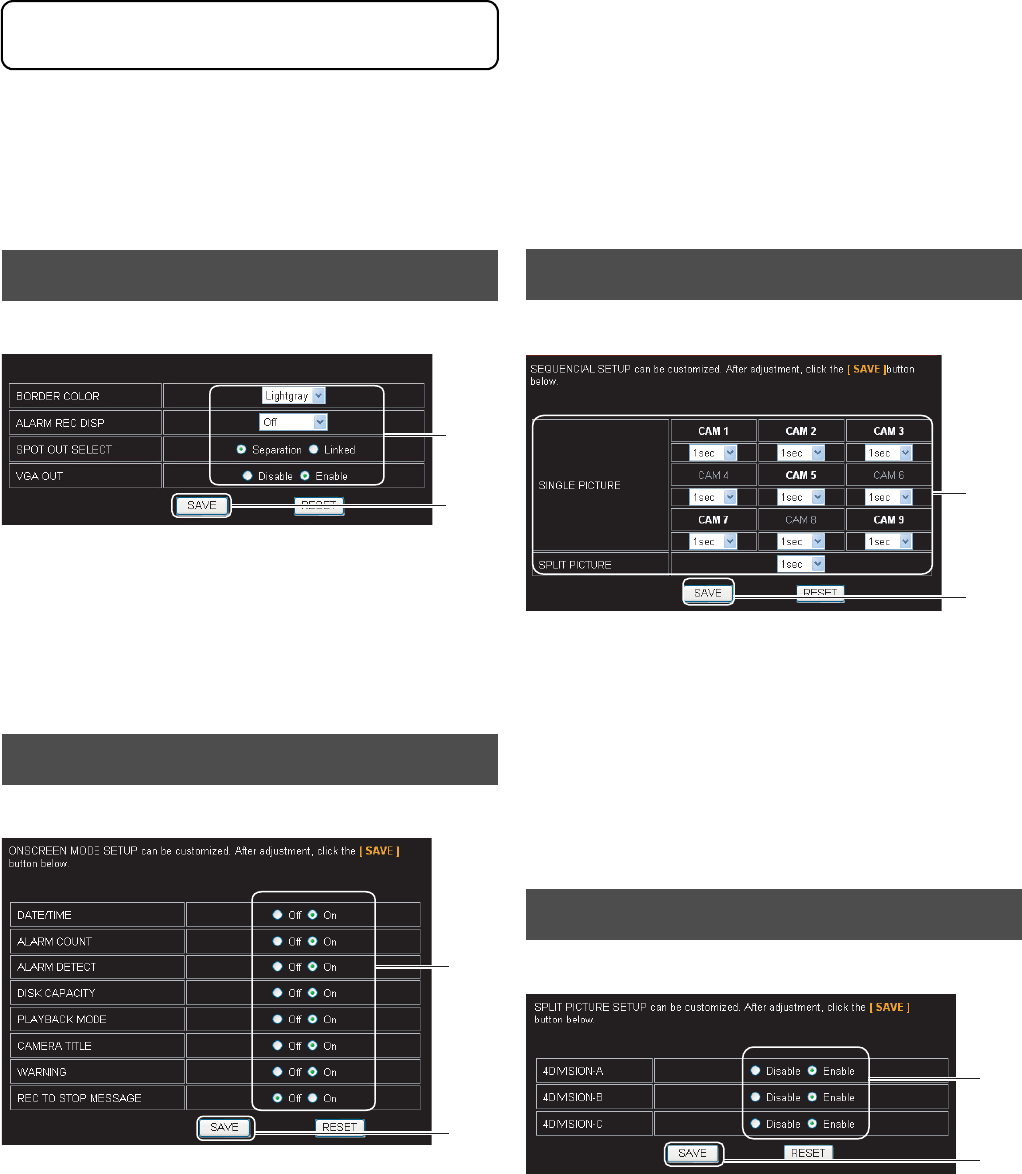
1. Click on “DISPLAY” → “MONITOR OUT” in that order.
2. Change the settings. (See page 24 for details)
3. Click on the [SAVE] button.
(Click on the [RESET] button to return to the setting values
on the main unit.)
1. Click on “DISPLAY” → “INDICATION” in that order.
2. Change the settings. (See page 25 for details)
3. Click on the [SAVE] button.
(Click on the [RESET] button to return to the setting values
on the main unit.)
1. Click on “DISPLAY” → “AUTO CHANGE” in that order.
2. Change the settings. (See page 24 for details)
3. Click on the [SAVE] button.
(Click on the [RESET] button to return to the setting values
on the main unit.)
* When the display is grayed out, it indicates that the
camera input settings for the [INTRODUCTION SET-1]
that correspond to the grayed out cameras have been set
to [DISCONNECT]. (See page 20)
1. Click on “DISPLAY” → “DIVISION PIC.” in that order.
2. Change the settings. (See page 25 for details)
3. Click on the [SAVE] button.
(Click on the [RESET] button to return to the setting values
on the main unit.)
MONITOR OUT
INDICATION
2.
3.
2.
3.
AUTO CHANGE
DIVISION PIC.
2.
3.
2.
3.
Changing VR-509 Settings Using a PC


