


63
Using Other External Devices
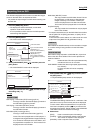
1. Connect the flash memory to the [SERIAL] port on the
front or on the back panel.
2. Press the [MENU] button.
• Open the menus in accordance with the instructions
provided in Changing MENU Settings (page 17) in the
sequence of “MENU” → “DETAIL OPERATION” →
“MAINTENANCE”→“MAINTENANCE/LOG”.
3. Select [DOWNLOAD] with [S/T], and then press the
[SET] button.
• A message stating [Download in progress] will be
displayed on the screen.
4. The menu settings will be saved in the flash memory
when the message is cleared from the screen.
5. Disconnect the flash memory from the [SERIAL] port.
1. Connect the flash memory to the [SERIAL] port on the
front or on the back panel.
2. Press the [MENU] button.
• Open the menus in accordance with the instructions
provided in Changing MENU Settings (page 17) in the
sequence of “MENU” → “DETAIL OPERATION” →
“MAINTENANCE”→“MAINTENANCE/LOG”.
3. Select [UPLOAD] with [S/T], and then press the [SET]
button.
• A message stating [Confirming setting data] will be
displayed on the screen.
The upload confirmation screen will be displayed on the
screen when the setting data has been confirmed.
4. Select [EXEC] on the confirmation screen, and then
press the [SET] button.
• A message stating “Updating setting data” will be
displayed on the screen.
The system will reboot when uploading has been
completed.
5. Disconnect the flash memory from the [SERIAL] port.
When the flash memory is not acknowledged
A message stating “The USB flash memory cannot be
recognized” will be displayed on screen.
• To continue, make sure the flash memory is connected
correctly, select [RETRIAL] on the screen, and then press
[SET].
• To abort the procedure, select [CANCEL] on the screen,
and then press [SET].
* This message will be displayed in the following
circumstances:
When a flash memory has not been connected.
When the flash memory contains a different file system.
A message stating “Set data taking out failure” or “It
failed in reading set data” will be displayed on screen if
the procedure for downloading/uploading the data fails.
In this event, select [CANCEL] on the screen and then press
[SET].
* See Troubleshooting on page 98 for details on the cause
and recovery methods when an error is triggered.
Storing Set Data in the Flash Memory
Loading Set Data from the USB Memory
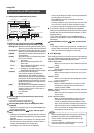
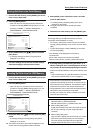
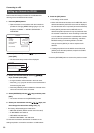
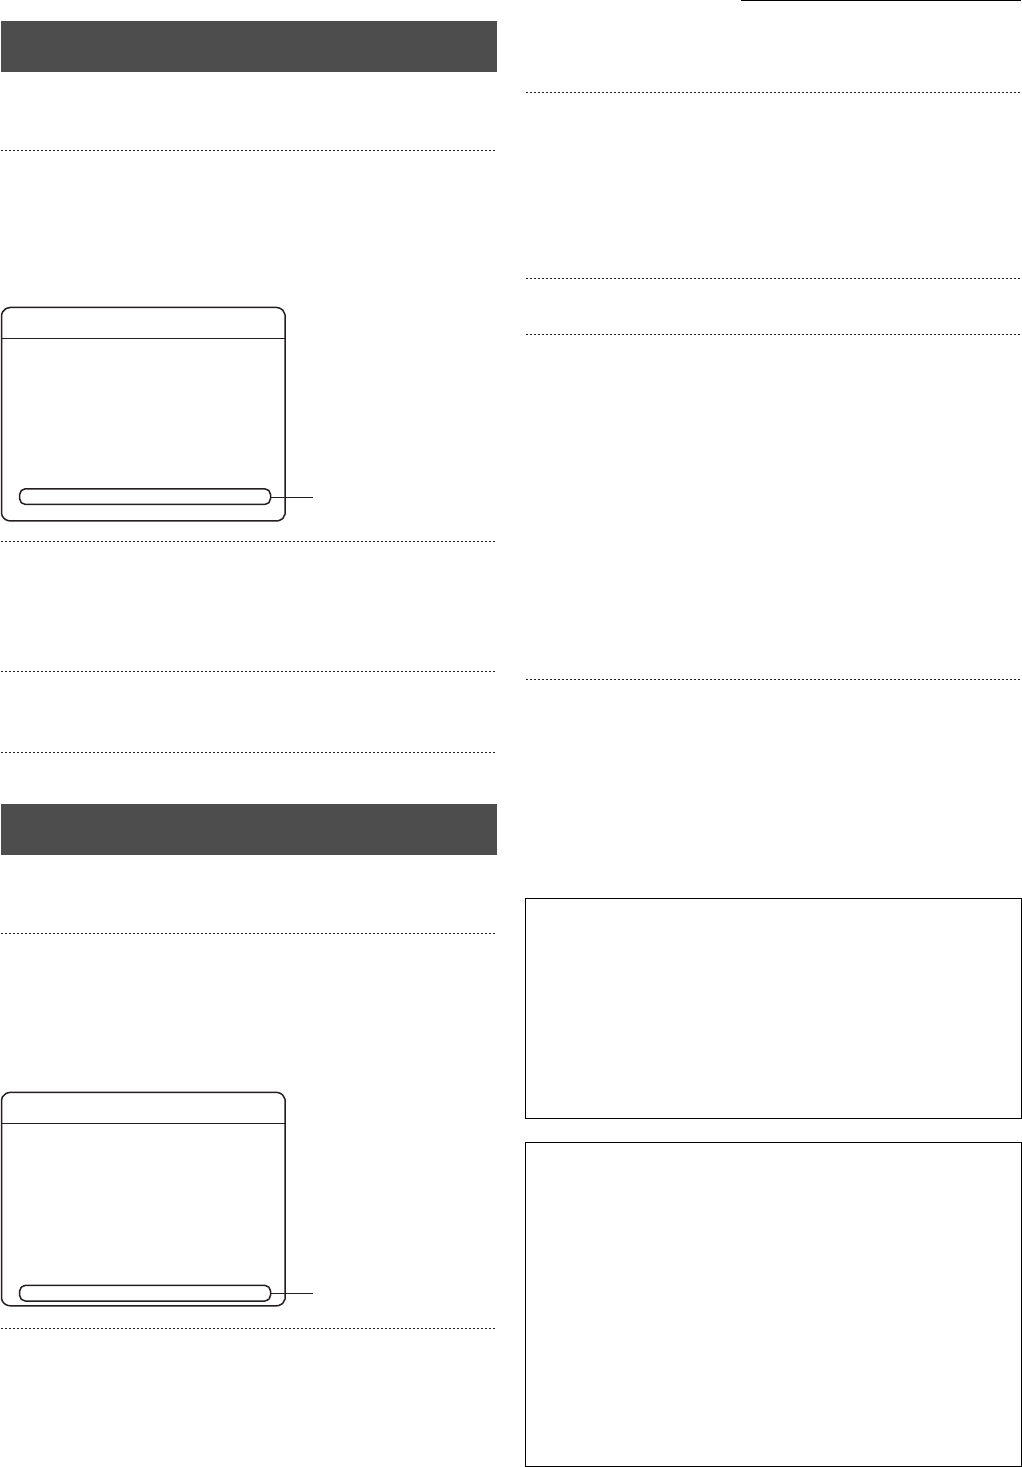
MAINTENANCE/LOG
TOTAL TIME
POWER OUTAGE TIME LIST
PL - ****
PL - ****
PL - ****
PL - ****
REBOOT
OPERATION LOG
RECORD LOG
DOWNLOAD
UPLOAD
********** h
**/**/**
**/**/**
**/**/**
**/**/**
** : **
** : **
** : **
** : **
EXEC
EXEC
EXEC
EXEC
EXEC
3.
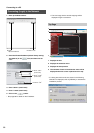
MAINTENANCE/LOG
TOTAL TIME
POWER OUTAGE TIME LIST
PL - ****
PL - ****
PL - ****
PL - ****
REBOOT
OPERATION LOG
RECORD LOG
DOWNLOAD
UPLOAD
********** h
**/**/**
**/**/**
**/**/**
**/**/**
** : **
** : **
** : **
** : **
EXEC
EXEC
EXEC
EXEC
EXEC
3.
* Flash memories connected to the VR-509 will be
registered automatically the first time. A maximum of ten
flash memories can be registered. The registration will be
erased when the power to the VR-509 is switched off.
* Image distribution onto a network will be suspended when
setup data is being downloaded or uploaded.
* Contact your nearest JVC dealer for details on the flash
memories that can be used.
The name of the setting data file
(Example) E00-12_051012040750.509.
VR-509 software version yymmddhhmmss, 509
When loading setting data
If [509] is the extension log, then it is possible to amend
the file name (although only with single-byte alpha-
numerals.)
When loading setting data
Only one item of setting data can be saved onto a USB
flash memory (the file is placed in the root directory.)
The most recently saved data will be loaded when
multiple setup data files exist on the root directly.