


25
ENGLISH
•
••••••••••••••••••••••••••••••••••••••••••••••••••••••••••••••••••••••••••••••••••••••••••••••••••••••••••••••••••••••••••••
Operations
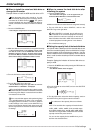
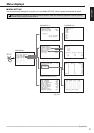
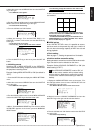
3. Turn the JOG dial until “ON” flashes and turn the SHUTTLE
ring to the right.
• The monitor display switches to the display position setting
menu.
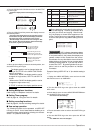
<TIME DATE DISPLAY>
DISPLAY MODE 2
CHARACTER SIZE SMALL
@CLOCK LOCATION OFF
<TIME DATE DISPLAY>
DISPLAY MODE 2
CHARACTER SIZE SMALL
@CLOCK LOCATION ON
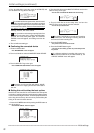
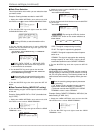
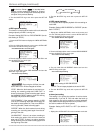
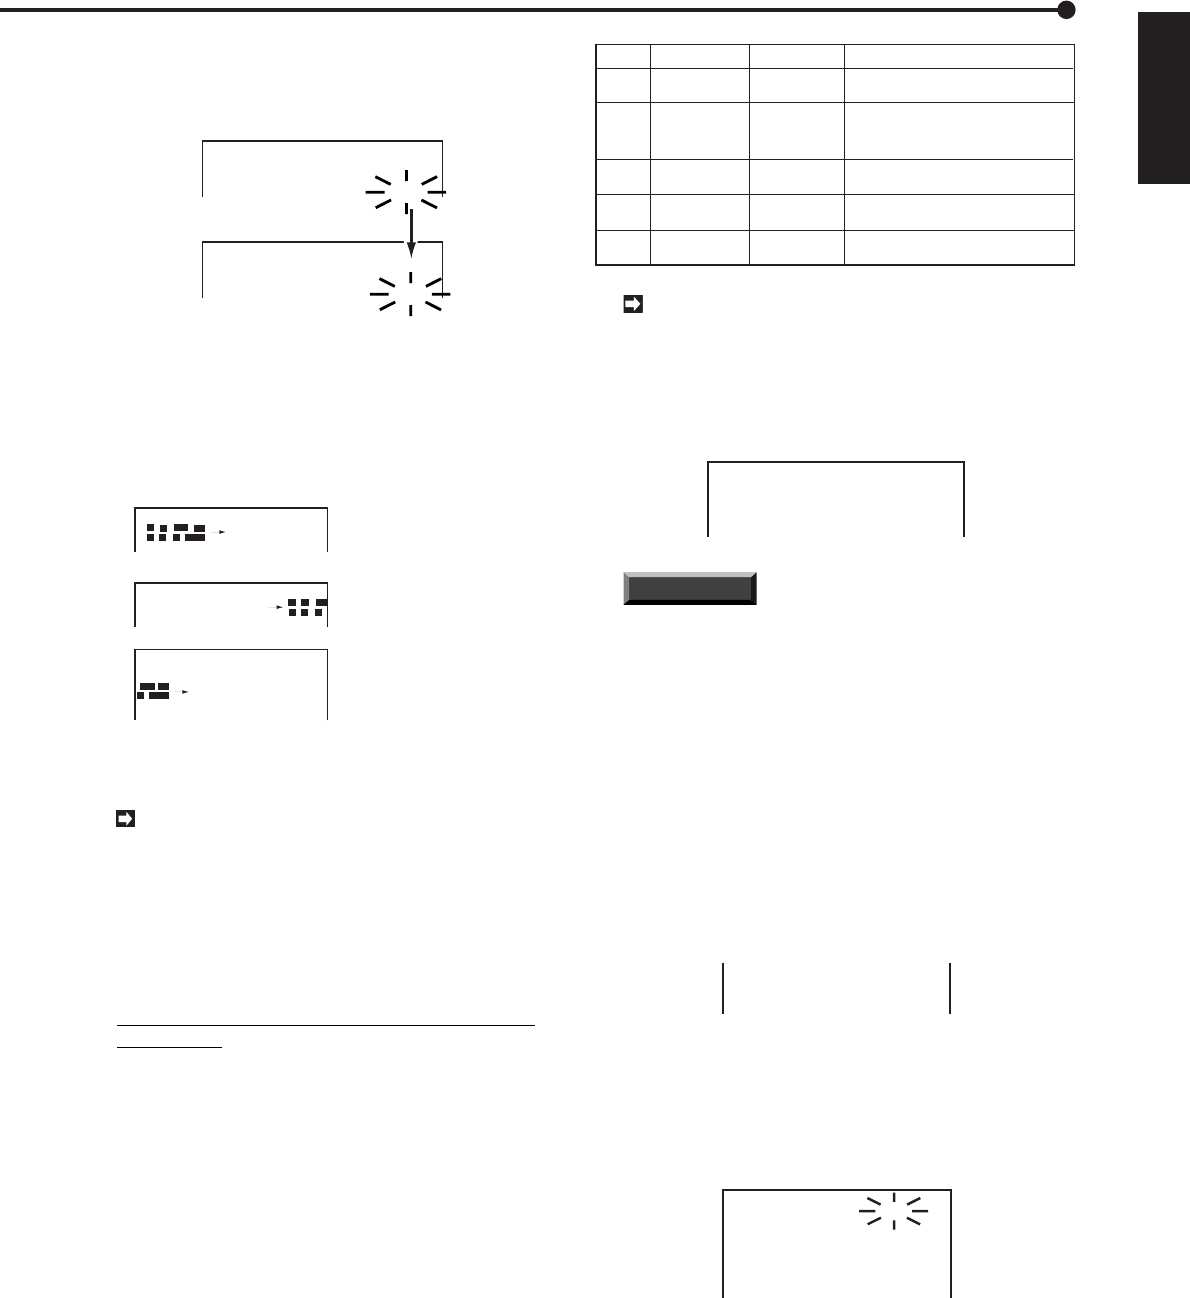
4. Turn the JOG dial until the present time display moves to
the desired position.
• The present time display moves to the right when turning
the JOG dial to the right. When the time display reaches the
right edge of the screen, it goes down to the next line.
• The time display moves to the left when turning the JOG
dial to the left. When the time display reaches the left edge
of the screen, it goes up to the next line.
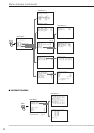
Turn the JOG dial to
the right to move the
display to the right.
::
1)
2)
After the screen has been
moved to its rightmost
border, it will move down
one level.
3)
By continuing to turn the
JOG dial, the screen will
scroll to its rightmost border.
- -
::
-
- -
5. When the time display reaches the desired position, turn
the SHUTTLE ring to the right.
The display position can be changed when the
setting of “CH. TITLE” in the <MPX FUNCTIONS>
menu is as follows:
• When set to “NONE”, the display position can be
changed on single-screen, SPLIT 4 and SPLIT 9
screen.
• When set to “CH.NO” the display position can be
changed on single screen only.
If “TITLE” is selected, the display position cannot
be changed.
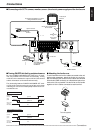
■ Setting Multiplexer functions
Refer to page 12, “Multiplexer functions” for details.
■ Setting Timer program
Refer to page 43, “Using the Timer” for details.
■ Setting recording functions
Refer to page 33, “Various recording settings” for details.
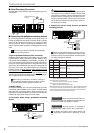
■ User set up operation
The following functions can be operated to USER SET
UP keys, A and B. Use of these buttons enables you to
operate functions shown below by pressing one of those.
Select 1 of 5 patterns shown right.
USER KEY A USER KEY B Settings
(NONE)
(NONE)
PRE-ALARM
RECORDING
PRE-ALARM
RECORDING
COPY START
OSD CLEAR
OSD CLEAR
(NONE)
(NONE)
COPY END
Pattern
1
2
3
4
5
Set the start point of copy by USER
KEY A and end point by USER KEY B.
Turn OSD (On Screen Displays) ON/OFF
by USER KEY A.
Turn pre-alarm recording
ON/OFF by USER KEY B.
No setting for USER KEYs.
Turn OSD (On Screen Displays) ON/OFF
by USER KEY A. Turn pre-alarm recording
ON/OFF by USER KEY B.
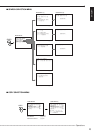
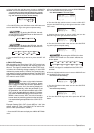
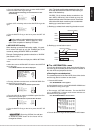
During playback, press button A at the point you
want to start copying. Likewise, press button B at
the point you want to end copying. After this set-
ting, the display as shown below appears on the
screen. To avoid an error on copy setting, make sure
to set the start point to copy before setting the end
point.
09-06-1999 WED
16:33:21 25F 25% C1
}A:28-05-1999 16:33:21
B:28-05-1999 16:40:21
INFORMATION
OSD indicates characters shown
on the screen. If you choose “SELECTED PATTERN
2” and press button A, the present time display and
camera number will be cleared from the screen.
Press button A or any other button once to show the
display back to the screen. You can turn pre-alarm
on/off by pressing button B, if you set PRE A-REC
to other than “OFF”. By pressing button B, the pre-
alarm is set to on and the pre-alarm rec indicator
illuminates.
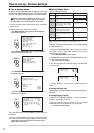
Example: Setting USER KEY to “3” (the default setting is
“1”).
1. Display the <MENU SETTING> menu and turn the JOG
dial until the cursor is at “USER KEY”.
RECORDING SET UP
@USER KEY
DATA
CLEAR
SELECTION
2. Turn the SHUTTLE ring to the right to show the <USER
KEY> menu.
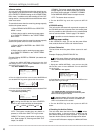
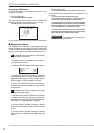
3. Check that the cursor is next to SELECTED PATTERN then
turn the SHUTTLE ring to the right.
• The sub-item will start flashing.
<USER KEY>
@SELECTED PATTERN 1
A B
1 COPY-A COPY-B
2 CLEAR OSD PRE A-REC
3 CLEAR OSD NONE
4 NONE PRE A-REC
4. Turn the JOG dial to show “3” and turn the SHUTTLE ring to
the right.
5. Turn the SHUTTLE ring to the left or press the SET UP
button.
• The <USER KEY> menu will disappear.