42
•••••••••••••••••••••••••••••••••••••••••••••••••••••••••••••••••••••••••••••••••••••••••••••••••••••••••••••••••••••••••••••••••••••••••••
INFORMATION
Non-regular recording mode can
be set using the P2 operational mode in the <TIMER
PROGRAM> menu. Once these settings are en-
tered, the system can be switched between regular
and non-regular operational modes as desired.
4) Set the Timer Program’s operational mode to P1.
Upon completing the above settings, press the TIMER REC
button. The unit will be in timer recording stand-by mode.
■ Operation example 2: Endless Repeat
recording
Copies and backups of up to 3 days’ volume of recorded
data can be made when the unit is running in continuous
recording mode. (Refer to page 52 for details on copying.)
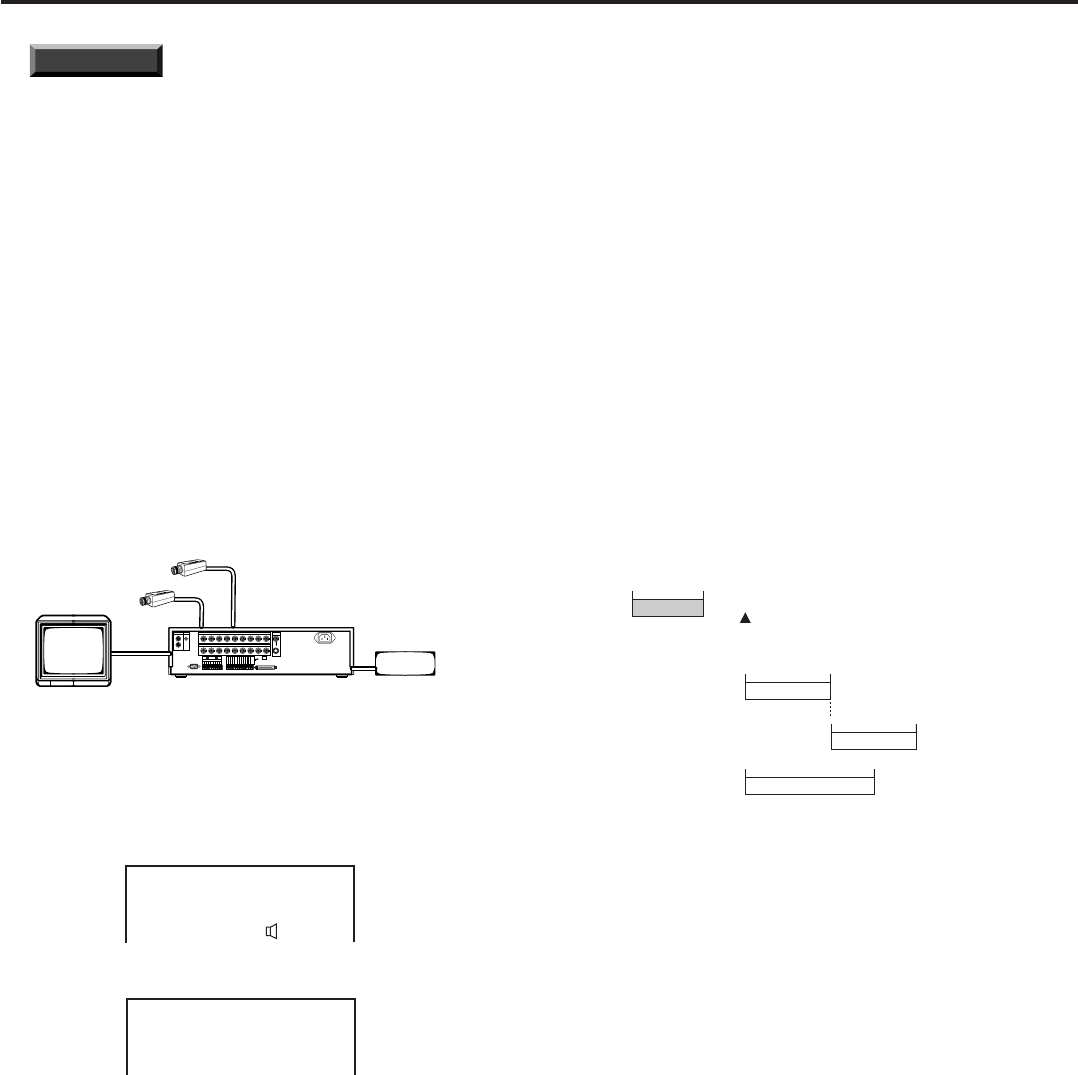
System configuration
Example of a system using the following peripherals:
• 9 connected video cameras
• Archive device connected to ID4 or copying device
connected to ID5
• Monitor
Monitor
•••
(Up to 9 cameras)
ID4: archive device
ID5: copy device
Images input by each of the connected cameras are re-
corded 24 hours a day.
• Set REC INTERVAL to “1.56F”.
• Set REC P.GRADE to “STANDARD”.
• Set AUDIO RECORDING to “ON”.
<RECORDING SET UP>
@REC INTERVAL
REC P.GRADE
AUDIO RECORDING
<ESTD TIME>
1.56F
STANDARD
ON
167H27M
• Set HDD FULL to “REPEAT”.
<INITIAL SET UP>
TIME DATE ADJUST
ARCHIVE OVERWRITE
@HDD FULL
HDD PB REPEAT
OFF
REPEAT
OFF
Upon completing the above settings, press the unit’s REC
button to initiate continuous recording operation.
♦ Making copies as needed
To copy segments of recorded data while the unit is run-
ning in continuous recording mode, make the following
adjustments:
• Change the automatic copy range setting to MANUAL,
and enter the desired start-time and end-time of the data
to be copied. (Refer to page 52.)
♦ Making backups as needed
To make backups, while the unit is running in continuous
recording mode, of portions of the total data stored in the
unit’s hard disk, load the appropriate medium into the ar-
chive device and press the ARCHIVE button.
■ Operation example 3
The number of video cameras can differ between opera-
tional modes A and B, and you may specify which set of
cameras goes into effect at what time and/or on which
day(s). Recording intervals can be reduced when the
number of operational cameras is large, and recording in-
tervals can be increased when using fewer cameras.
System configuration
Settings are entered so that the backups are created every
Monday morning between 00:00 and 05:00. To facilitate
the exchange of the storage medium after the backup has
been completed, AUTO EJECT is set to “ON”. Refer to
“Audio-eject setting” on page 30 for details.
Cameras in CAMERA USAGE A are set to operate from
08:00 to 15:00 on Monday through Friday. Cameras in
CAMERA USAGE B are set to operate from 15:00 to 20:00
on these same days.
Cameras in CAMERA USAGE B are set to operate from
08:00 to 17:00 on Saturday and Sunday. The overall sched-
ule is as shown in the following chart.
Monday
00 : 00
05 : 00
Saturday and Sunday
08 : 00 17 : 00
Monday to Friday
08 : 00 15 : 00
Archive
CAMERA USAGE A
20 : 00
CAMERA USAGE B
CAMERA USAGE B
replace archive medium
Settings
1) Camera settings are made as follows. (Refer to page 38
for details on the “Camera usage setting” screen.)
• Set cameras #1 through #9 to operational mode A.
• Set cameras #1, #2, #3, #8, and #9 to operational mode B.
2) Recording picture grade (REC P.GRADE) is set to
“STANDARD”.
3) Settings for TIMER PROGRAM are made as follows.
• Designate Monday to Friday as the days of operation
(SPECIAL DW). Then, in Program #1, set the action (MODE)
to “A– 1F” for 08:00 to 15:00 on the designated days(SPL).
• In Program #2, set the action to “B– 1F” for 15:00 to 20:00
on the designated days.
• In Program #3, set the action to “B– 1F” for 08:00 to 17:00
on Saturday.
• In Program #4, set the action to “B– 1F” for 08:00 to 17:00
on Sunday.
• In Program #5, set the action to BACKUP for Sunday’s start-
time of 00:00 to end-time of 05:00.
Upon completing the above settings, press the unit’s TIMER
REC button to initiate Timer operation.
Operation examples (continued)
