


45
ENGLISH
•
••••••••••••••••••••••••••••••••••••••••••••••••••••••••••••••••••••••••••••••••••••••••••••••••••••••••••••••••••••••••••••
Operations
Content of this Error
1) HDD FULL setting on the <INITIAL SET UP> menu is
set to “STOP”.
Countermeasure
1) Set the HDD FULL to other settings except “STOP” (page 30).
Symptom 3)
The Timer backup would not start even when the time is
ready for timer backup.
Content of this Error
1) The medium of the peripheral connected recording device.
Countermeasure
1) Insert the new medium and press the WARNING RESET
button to erase warning on screen. Press the TIMER REC but-
ton to release the timer, then press the TIMER REC button again.
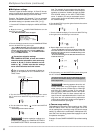
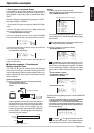
♦ Overlapping Timer settings
When Timer settings overlap, the unit will give priority to
the higher-numbered program.
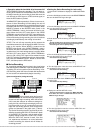
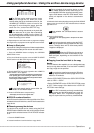
Example #1
• Program #1 is set for 14:00 to 17:00 with a recording
interval of 0.13F.
• Program #2 is set for 15:00 to 16:00 with recording inter-
val of 0.5F.
Under this condition, the unit will give priority to Program #2
for the duration of the overlapping period, from 15:00 to 16:00.
The unit will operate as shown in the chart below.
Example 1)
In Program #1, recording is set for every
0.13F, from 14:00 to 17:00.
14:00 15:00 16:00 17:00
14:00 15:00 16:00 17:00
0.5F
In Program #2, recording is set for
every 0.5F, from 15:00 to 16:00.
Actual recording will occur as follows.
0.13F 0.13F
Setting for the prioritized Program #2.
In this situation, the unit gives priority to the higher-numbered Program #2.
0.13F
0.5F
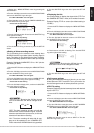
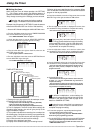
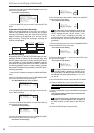
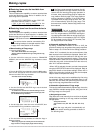
Example #2
• Program #1 is set for 14:00 to 17:00 with a recording
interval of 0.13F.
• Program #2 is set for 15:00 to 16:00 with the SKIP setting.
Again, the unit will give priority to Program #2 for the duration
of the overlapping period. As shown in the illustration below,
the unit will activate the Skip setting from 15:00 to 16:00.
Example 2)
In Program #1, recording is set for
every 0.13F, from 14:00 to 17:00.
14:00 15:00 16:00 17:00
14:00 15:00 16:00 17:00
SKIP
In Program #2, the SKIP setting is
entered for 15:00 to 16:00.
0.13F
0.13F
0.13F
NO
RECORDING!
Actual recording
Setting for the prioritized Program #2.
In this situation, the unit gives priority to the higher-numbered Program #2.
■ Alarm Recording
When an alarm sensor connected to the ALARM IN termi-
nal is triggered, the unit will switch to the interval setting
established for Alarm Recording and make detailed record-
ings of the situation.
When running in Alarm Recording mode, the unit
will continue to record for the entire Alarm Record-
ing duration even if the end-time specified in a Timer
Program has been exceeded. Refer to page 33.
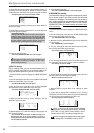
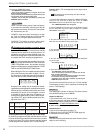
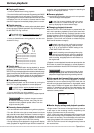
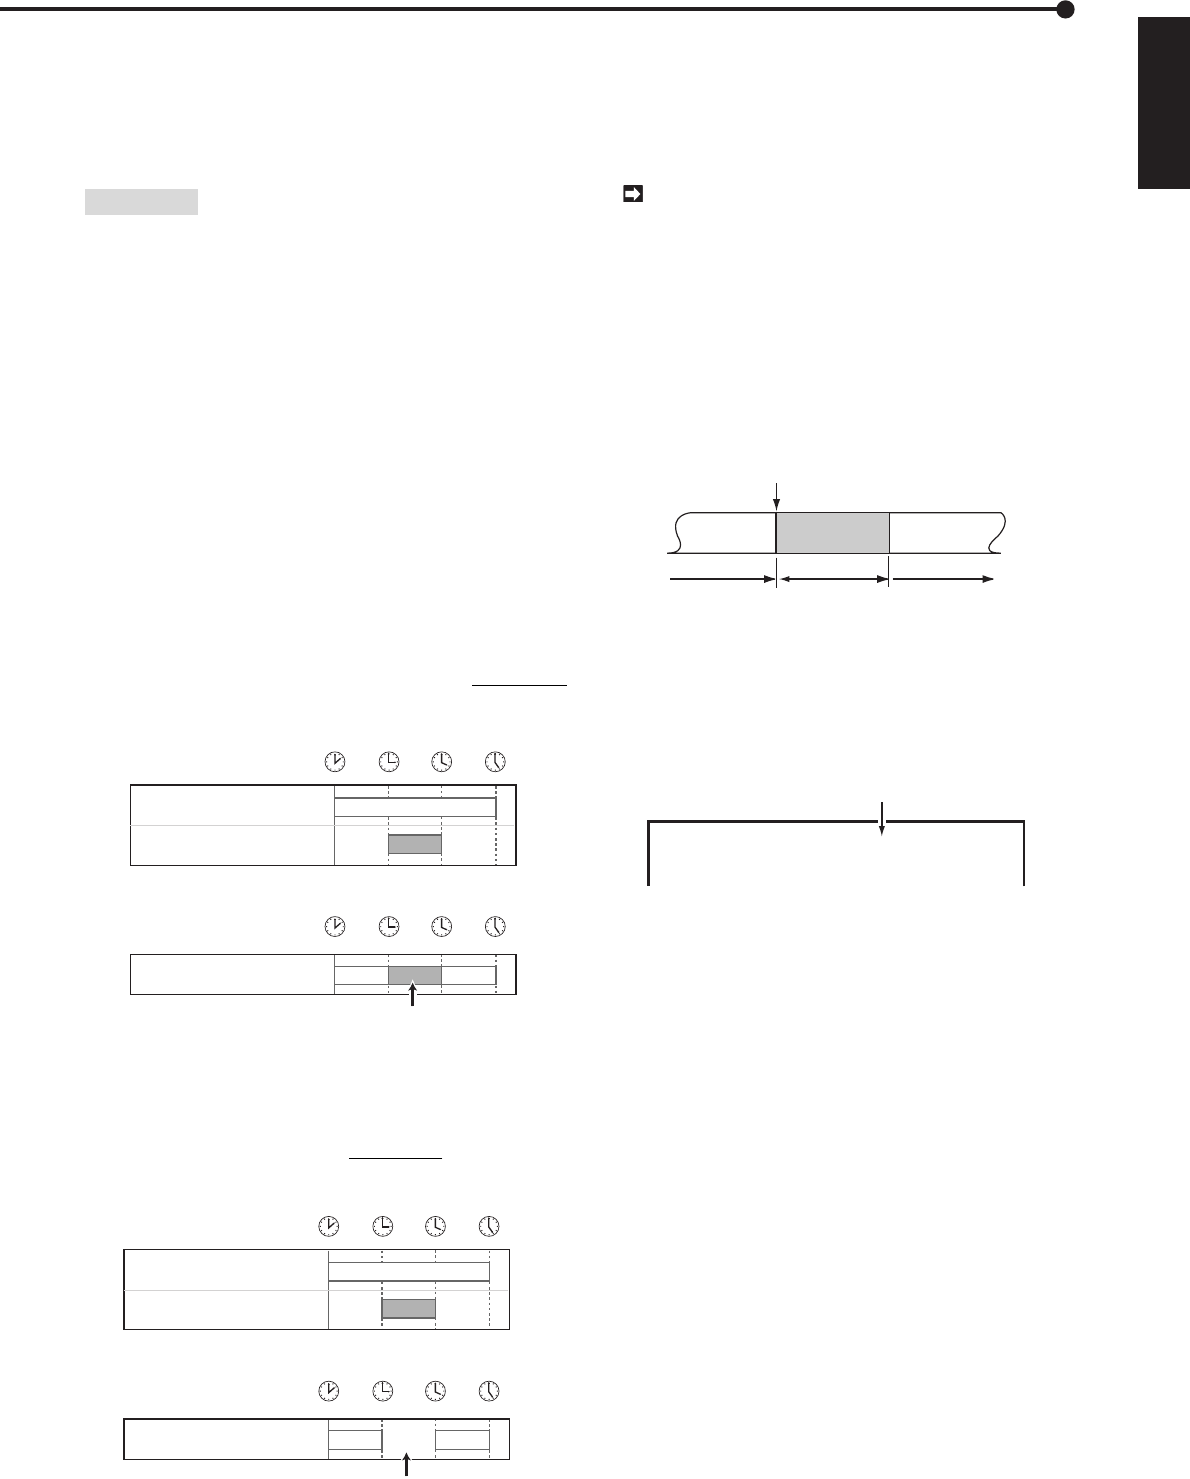
♦ Alarm Recording operation
When the ALARM IN terminal is triggered during normal
operation, the unit will respond as shown in the illustration
below.
Example: The unit is programmed for 0.5F recording inter-
vals, and Alarm Recording is set at intervals of 4.17F and
for a duration of 2 minutes.
ALARM SET IN
normal recording normal recording
alarm recording
recording at 0.13F
recording at 0.13Frecording at 4.17F
2 minutes
♦ Setting Alarm Recording
For details of the setting please refer to “Alarm recording
settings” on page 33.
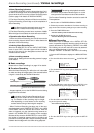
♦ Operations during Alarm Recording
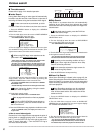
1) An index signal will automatically be stored in memory
when Alarm Recording begins.
01-01-2000 SAT A0001
00:00:00 25F 50% C1
Alarm recording number
2) If the unit receives a new alarm signal while running in
Alarm Recording mode, the unit will complete the Alarm
Recording session initiated by the new signal.
3) If the unit receives an alarm signal while settings are
being made on the on-screen menus, the unit will exit the
menu screen and begin Alarm Recording.
♦ Alarm Recording time indicators
When Alarm Recording is started, the unit will store a user-
confirmable data entry of the time it receives the alarm sig-
nal. To access this data entry, press the SEARCH button
to call-up the <SEARCH SELECTION> menu and select
ALARM LIST SEARCH. Use the JOG dial to move the cur-
sor to the desired entry, and turn the SHUTTLE ring to re-
trieve the entry. (Refer to page 50 for details on “Alarm List
Search”.)
1) Up to 500 entries for Alarm Recording start time can be
displayed. After 500 entries, entry #1 will be erased and
#501 will be added to the list, and so on.
2) As an index signal is also automatically stored at the
beginning of Alarm Recording, the Alarm Recording start-
time can also be retrieved using INDEX SEARCH. (Refer
to page 50 for details on “Index Search”.)
/ Alarm Recording
Using the Timer (continued)