80 Chapter 6. NetCommand Functions
Immediate Recording from ChannelView
1. Press
INPUT
toopentheInputSelectionmenu.High-
lightan
ANT 1
or
ANT 2
programsourceandpress
ENTER
.
2. Press
GUIDE
toopentheChannelViewchannelguidefor
thecurrentantennainput.
3. Use tohighlightthechannelandprogramyou
wishtorecordfromthelistofchannels.
4. Press (
RECORD
).TheTVwilltunetothechannelif
needed.
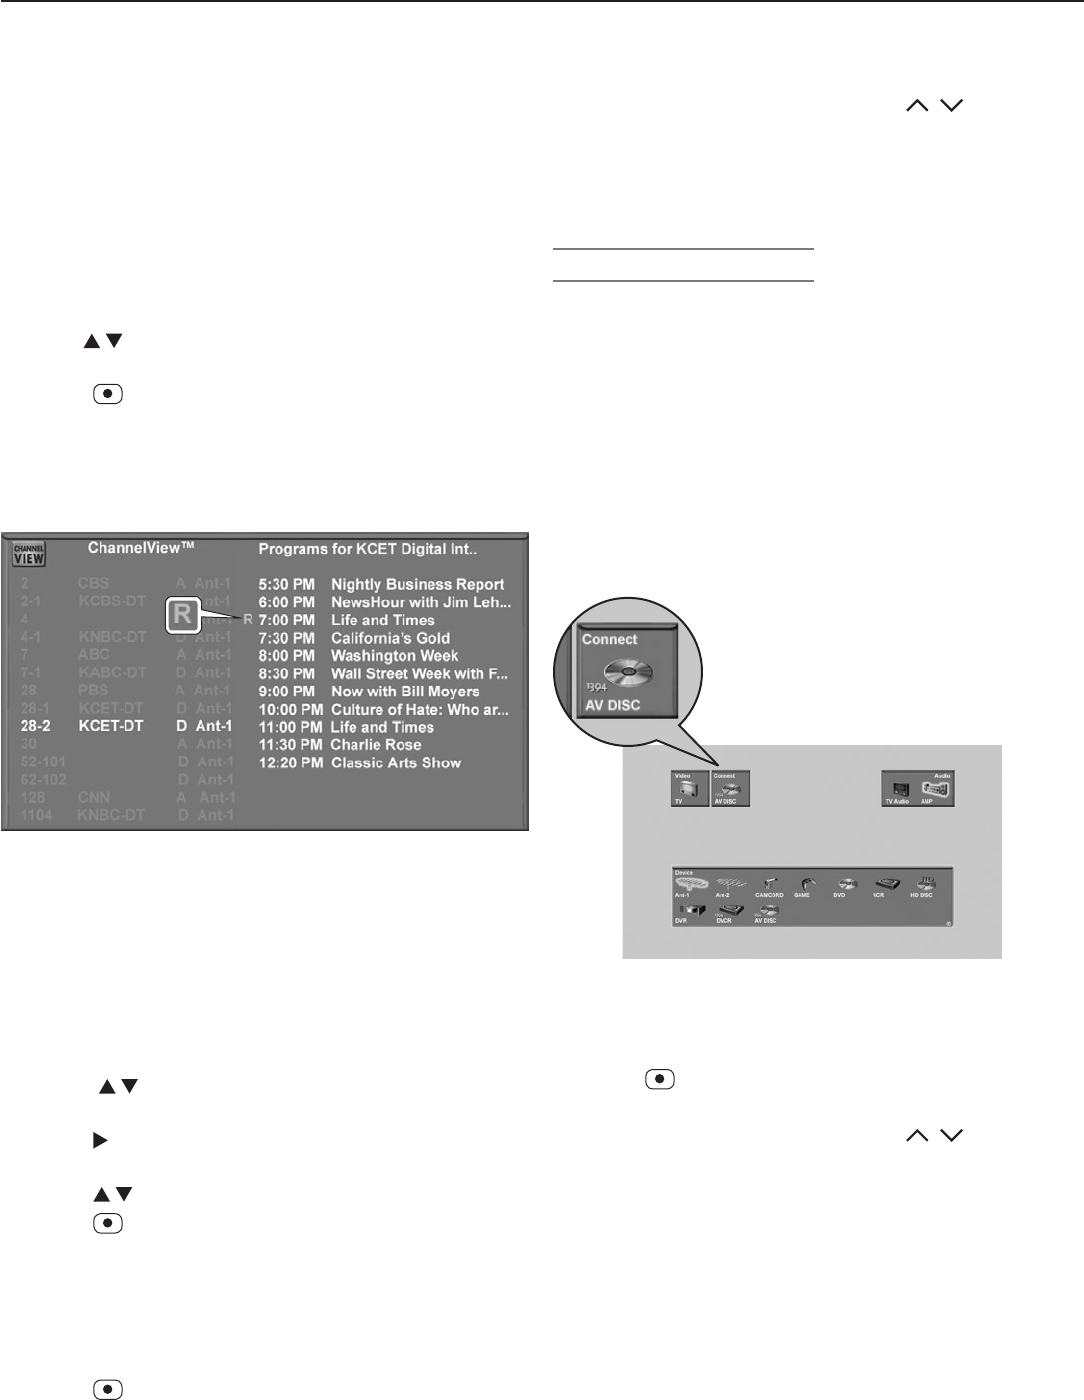
Ared“R”temporarilydisplaysnexttotheprogram
listingtoindicatetheprogramwillberecorded.
5. Press
EXIT
toreturntoTVviewing.
Figure 4. A red “R” appears briefly in the ChannelView
screen to indicate a scheduled recording.
Time-Delayed Recording from ChannelView
Set Up the Recording
1. EnsurethatTVEnergyModeissettoFast Power On
andtheTVclockissettothecorrecttimeandday.
See“SetupMenu”inchapter3,“TVSetup.”
2. Performsteps1and2describedabove.
3 Press tohighlightthesourcechannelfromwhich
youwishtorecord.
4. Press toviewalistoffutureprogramsonthat
channel.
5. Press tohighlightafutureprogram.
6. Press (
RECORD
).
Ared“R”temporarilydisplaysnexttotheprogram
listingtoindicatetheprogramwillberecorded.
Youcanscheduleamaximumof32recordings.
7. Press
EXIT
toclosethemenu.
Confirm the Recording Setup
1. Press
(
RECORD
)toopentheRecordmenu.
NetCommand-Controlled
Recording, continued
2. Press
GUIDE
toopentheRecordList(figure2)andview
allscheduledrecordings.Press
CH
/ topage
quicklythroughthelist.
3. Verifythattheprogramyouwishtorecordappearsin
thelist.
4. Press
EXIT
toclosethemenu.
Cancelling Recordings
To Cancel a Recording in Progress
1. Press
INPUT
toopentheInputSelectionmenu.
2. Movethehighlighttothesourceinputicon.Thereis
noneedtopress
ENTER
.
TheInputSelectionmenudisplaysaniconforan
activerecordingconnection.Seetheconnectionicon
infigure5.
3. Press
CANCEL
.Theconnectioniconwilldisappearto
indicateterminationoftherecordingconnection.
4. Press
EXIT
toreturntoTVviewing.
Connection
Icon
Figure 5. The Input Selection menu displays a connection
icon for the destination device of a recording in progress.
To Cancel a Scheduled Recording
1. Press (
RECORD
)toopentheRecordmenu.
2. Press
GUIDE
toopentheRecordList(figure2)andview
allscheduledrecordings.Press
CH
/ topage
quicklythroughthelist.
3. Highlighttheprogramyouwishtoremovefromthe
RecordListandpress
CANCEL
.
4. Press
EXIT
toclosethemenu.
