20 C1696M (8/06)
Overview of Navigation and Controls
The DVR5100 Series DVR provides semitransparent on-screen menus that allow you to adjust settings while continuing to monitor live video. The
DVR5100 Control Pad offers a quick and convenient set of local controls that allow you to configure and operate the DVR.
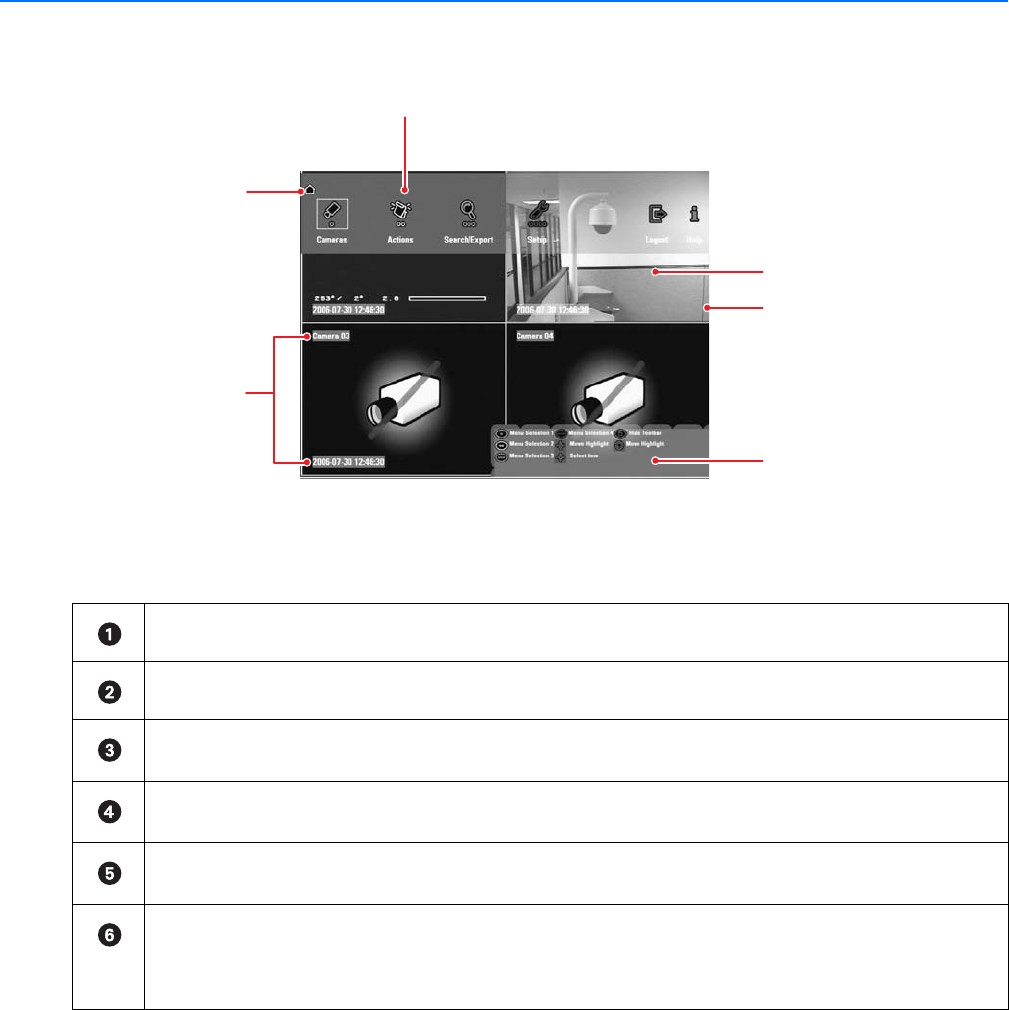
Figure 10. DVR5100 Main Window
The DVR5100 application window contains the following elements:
Icon path: Orients you to your location in the menu hierarchy.
Camera information: Displays the camera name and the date and time where that camera is located.
On-screen menus: Provide access to all operational functions through a hierarchical set of four-option menus. Large, color-coded
icons make it easy to view and make your selections.
Video pane: Displays video, either live from a camera or recorded from the hard disk of the unit. Displays up to 16 video streams at
one time, in any combination of live and recorded video.
Video pane border: Indicates status. Bright green indicates the currently active video pane. Red indicates that manual recording is
in progress. Yellow indicates that recorded video is being played back. Blue indicates that PTZ controls are active.
Context-sensitive help: Describes how to use the currently active function from the KBD5000 or how to use the front panel
controls on the DVR5100. Note that a different set of online help information appears depending on how you display the help. To
view the online help about the KBD5000, press the Help button on the keyboard. To display online help about the front panel
controls, select the Help icon from the main menu of the DVR5100. Figure 10 illustrates the online help for the KBD5000.
ᕦ
ᕡ
ᕣ
ᕢ
ᕥ
ᕤ


