C1696M (8/06) 23
3. Enter characters by pressing the following keys:
• Turn the jog to the right or left to select a character of the name or IP address that you are entering.
• Use the joystick, blue function key, or yellow function key to move between characters within the text field.
• Use the jog/shuttle to move slowly or quickly through the list of characters.
• Press the Minus key to delete the previous character.
• Press the Plus key to insert a space.
• Press the Shift/Enter key to accept the currently selected command and return to navigating between fields on the Setup tab.
• Press the green function key to accept a completed entry.
• Press the red function key to cancel an entry and return to the previous dialog.
NOTE: You can use masks to select the set of characters appropriate for some text fields (e.g. 1–255 for IP addresses, A–Z, numbers, and special
characters for names).
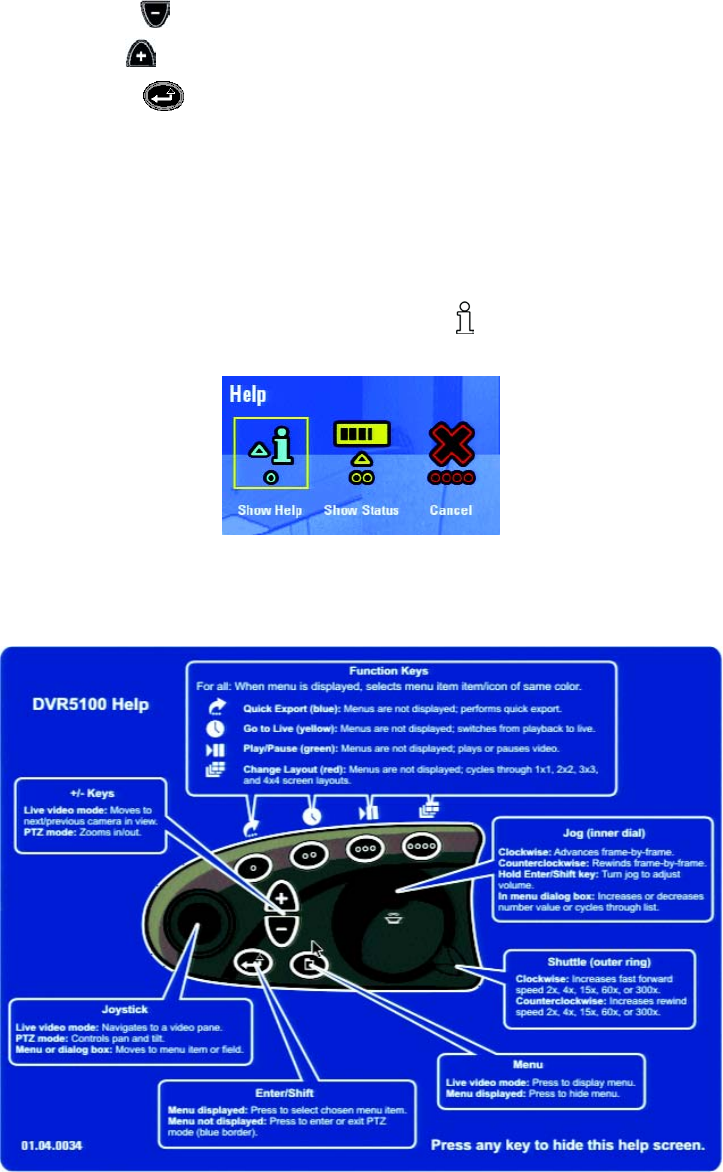
SHOWING AND HIDING ONLINE HELP INFORMATION
For help with the system or to view system status, select the on-screen Help icon , and then press the blue function key to display online help,
or press the yellow function key to display system status.
Figure 15. Help Menu
If you choose to display online help, the following screen appears. Pressing any key hides this screen.
Figure 16. Online Help for the Control Pad


