


C1695M (8/06) 61
GENERAL SETTINGS
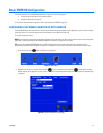
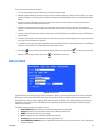
The General tab allows you to configure the picture quality for system-wide display and recording and to reset all cameras to the factory default
settings. For information about setting picture quality for individual cameras, refer to Reset Picture Quality on page 61.
To change the system-wide picture quality setting:
TIP: You can use an optional KBD5000 keyboard or a USB PC keyboard and mouse to perform some setup tasks more easily. Refer to
Understanding DVR5100 Controls and Menus on page 31 for a comparison on using any of these devices to work with the on-screen menus.
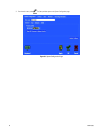
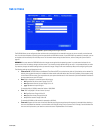
1. If it is not already displayed, select the General tab of the System Configuration page.
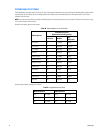
2. Navigate to Picture Quality, and select the setting you want for your NTSC or PAL cameras.
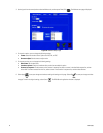
3. Turn the jog (inner dial) right or left to select the appropriate setting. Refer to Picture Quality Settings on page 62 for a complete list of
settings.
4. Select Apply to save your changes and continue working with settings on this page. Select OK to save your changes and close
the screen. To retain the original settings, select Cancel . The DVR5100 main menu closes.
RESET PICTURE QUALITY
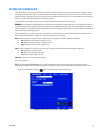
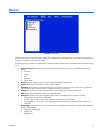
Individual cameras can be assigned different picture quality settings. You can reset all cameras back to their original settings with a single
command. Selecting this command forces all of the cameras to switch to the picture quality setting for the system. Resetting all cameras to the
system setting for picture quality can take as long as five minutes. If you have the maximum number of cameras attached to your unit, you might
notice such a delay in adjusting the picture quality settings.
To reset all cameras to their factory settings:
TIP: You can use an optional KBD5000 keyboard or a USB PC keyboard and mouse to perform some setup tasks more easily. Refer to
Understanding DVR5100 Controls and Menus on page 31 for a comparison on using any of these devices to work with the on-screen menus.
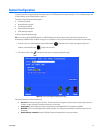
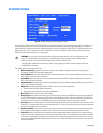
1. If it is not already displayed, select the General tab of the System Configuration page.
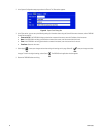
2. Navigate to Picture Quality, and select the Reset All Cameras to System Quality command.
3. Select Apply to save your changes and continue working with settings on this page. Select OK to save your changes and close
the page. To retain the original settings, select Cancel . The DVR5100 main menu closes.